

Fragrant Rosemary Garlic Pull Apart Bread Recipe to Share
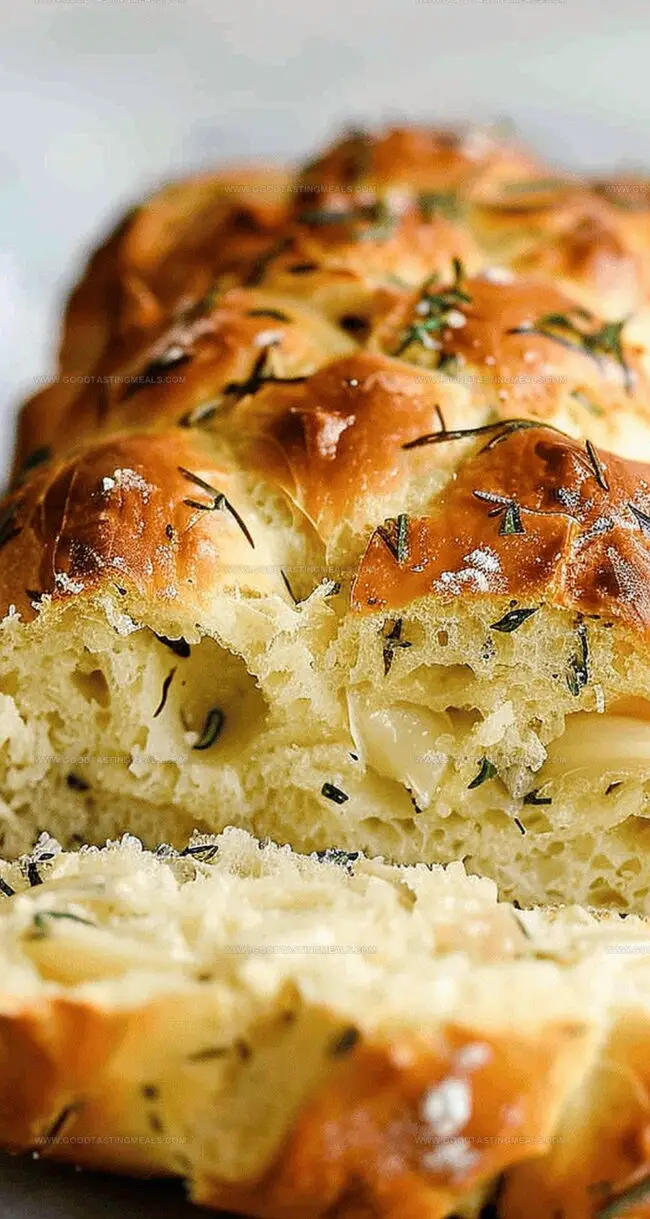
Warm, golden, and irresistibly fragrant, this rosemary garlic pull apart bread weaves magic into every bite.
Aromatic herbs dance with rich, roasted garlic to create a sensational bread that beckons hungry souls.
Soft, pillowy layers practically melt in your mouth, promising pure comfort with each tear.
The rustic charm of this bread makes it perfect for casual dinners or elegant gatherings.
Buttery edges crisp up beautifully, while the interior remains tender and light.
Layers infused with robust herbs and pungent garlic elevate this bread from ordinary to extraordinary.
You’ll find yourself reaching for just one more piece, again and again.
Quick Recipe Overview
What Goes Into Rosemary Garlic Pull Apart Bread
For Dough Base:For Flavor Enhancers:For Binding and Richness:Items You’ll Need for Rosemary Garlic Bread Success
Rosemary Garlic Pull Apart Bread: How It’s Made

Combine yeast with warm milk in a cozy mixing bowl. Let the mixture bubble and bloom for several minutes until it looks frothy and alive.
Blend soft butter, egg, flour, and aromatic herbs into the yeast mixture. Knead until the dough feels smooth and elastic, with a silky texture that springs back when touched.
Place the dough in a greased bowl and let it relax in a warm spot. Watch it double in size, transforming into a puffy cloud of potential deliciousness.
Mix butter with fragrant herbs and garlic. This magical blend will infuse each bread pocket with mouthwatering flavor.
Divide the dough into small rounds. Spread the herbed butter mixture, fold each piece, and nestle them into a loaf pan like a cozy bread family.
Allow the bread to puff up again, getting ready for its oven adventure. The dough will become light and promising.
Slide the pan into a preheated oven. Bake until the bread turns a gorgeous golden brown, filling your kitchen with irresistible aromas.
Let the bread cool briefly, then pull apart the herbed pockets. Enjoy warm, savoring each herb-infused morsel.
Creative Twists for Rosemary Garlic Bread Fans
Serving Rosemary Garlic Bread with Flair
Keep Rosemary Garlic Bread Fresh and Soft
Print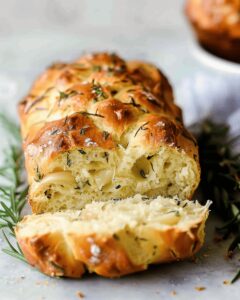
Aromatic Rosemary Garlic Pull Apart Bread
- Total Time: 3 hours 5 minutes
- Yield: 13 1x
Description
Homemade rosemary garlic pull apart bread delivers savory comfort with layers of herbal aroma and crisp golden edges. Pulling apart each warm section reveals buttery, fragrant threads perfect for sharing with friends and family.
Ingredients
- 2 and ⅓ cups (291g) all-purpose flour
- 1 cup (240ml) whole milk
- 1 cup (95g) shredded parmesan, mozzarella, or white cheddar cheese
- 1 large egg
- 2 tsps platinum yeast from Red Star
- 3 tbsps (43g) unsalted butter
- 6 tbsps (86g) unsalted butter
- 2 garlic cloves, minced
- 1 tbsp granulated sugar
- 2 tbsps finely chopped fresh rosemary
- 1 tbsp finely chopped fresh parsley
- 1 tsp garlic powder
- 1 tsp salt
- ¼ tsp salt
- 1 tbsp melted butter
- Coarse or flaky sea salt for sprinkling
Instructions
- Yeast Activation: Combine yeast with sugar in a stand mixer bowl, gently pour warm milk, and allow the mixture to become frothy for 5-10 minutes, creating a bubbly foundation for the bread.
- Dough Formation: Mix softened butter, egg, flour, salt, garlic powder, and rosemary on low speed until a soft, cohesive dough emerges, kneading until smooth and elastic with a resilient texture.
- First Rise: Transfer the dough to a greased bowl, cover, and let it rise in a warm environment until it doubles in volume, approximately 60-90 minutes, developing rich flavor and texture.
- Filling Preparation: Blend softened butter with rosemary, parsley, garlic, and salt, creating a fragrant, herb-infused spread to enhance the bread’s taste profile.
- Dough Shaping: Deflate the risen dough, divide into 12 equal portions, flatten each into a circular shape, spread herbed butter, sprinkle with cheese, and fold into half-moon shapes.
- Second Rise and Arrangement: Place the folded dough pieces in a greased loaf pan with rounded sides facing upward, cover, and allow a second rise until puffy and expanded, around 45 minutes.
- Baking Process: Preheat the oven to 350°F, position the rack in the lower third, bake the bread until golden brown, approximately 50 minutes, protecting the surface with foil if browning too quickly.
- Finishing Touches: Cool the bread in the pan for 10 minutes, transfer to a wire rack, optionally brush with melted butter and sea salt, and serve warm for optimal enjoyment.
- Storage and Reheating: Store leftovers at room temperature for two days or refrigerate for up to a week, reheating in the oven or microwave before serving to maintain freshness and flavor.
Notes
- Yeast Activation Tip: Ensure warm milk is between 110-115°F to perfectly activate yeast without killing it, creating a frothy base for soft, fluffy bread.
- Dough Kneading Technique: Develop gluten by kneading until dough becomes smooth and elastic, preventing a dense or tough texture in the final bread.
- Rising Environment: Choose a draft-free, warm spot like near a preheated oven or inside a turned-off oven with the light on to help dough rise consistently.
- Butter Coating Hack: Brush warm bread with melted butter and sprinkle sea salt for enhanced flavor and a golden, glossy finish that elevates the entire dish.
- Prep Time: 30 minutes
- Cook Time: 50 minutes
- Category: Snacks, Appetizer
- Method: Baking
- Cuisine: Italian
Nutrition
- Serving Size: 13
- Calories: 175
- Sugar: 1g
- Sodium: 250mg
- Fat: 8g
- Saturated Fat: 5g
- Unsaturated Fat: 2g
- Trans Fat: 0g
- Carbohydrates: 20g
- Fiber: 1g
- Protein: 6g
- Cholesterol: 30mg
Sophie Martin
Co-Founder & Content Creator
Expertise
Education
Stellenbosch University, South Africa
South African Chefs Academy, Cape Town
Sophie Martin is the nutrition brain and feel-good foodie at Good Tasting Meals. With a degree in Human Nutrition from Stellenbosch University and chef training from the South African Chefs Academy, Sophie brings balance to the table, literally. She loves creating meals that are easy to make, great to eat, and good for your body too.
Her recipes are made for everyday living, with a little flair and a lot of heart. Sophie’s not here to count calories, she’s here to show you how fresh, simple food can fit into your life, taste amazing, and still be nourishing.