

Top Biscoff Dessert Cups Recipe: No-Bake Bliss
Biscoff dessert cups bring a delightful twist to traditional sweet treats, enhanceing ordinary moments into extraordinary culinary experiences.
These magical little delicacies combine creamy textures with crunchy cookie sensations that dance across your palate.
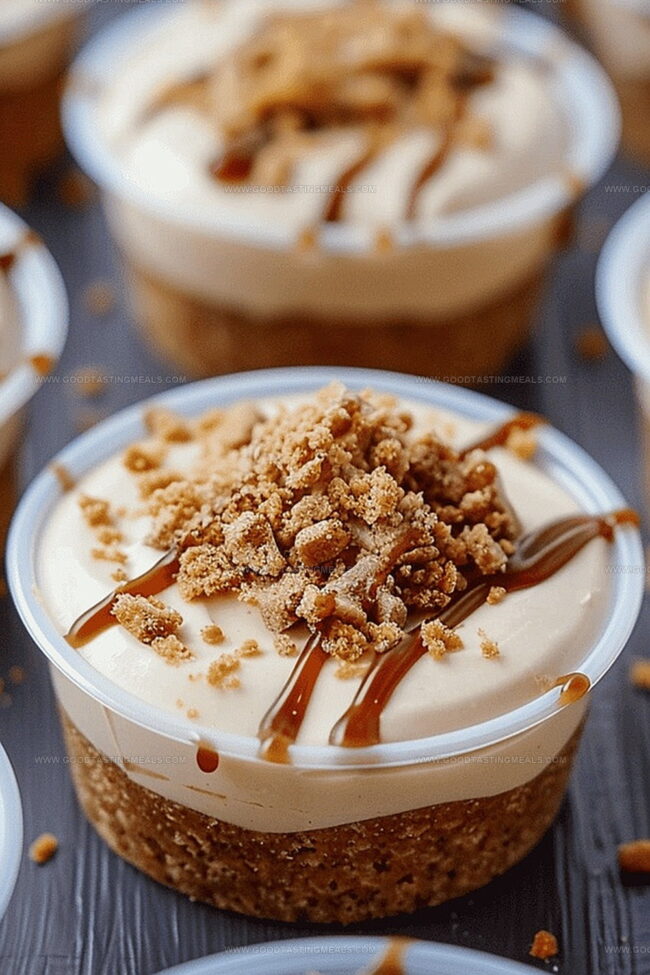
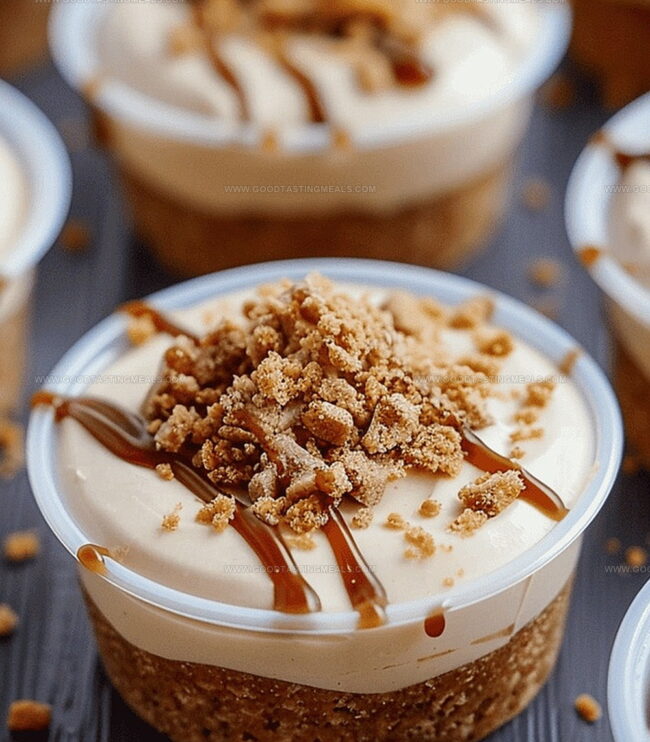
Smooth and rich fillings nestle perfectly within a crumbly, caramelized cookie base that promises indulgence in every bite.
Crafted with minimal ingredients, these dessert cups represent pure comfort and nostalgic pleasure for anyone seeking a quick yet impressive confection.
Delicate layers of flavor intertwine, creating a symphony of sweetness that feels both familiar and exciting.
Crisp cookie crumbles provide a stunning contrast to the velvety inner components, making each spoonful a balanced adventure.
The magic happens when simple ingredients enhance into something extraordinary.
elevate your dessert game with these irresistible biscoff cups.
Biscoff Dessert Cups With Creamy Layers and Crunch
Ingredients to Build Biscoff Dessert Cups
Base:Filling:Topping:How to Layer Your Dessert Cups for Visual Appeal
Step 1: Crush Cookie Base
Grab Biscoff cookies and transform them into fine crumbs using a food processor or rolling pin. Melt butter and blend with cookie crumbs until perfectly combined.
Create a consistent mixture that holds together when pressed.
Step 2: Create Crust Foundation
Select small plastic cups and distribute the cookie crumb mixture evenly. Press down firmly using the back of a spoon or another cup to create a solid base.
Step 3: Whip Creamy Filling
In a large mixing bowl, blend cream cheese until smooth. Add sugar and vanilla extract, creating a velvety texture.
Mix until no lumps remain.
Step 4: Incorporate Cookie Butter Magic
Fold Biscoff spread into the cream cheese mixture. Blend thoroughly until the mixture becomes silky and uniform.
Step 5: Elevate With Whipped Cream
Pour heavy whipping cream into the mixture. Whip on medium-high speed until the filling becomes light, airy, and voluminous.
Step 6: Fill Dessert Cups
Transfer the creamy filling into a piping bag. Carefully pipe the mixture into each cup, filling approximately three-quarters full.
Step 7: Drizzle Decadent Topping
Warm Biscoff spread in the microwave for a few seconds. Pour into a squeeze bottle or piping bag and create elegant drizzles across the dessert cups.
Step 8: Add Final Touches
Sprinkle additional crushed Biscoff cookies over the top of each cup for extra crunch and visual appeal.
Step 9: Chill And Serve
Cover the cups with lids and refrigerate. These delightful treats can be enjoyed immediately or stored for 2-3 days in the refrigerator.
Tips for Smooth Cream Layers and Crisp Biscoff Bottoms
Keeping Dessert Cups Fresh for Serving Later
Pairing Treats With Biscoff Dessert Cups
Flavor Options to Switch Up These Dessert Cups
Print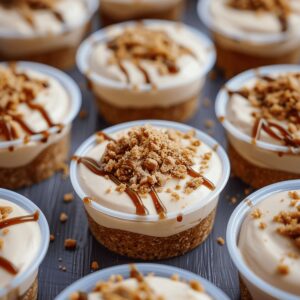
Biscoff Dessert Cups Recipe
- Total Time: 20 minutes
- Yield: 8 1x
Description
Irresistible biscoff dessert cups deliver a luxurious blend of creamy indulgence and cookie crunch. Smooth cheesecake layers nestled in crushed speculoos cookies create a delightful experience that will leave you craving more with each delectable bite.
Ingredients
Primary Ingredients:
- 8 ounces (226 grams) cream cheese, room temperature
- 1 ½ cups (360 milliliters) heavy cream
- ¾ cup (180 milliliters) Biscoff spread (cookie butter)
- 2 cups (240 grams) Biscoff cookie crumbs
Sweeteners and Flavorings:
- ¾ cup (150 grams) granulated sugar
- 1 teaspoon vanilla extract
- ¼ cup (60 milliliters) unsalted butter, melted
Garnish:
- 2 tablespoons Biscoff spread (cookie butter), slightly melted
- ¼ cup (30 grams) Biscoff cookie crumbs
Instructions
- Crush Biscoff cookies into fine crumbs, ensuring a uniform texture that will create a solid foundation for the dessert base.
- Incorporate melted butter into the cookie crumbs, mixing thoroughly to achieve a cohesive and slightly damp consistency that will hold together when pressed.
- Distribute the buttery crumb mixture evenly across individual serving cups, using a precise tool to compact the base firmly and create a smooth, even surface.
- In a spacious mixing bowl, whip cream cheese until it becomes silky and free of lumps, creating a smooth canvas for the remaining ingredients.
- Gradually fold in granulated sugar and vanilla extract, blending until the mixture achieves a uniform, glossy appearance.
- Introduce Biscoff spread to the cream cheese mixture, stirring gently to integrate the rich, caramelized flavor throughout the filling.
- Whip heavy cream into soft peaks, then fold it into the Biscoff cream cheese mixture to create a light, airy texture.
- Transfer the luxurious filling into a piping bag, carefully dispensing it into each prepared cup, stopping just below the rim to allow space for toppings.
- Gently warm Biscoff spread in the microwave until it reaches a smooth, drizzle-friendly consistency.
- Artfully cascade the warmed Biscoff spread across the surface of each dessert cup, creating an elegant zigzag pattern.
- Sprinkle additional crushed Biscoff cookies over the top, adding a delightful crunch and visual appeal.
- Refrigerate the dessert cups for at least one hour to allow flavors to meld and texture to set, enhancing the overall taste experience.
Notes
- Create individual servings using small 2-ounce plastic cups for perfect portion control and easy serving.
- Press cookie crumbs firmly into the cup base to ensure a stable and compact crust that won’t crumble.
- Ensure cream cheese and Biscoff spread are at room temperature for smoother, lump-free mixing.
- Whip the heavy cream to medium-high speed for a light, airy texture that enhances the dessert’s creaminess.
- Drizzle melted Biscoff spread just before serving to maintain a glossy, appetizing appearance.
- Refrigerate dessert cups for at least 30 minutes to allow flavors to meld and achieve the ideal chilled consistency.
- Prep Time: 20 minutes
- Cook Time: 0 minutes
- Category: Desserts, Snacks
- Method: None
- Cuisine: American
Nutrition
- Serving Size: 8
- Calories: 554
- Sugar: 36 g
- Sodium: 150 mg
- Fat: 38 g
- Saturated Fat: 23 g
- Unsaturated Fat: 10 g
- Trans Fat: 0 g
- Carbohydrates: 50 g
- Fiber: 1 g
- Protein: 5 g
- Cholesterol: 80 mg
Liam O’Brien
Founder & Recipe Developer
Expertise
Education
Dublin Institute of Technology (now Technological University Dublin)
Ballymaloe Cookery School, County Cork, Ireland
Liam O’Brien is the co-founder and kitchen soul behind Good Tasting Meals, a chef who believes that cooking shouldn’t feel stressful or complicated.
He earned his culinary stripes at Technological University Dublin and polished his farm-to-table skills at Ballymaloe Cookery School. With over 15 years flipping pans and stirring up stories, Liam has worked in family cafés, bustling bistros, and everything in between.
At Good Tasting Meals, Liam brings you recipes that feel like home: cozy, simple, and full of flavor.