
Heavenly Arepas con Queso Recipe: Cheesy Latin Comfort Joy
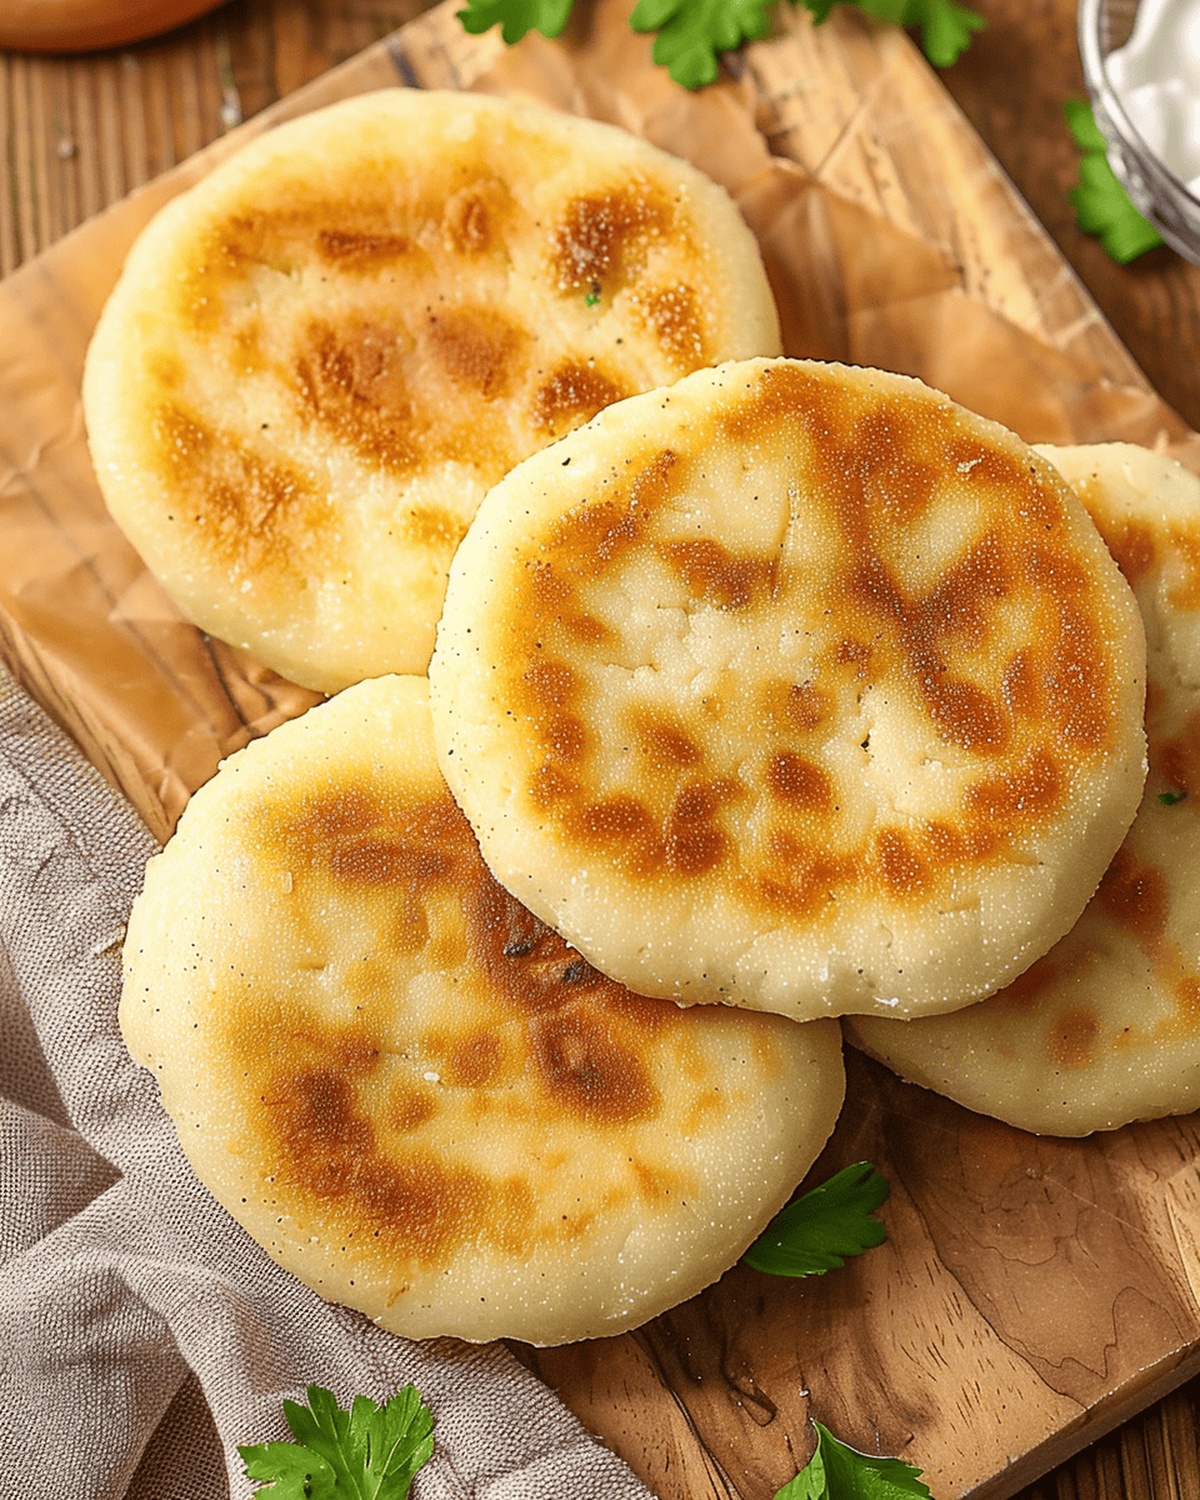
Warm, golden arepas con queso dance with the vibrant spirit of Venezuelan cuisine, offering a mouthwatering blend of crispy exterior and melted cheese perfection.
These corn-based delights burst with authentic flavor and comfort in every single bite.
Generations of home cooks have mastered this simple yet sublime street food that connects deeply to cultural roots.
Soft inside and slightly crunchy outside, arepas become magical when stuffed with rich, gooey cheese that stretches tantalizingly with each tear.
Corn flour creates the perfect canvas for this beloved dish that speaks volumes about traditional cooking techniques.
The magic happens when you combine just a few fresh ingredients to create something truly spectacular.
Dive into this recipe and let your taste buds experience a delicious journey through Venezuelan culinary traditions.
Quick Recipe Overview
Arepas con Queso Ingredient List
For Dough Base:For Cheese Filling:For Cooking and Finishing:Tools for Cooking Cheesy Arepas Perfectly
Shaping and Cooking Arepas the Way
Blend masarepa, salt, Cotija, butter, and warm water in a bowl. Work the mixture until smooth and pliable like play clay. Let the dough rest under a kitchen towel for 10 minutes.
Test a small piece of dough between your palms. If edges split, sprinkle water gradually until the dough feels soft and cooperative.
Dampen hands slightly. Divide dough into 8 portions. Roll each into a ball, then press into gentle circles about palm-width size and finger-thick.
Center mozzarella in half the dough circles. Cover with remaining circles, sealing edges carefully to create plump, filled pockets.
Heat a skillet or griddle over medium warmth. Spread a thin butter layer across cooking surface. Place arepas gently, allowing each side to transform into a golden, crispy landscape. Flip after 4-5 minutes, cooking until both sides gleam with a rich, toasted color.
Transfer hot arepas to a welcoming plate. Optional: Crown with a small butter medallion for extra indulgence. Enjoy immediately while warmth and crispness sing their delicious song.
Tips to Make Them Crispy Outside, Melty Inside
Serving Ideas for Arepas con Queso
How to Store and Reheat Arepas with Cheese
Print
Cheesy Arepas Recipe
- Total Time: 45 minutes
- Yield: 5 1x
Description
Cheesy Colombian arepas deliver a delightful blend of corn masa and melted cheese. Crispy exterior and warm interior invite passionate cooks to savor a classic Latin American comfort dish.
Ingredients
- 2 cups (473 ml) masarepa (pre-cooked white cornmeal)
- 1¼ cups (296 ml) warm water
- 8 oz (227 g / 2 cups) shredded mozzarella cheese
- 2 oz (57 g / ½ cup) finely crumbled Cotija cheese
- ½ tsp sea salt or Kosher salt
- 1 tbsp (15 ml) butter, softened
- Oil or butter for cooking
Instructions
- Dough Preparation: Combine masarepa, salt, Cotija cheese, softened butter, and warm water in a bowl, kneading until a smooth, cohesive mixture forms with consistent texture.
- Dough Hydration: Rest the dough for 10 minutes, covered, then assess moisture by gently pressing; incorporate additional water if edges crack, ensuring a supple, workable consistency.
- Arepa Shaping: Divide dough into eight portions, rolling each into a sphere, then flatten into 5-inch wide, ¼-inch thick discs with even, gentle pressure.
- Cheese Filling: Position shredded mozzarella in the center of one dough circle, leaving a half-inch border, then carefully overlay a second dough circle, sealing edges to create a compact, half-inch thick sealed disk.
- Cooking Process: Heat a skillet or griddle with a thin oil or butter layer at medium-low temperature, then carefully transfer arepas and cook for 4-5 minutes per side, rotating to achieve an evenly golden-brown, crisp exterior.
- Serving: Transfer cooked arepas to a plate, optionally adding a small butter pat, and serve immediately while warm to showcase the melted cheese’s luxurious, gooey center.
Notes
- Moisture Management: Check dough consistency by gentle palm pressing; add water sparingly if edges crack to achieve smooth, flexible texture.
- Cheese Distribution: Create even cheese pockets by maintaining half-inch border around edges, preventing leakage during cooking.
- Temperature Control: Use medium-low heat to develop golden-brown exterior without burning, ensuring crispy surface and melted interior cheese.
- Resting Technique: Allow dough to rest covered for 10 minutes, enabling ingredients to blend and develop optimal cohesive structure.
- Prep Time: 15 minutes
- Cook Time: 10 minutes
- Category: Breakfast, Lunch, Snacks
- Method: Frying
- Cuisine: Venezuelan
Nutrition
- Serving Size: 5
- Calories: 303
- Sugar: 1 g
- Sodium: 429 mg
- Fat: 16 g
- Saturated Fat: 10 g
- Unsaturated Fat: 6 g
- Trans Fat: 0 g
- Carbohydrates: 30 g
- Fiber: 2 g
- Protein: 11 g
- Cholesterol: 42 mg
Sophie Martin
Co-Founder & Content Creator
Expertise
Education
Stellenbosch University, South Africa
South African Chefs Academy, Cape Town
Sophie Martin is the nutrition brain and feel-good foodie at Good Tasting Meals. With a degree in Human Nutrition from Stellenbosch University and chef training from the South African Chefs Academy, Sophie brings balance to the table, literally. She loves creating meals that are easy to make, great to eat, and good for your body too.
Her recipes are made for everyday living, with a little flair and a lot of heart. Sophie’s not here to count calories, she’s here to show you how fresh, simple food can fit into your life, taste amazing, and still be nourishing.