Chilaquiles Recipe

Zesty Chilaquiles Recipe: Breakfast Joy On A Plate

Chilaquiles burst with vibrant Mexican culinary tradition, representing a delightful breakfast staple that reinvents simple ingredients into a mouthwatering feast.

Crispy tortilla chips bathed in rich, spicy sauce create a symphony of textures and flavors that dance across your palate.

Hearty and satisfying, this dish embodies comfort food at its finest, blending robust seasonings with tender, tangy elements.

Layered with complex taste profiles, chilaquiles offer a delectable balance between crunch and softness that makes every bite memorable.

Home cooks and food enthusiasts adore this versatile recipe for its ability to elevate humble ingredients into a stunning meal.

Regional variations showcase the incredible adaptability of this beloved dish, each version telling a unique cultural story.

Chilaquiles: A Crunchy, Saucy Mexican Comfort Food

  • Broil and Blend Flavor Explosion: The recipe transforms simple ingredients like onions, peppers, and garlic by broiling them to create a deeply caramelized, smoky sauce that intensifies the overall taste profile.
  • Layered Cheese Texture Delight: By strategically layering tortilla chips with two types of cheese (shredded and cotija), the dish offers a perfect balance of crispy, melty, and crumbly textures that make each bite exciting.
  • Quick and Customizable Comfort Meal: This chilaquiles recipe is incredibly versatile, allowing home cooks to adjust spice levels, sauce chunkiness, and toppings while still delivering a restaurant-quality breakfast in under 30 minutes.

Ingredients That Make Chilaquiles Pop With Flavor

Vegetables and Aromatics:
  • Onion: Provides a sweet and savory base for the sauce with a nice depth of flavor.
  • Peppers: Adds smoky and slightly spicy character to the sauce, choose fresh and firm peppers.
  • Garlic: Brings intense aromatic flavor and enhances overall taste of the dish.
Dairy and Cheese:
  • Shredded Cheese: Melts easily and creates a creamy texture for the chilaquiles.
  • Cotija Cheese: Traditional Mexican cheese with a salty and crumbly texture, adds authentic flavor.
  • Sour Cream: Provides a cool and tangy finish to balance the spicy sauce.
  • Butter: Helps create smooth and rich scrambled eggs with a golden color.
Proteins and Base Ingredients:
  • Eggs: Main protein source, create fluffy scrambled eggs as a topping.
  • Tortilla Chips: Traditional base for chilaquiles, provides crunch and structure.
  • Canned Tomatoes: Creates the primary sauce with rich, smooth consistency.
  • Salt, Pepper: Essential seasonings to enhance overall flavor profile.
Garnish and Additional Flavors:
  • Jalapeño: Adds fresh and spicy kick, optional for heat lovers.
  • Radish: Provides crisp texture and peppery freshness.
  • Cilantro: Brings bright, herbal notes to finish the dish.

Quick Instructions for Building Perfect Chilaquiles

Step 1: Prepare Roasted Vegetables

  • Preheat broiler
  • Line baking sheet with aluminum foil
  • Lightly brush with oil
  • Arrange vegetables on sheet
  • Onion
  • Peppers
  • Garlic

Broil 5-10 minutes until softened and blistered. Remove peppers earlier if cooking faster than onions.

Step 2: Create Spicy Tomato Sauce

Transfer roasted vegetables to blender with canned tomatoes. For chunkier sauce, add only half the tomatoes. Purée until smooth. Pour into saucepan over medium heat. Simmer and stir for 10 minutes. Season with salt and pepper.

Step 3: Assemble Layered Tortilla Base

Preheat oven to 400°F. Lightly oil cast-iron skillet. Create layers:
  • Tortilla chips
  • Tomato sauce
  • Shredded cheese
  • Cotija cheese

Repeat layers twice. Bake 5-10 minutes until cheese melts and bubbles.

Step 4: Prepare Fluffy Scrambled Eggs

Heat nonstick skillet over medium heat. Whisk eggs until uniform. Add melted butter. Cook eggs by continuously scraping and flipping for 2-3 minutes until just cooked.

Step 5: Finish And Garnish

Remove skillet from oven. Top with:
  • Scrambled eggs
  • Jalapeño slices
  • Radish slices
  • Fresh cilantro
  • Sour cream dollop

Serve immediately while hot and crispy.

Tips for Crispy Chips and Creamy Sauce

  • Broil with Precision: Watch vegetables closely during broiling to prevent burning, removing peppers earlier if they cook faster than onions.
  • Sauce Consistency Control: Adjust tomato blending to create either a smooth or chunky sauce based on personal texture preference.
  • Layer Strategically: Create even layers of tortilla chips and cheese to ensure every bite has balanced flavor and crunch.
  • Egg Technique Master: Use gentle scraping and flipping method to create soft, creamy scrambled eggs without overcooking.
  • Serve Immediately: Enjoy chilaquiles right after preparation to maintain crispy tortilla chips and melted cheese texture.

Chilaquiles Storage and Reheating Hacks

  • Refrigerate: Store chilaquiles in an airtight container within 2 hours of cooking. Keep refrigerated for up to 3 days.
  • Separate Components: Store eggs, sauce, and chips separately to prevent soggy texture. This helps maintain crispness and flavor.
  • Reheat Carefully: Warm in a preheated oven at 350°F for 10-15 minutes. Add fresh cheese and toppings after reheating to preserve texture and freshness.

Serving Suggestions That Complete Chilaquiles

  • Spice Up with Mexican Lager: Pair these zesty chilaquiles with a crisp Mexican beer like Modelo Especial or Pacifico. The light, refreshing brew cuts through the rich, spicy sauce and melted cheese, creating a perfect balance of flavors.
  • Cool Down with Fresh Salsa Verde: Serve a homemade salsa verde on the side to add an extra layer of bright, tangy freshness. The green sauce complements the deep red tomato base and provides a cool contrast to the warm, cheesy chips.
  • Brighten with Citrus Margarita: Mix up a classic margarita with fresh lime juice to complement the dish's bold flavors. The citrusy kick and slight saltiness will enhance the chilaquiles' spicy and cheesy elements, making each bite more vibrant and exciting.
  • Refresh with Agua Fresca: Balance the rich dish with a light, fruity agua fresca made from watermelon or pineapple. This traditional Mexican drink offers a sweet, hydrating counterpoint to the savory, spicy chilaquiles.

Flavor Variations That Add New Life to Chilaquiles

  • Spicy Chorizo Chilaquiles: Replace tortilla chips with homemade corn tortilla strips and add crispy chorizo sausage for extra heat and flavor.
  • Green Salsa Verde Version: Swap red tomato sauce with tangy salsa verde made from roasted green tomatillos, creating a zesty alternative to traditional chilaquiles.
  • Vegetarian Black Bean Option: Substitute meat with black beans, roasted vegetables, and add queso fresco instead of cotija for a protein-rich vegetarian adaptation.
  • Breakfast Skillet Remix: Layer crispy potato hash browns underneath the tortilla chips and top with crumbled bacon for a hearty morning breakfast variation.
Print
clock clock iconcutlery cutlery iconflag flag iconfolder folder iconinstagram instagram iconpinterest pinterest iconfacebook facebook iconprint print iconsquares squares iconheart heart iconheart solid heart solid icon
Chilaquiles Recipe

Chilaquiles Recipe


5 Stars 4 Stars 3 Stars 2 Stars 1 Star

4.8 from 36 reviews

  • Total Time: 45 minutes
  • Yield: 2 1x

Description

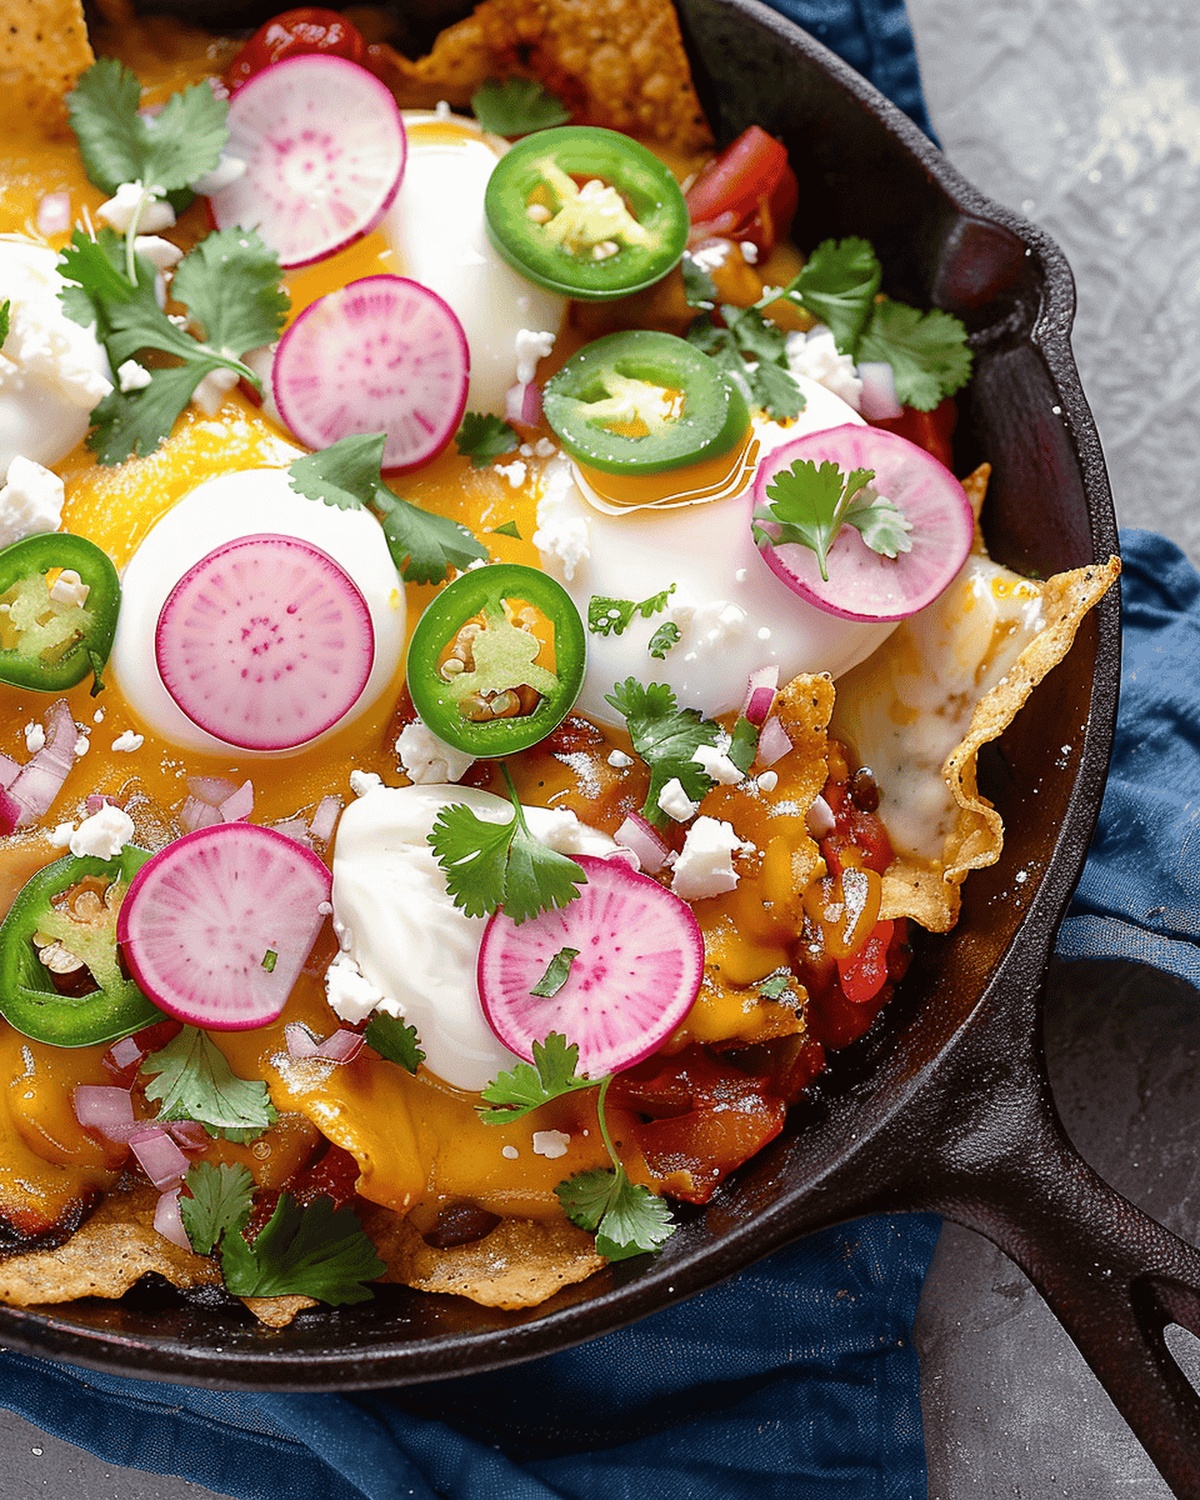
Mexican chilaquiles combine crispy tortilla chips simmered in a spicy red or green salsa, topped with crumbled queso fresco, sliced onions, and a perfectly fried egg. Rich layers of flavor create a traditional breakfast classic that welcomes you to savor authentic Mexican morning comfort.


Ingredients

Scale

Main Ingredients:

  • 4 large eggs
  • ½ bag tortilla chips
  • ½ cup shredded Mexican blend cheese
  • 2 tablespoons crumbled cotija or queso fresco cheese

Spicy and Tangy Components:

  • 1216 pickled jalapeño slices

Garnish and Condiments:

  • 1 watermelon radish, thinly sliced
  • 1 tablespoon butter
  • fresh cilantro leaves
  • sour cream

Instructions

  1. Char onions, peppers, and garlic under the broiler on a foil-lined baking sheet until softened and slightly blistered, carefully removing peppers if cooking faster than onions.
  2. Transfer roasted vegetables to a blender with canned tomatoes, puréeing until smooth. For a chunkier texture, reserve half the tomatoes to add after initial blending.
  3. Simmer the sauce in a saucepan over medium heat for 10 minutes, stirring frequently to prevent splattering. Season with salt and pepper to taste.
  4. Prepare an oven-safe skillet by lightly oiling the surface, then create alternating layers of tortilla chips, sauce, shredded cheese, and cotija cheese.
  5. Bake in a preheated 400°F oven until cheese melts and becomes bubbly, approximately 5-10 minutes.
  6. While the chilaquiles bake, prepare scrambled eggs in a nonstick skillet. Whisk eggs until uniformly colored, then cook in melted butter.
  7. Continuously scrape and flip eggs with a spatula, breaking up larger pieces, until just cooked through but still soft.
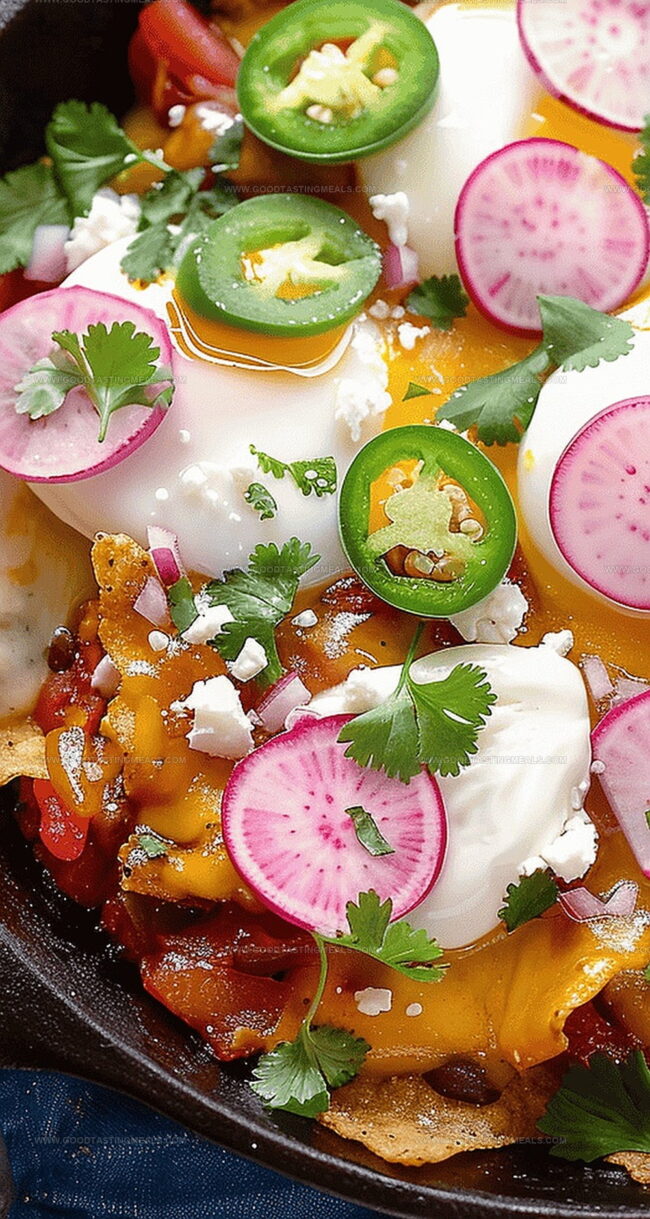
  8. Remove chilaquiles from the oven and top with scrambled eggs, sliced jalapeños, radish rounds, and fresh cilantro.
  9. Finish with a generous dollop of sour cream in the center and serve immediately while hot and crisp.

Notes

  • Broiling vegetables brings out a smoky, caramelized flavor that adds depth to the tomato sauce.
  • Blending half the canned tomatoes creates a textured sauce with chunks of roasted vegetables for extra complexity.
  • Layering tortilla chips with sauce and two types of cheese ensures each bite is packed with melty, crispy goodness.
  • Gentle scrambling technique prevents eggs from becoming dry or rubbery, creating soft, creamy curds.
  • Garnishing with fresh jalapeños, radishes, and cilantro adds bright, zesty contrast to the rich, cheesy base.
  • Serving immediately keeps the tortilla chips crisp and prevents them from becoming soggy.
  • Prep Time: 15 minutes
  • Cook Time: 30 minutes
  • Category: Breakfast, Lunch
  • Method: Broiling
  • Cuisine: Mexican

Nutrition

  • Serving Size: 2
  • Calories: 585
  • Sugar: 2 g
  • Sodium: 800 mg
  • Fat: 38 g
  • Saturated Fat: 17 g
  • Unsaturated Fat: 18 g
  • Trans Fat: 0 g
  • Carbohydrates: 42 g
  • Fiber: 3 g
  • Protein: 24 g
  • Cholesterol: 370 mg
Liam O'Brien

Liam O’Brien

Founder & Recipe Developer

Expertise

  • Traditional Irish Dishes
  • Farm-to-Table Cooking
  • Recipe Creation
  • Teaching Cooking Skills
  • Sustainable Food Practices

Education

Dublin Institute of Technology (now Technological University Dublin)

  • Program: Bachelor of Arts in Culinary Arts
  • Focus: Hands-on training in cooking techniques, kitchen management, and exploring both Irish and international cuisines.

Ballymaloe Cookery School, County Cork, Ireland

  • Program: 12-Week Certificate Course
  • Focus: Farm-to-table cooking, emphasizing the use of fresh, local ingredients and traditional cooking methods.

Liam O’Brien is the co-founder and kitchen soul behind Good Tasting Meals, a chef who believes that cooking shouldn’t feel stressful or complicated.

He earned his culinary stripes at Technological University Dublin and polished his farm-to-table skills at Ballymaloe Cookery School. With over 15 years flipping pans and stirring up stories, Liam has worked in family cafés, bustling bistros, and everything in between.

At Good Tasting Meals, Liam brings you recipes that feel like home: cozy, simple, and full of flavor.

Leave a Reply

Your email address will not be published. Required fields are marked *

Recipe rating 5 Stars 4 Stars 3 Stars 2 Stars 1 Star