

Easy Chocolate Peanut Butter No-Bake Cookie Bars Recipe for Joy
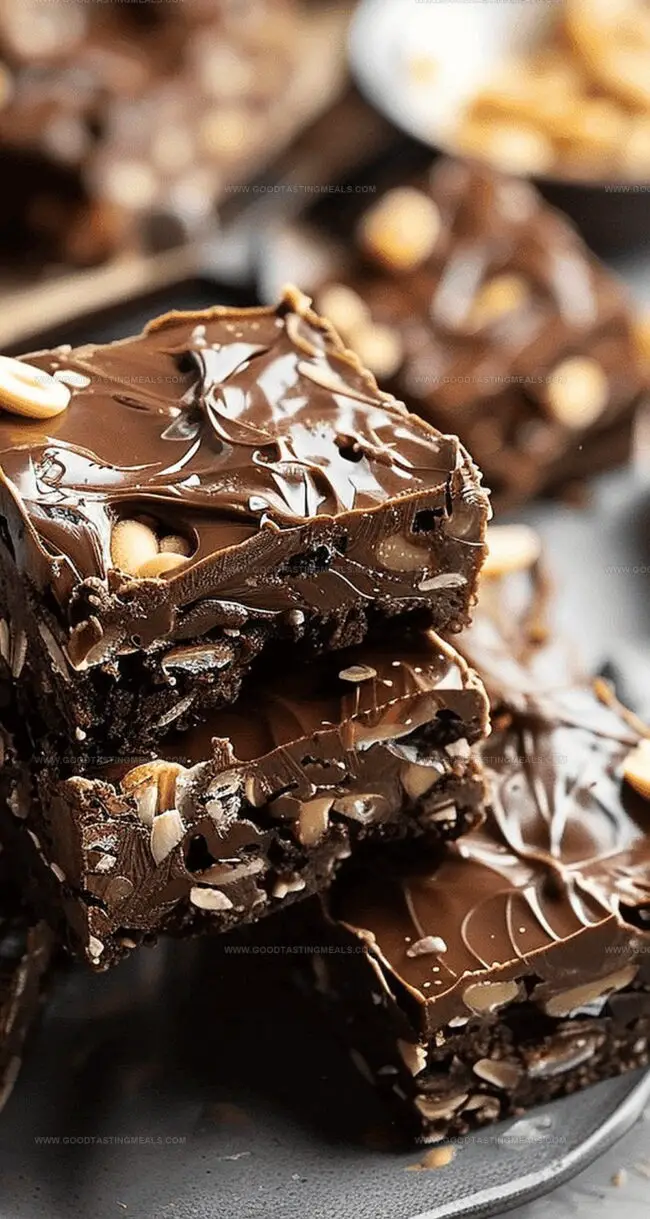
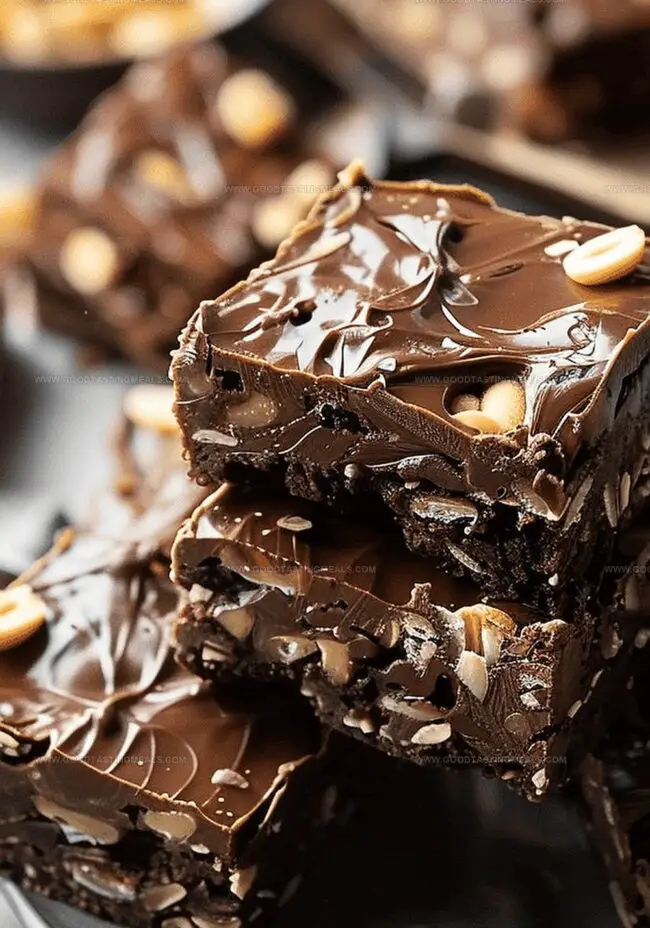
Chocolate peanut butter no-bake cookie bars represent the ultimate sweet indulgence for busy dessert lovers seeking a quick and delectable treat.
Rich, creamy textures blend seamlessly with classic comfort flavors that everyone craves.
The magic happens without touching an oven, making these bars a foolproof culinary adventure for novice and experienced bakers alike.
Smooth chocolate and nutty peanut butter create an irresistible combination that melts in your mouth with decadent intensity.
No complicated techniques or specialized equipment stand between you and these delightful squares of pure happiness.
Each bite delivers a perfect balance of sweetness and richness that feels simultaneously nostalgic and innovative.
Simple ingredients refine into an extraordinary dessert that sparks immediate joy and satisfies deep cravings.
What Makes Chocolate Peanut Butter No-Bake Cookie Bars So Addictive
Everything You Need for Chocolate Peanut Butter Cookie Bars
Base Ingredients:Binding Ingredients:Topping Ingredients:How to Assemble These No-Bake Bars in Minutes
Step 1: Prepare Baking Pan
Line an 8×8″ pan with parchment paper, allowing overhang for easy removal. Lightly spray with non-stick cooking spray.
Step 2: Create Chocolate Base
In a saucepan over medium heat, combine:Stir gently until ingredients blend smoothly and become integrated. Avoid letting the mixture boil.
Step 3: Mix Flavor Enhancers
Remove pan from heat. Stir in:Mix until completely smooth and well combined.
Step 4: Add Oats
Incorporate oats into the mixture, ensuring they are completely coated with the chocolate mixture.
Step 5: Form Base Layer
Press the oat mixture firmly into the prepared pan. Create an even, compact layer using the back of a spatula.
Step 6: Initial Chilling
Refrigerate the base layer for 10 minutes to help it set and become slightly firm.
Step 7: Prepare Chocolate Topping
Melt chocolate chips with olive oil in the microwave. Use 15-second intervals, stirring between each burst until smooth and glossy.
Step 8: Create Decorative Swirl
Remove pan from refrigerator and press down the base layer again.
Spread melted chocolate evenly over the top.
Dot small amounts of peanut butter across the chocolate surface.
Use a knife or toothpick to create a swirling pattern.
Step 9: Final Chilling
Refrigerate for at least 2 hours to allow bars to completely set and firm up.
Step 10: Slice and Serve
Remove from refrigerator 10 minutes before cutting.
Use a knife warmed under hot water and dried for clean, smooth slices.
Step 11: Storage
Store in an airtight container with parchment paper between layers to prevent sticking.
Keeps well in refrigerator for up to 1 week.
Smart Tips for the Perfect No-Bake Texture
Keeping Chocolate Peanut Butter Bars Fresh and Delicious
What to Pair with These Creamy Crunchy Bars
Flavor Upgrades for Chocolate Peanut Butter No-Bake Bars
Print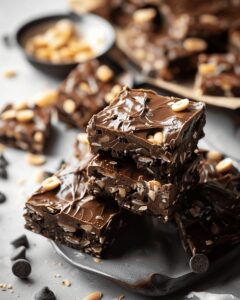
Chocolate Peanut Butter No-Bake Cookie Bars Recipe
- Total Time: 30 minutes
- Yield: 12 1x
Description
Chocolate peanut butter no-bake cookie bars deliver a dreamy fusion of rich cocoa and creamy peanut butter. Quick and simple to prepare, these irresistible bars melt in your mouth, offering pure indulgence without turning on the oven.
Ingredients
Main Ingredients:
- 2 ¼ cups (230g) quick oats
- 1 cup + 2 tablespoons (281g) natural peanut butter, room temperature
- 1 cup (210g) white granulated sugar
Wet Ingredients:
- 6 tablespoons (85g) plant-based butter (or regular butter)
- 6 tablespoons (75g) almond milk (or regular milk)
- ¾ teaspoon vanilla extract
- 1–2 teaspoons olive oil
Chocolate and Cocoa Ingredients:
- 3 tablespoons (15g) Dutched cocoa powder
- ¾ cup (135g) semi-sweet chocolate chips (dairy-free if needed)
- 2 tablespoons natural peanut butter, room temperature
Instructions
- Line an 8 x 8 inches (20 x 20 centimeters) baking pan with parchment paper, allowing excess paper to hang over the edges for effortless removal. Lightly coat the parchment with non-stick cooking spray.
- In a medium saucepan, combine granulated sugar, unsalted butter, unsweetened cocoa powder, and whole milk. Heat over medium temperature, stirring continuously until the mixture becomes smooth and fully integrated. Avoid letting the mixture reach a boiling point.
- Remove the saucepan from heat source and thoroughly blend in creamy peanut butter and pure vanilla extract until the mixture achieves a uniform consistency.
- Gradually fold rolled oats into the liquid mixture, ensuring each oat is completely coated and distributed evenly.
- Transfer the mixture into the prepared pan, using a spatula or the back of a spoon to press the contents firmly and create an even layer across the surface.
- Refrigerate the base for approximately 10 minutes to help it set slightly and become more compact.
- In a microwave-safe bowl, melt semi-sweet chocolate chips with a small amount of olive oil. Heat in 15-second intervals, stirring between each burst until the chocolate becomes completely smooth and glossy.
- Remove the chilled base from the refrigerator and gently press down once more to ensure a compact surface.
- Pour the melted chocolate evenly over the oat base, spreading it to cover the entire surface using an offset spatula.
- Drop small dollops of additional peanut butter across the chocolate layer, then use a toothpick or knife to create decorative swirl patterns.
- Return the pan to the refrigerator and chill for a minimum of 2 hours, allowing the bars to set completely.
- Before serving, remove the pan from the refrigerator and let it rest at room temperature for 10 minutes to slightly soften.
- Using a sharp knife that has been heated under hot water and thoroughly dried, cut the bars into clean, precise squares.
- Serve immediately or store in an airtight container, placing parchment paper between layers to prevent sticking. Bars can be refrigerated for up to one week.
Notes
- Prep the pan carefully with non-stick spray and parchment paper for effortless bar removal and clean cutting.
- Create a smooth chocolate base by heating ingredients slowly, avoiding boiling to maintain perfect texture and prevent burning.
- Mix peanut butter thoroughly into the warm mixture to ensure even distribution and rich, creamy flavor throughout the bars.
- Chill the base before adding chocolate topping to help layers set quickly and prevent mixing of layers.
- Melt chocolate chips gently using short microwave bursts to prevent scorching, adding a touch of olive oil for glossy finish.
- Store bars in an airtight container with parchment between layers to maintain freshness and prevent sticking for up to 5 days.
- Prep Time: 20 minutes
- Cook Time: 10 minutes
- Category: Snacks, Desserts
- Method: Simmering
- Cuisine: American
Nutrition
- Serving Size: 12
- Calories: 281 kcal
- Sugar: 20 g
- Sodium: 105 mg
- Fat: 18 g
- Saturated Fat: 6 g
- Unsaturated Fat: 10 g
- Trans Fat: 0 g
- Carbohydrates: 25 g
- Fiber: 3 g
- Protein: 7 g
- Cholesterol: 10 mg
Liam O’Brien
Founder & Recipe Developer
Expertise
Education
Dublin Institute of Technology (now Technological University Dublin)
Ballymaloe Cookery School, County Cork, Ireland
Liam O’Brien is the co-founder and kitchen soul behind Good Tasting Meals, a chef who believes that cooking shouldn’t feel stressful or complicated.
He earned his culinary stripes at Technological University Dublin and polished his farm-to-table skills at Ballymaloe Cookery School. With over 15 years flipping pans and stirring up stories, Liam has worked in family cafés, bustling bistros, and everything in between.
At Good Tasting Meals, Liam brings you recipes that feel like home: cozy, simple, and full of flavor.