

Sizzling Classic Tuna Melt Recipe: Cozy Comfort in Minutes
Tuna melts offer a delightful culinary experience that reimagines ordinary sandwich ingredients into something magical.
Hearty and satisfying, these classic comfort foods blend rich flavors with simple preparation techniques.
Creamy tuna mixed with zesty seasonings creates a mouthwatering combination that appeals to many palates.
Crisp bread provides the perfect foundation for melted cheese and savory protein.
Home cooks appreciate how quickly this dish comes together with minimal ingredients and maximum taste.
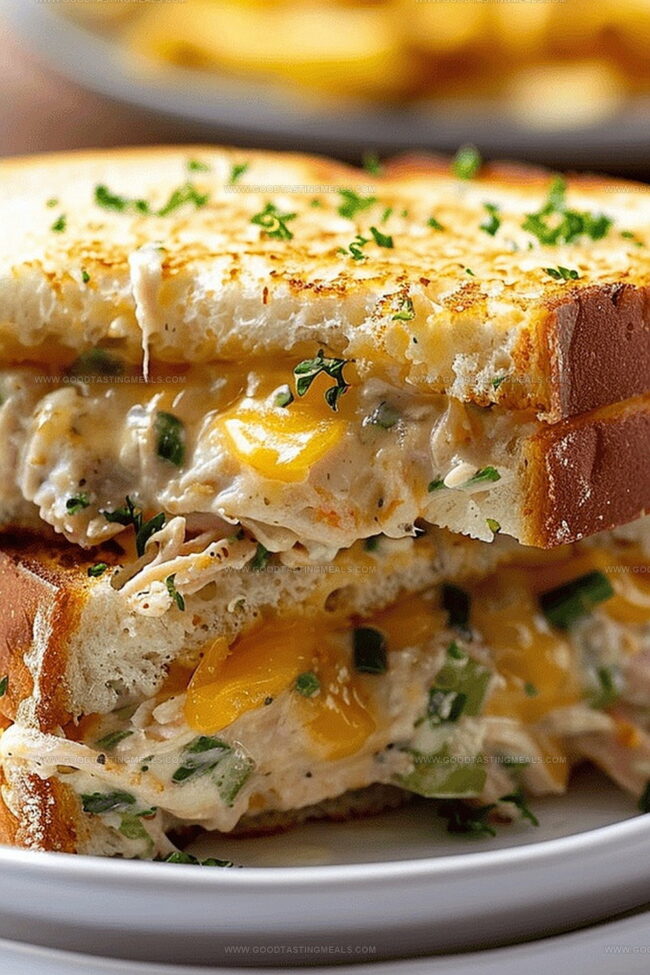
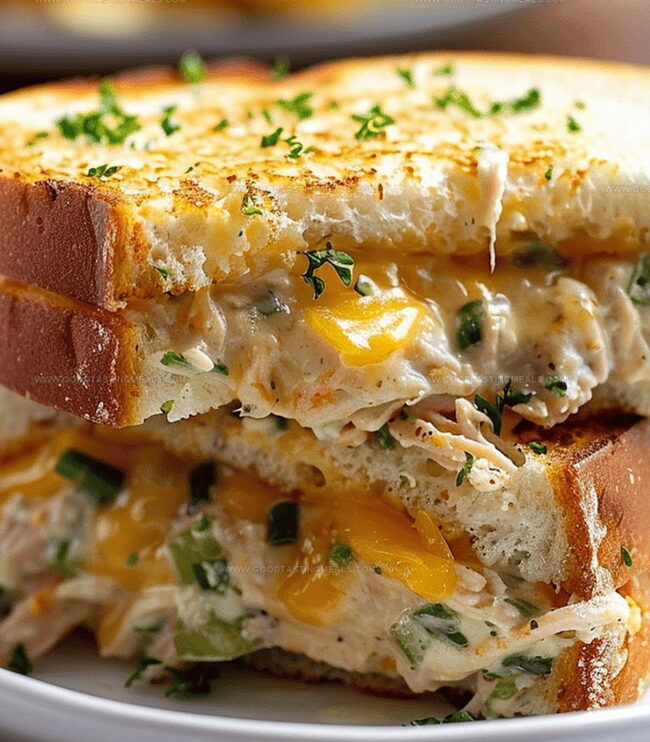
The magic happens when carefully selected components merge into a golden, bubbling masterpiece that beckons hungry diners.
Your taste buds will dance with excitement over this timeless recipe that promises warmth and satisfaction.
A Toasty Take on a Tuna Favorite
The Essentials for a Melt-in-Your-Mouth Sandwich
Main Ingredients:
Bread: Sturdy white or sourdough bread with a good structure for holding the sandwich together, ideal for toasting and creating a crispy exterior.
Tuna: Canned chunk light or albacore tuna, well-drained for a flaky and moist texture in the salad.
Cheese Ingredients:
Cheddar Cheese, Swiss Cheese: Melting cheeses that provide rich, creamy flavor and help bind the sandwich components together.
Salad and Seasoning Ingredients:
Mayonnaise: Creamy base that adds moisture and richness to the tuna mixture.
Celery: Provides a fresh, crisp texture and subtle crunch to the tuna salad.
Red Onion: Adds sharp, zesty flavor to enhance the overall taste profile.
Salt, Black Pepper: Essential seasonings for balancing and elevating the tuna salad’s flavor.
Binding and Cooking Ingredients:
Butter: Used for toasting bread, creating a golden, crispy exterior with rich flavor.
How to Grill Tuna Melts That Stay Crisp
Step 1: Prepare the Oven
Preheat the oven to 350°F.
Step 2: Create Tasty Tuna Filling
Drain the tuna completely. Break or shred the tuna into small pieces. Mix the tuna salad ingredients in a medium bowl until well blended.
Ingredients for Tuna Filling:Step 3: Toast Bread to Golden Perfection
Melt butter in a skillet over medium-low heat. Place bread slice in the skillet and coat evenly with butter. Toast until golden brown, about 2-3 minutes. Flip and toast the other side for 1 minute. Repeat with remaining bread slices.
Step 4: Craft the Sandwich
Layer tuna mixture on 3 bread slices. Top each with 2 slices of cheese. Cover with remaining bread slices, ensuring golden sides face outward.
Step 5: Bake Until Melty and Warm
Transfer sandwiches to a foil-lined baking sheet. Bake for 15-20 minutes until cheese melts completely and sandwich is heated through.
Serving Tip: Serve immediately while cheese is gooey and bread is crisp.
Tips to Keep Tuna Flavor Bright and Bold
Storing Without Making the Bread Soggy
What to Eat Alongside This Classic
Ways to Upgrade Your Tuna Melt Game
Print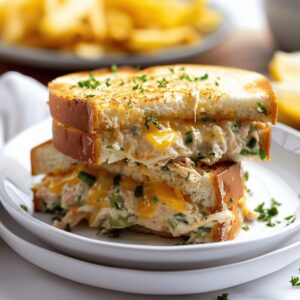
Classic Tuna Melt Recipe
- Total Time: 40 minutes
- Yield: 6 1x
Description
Classic Tuna Melt brings comfort and nostalgia to sandwich lovers with its melty cheese and perfectly toasted bread. Crisp edges, creamy tuna filling, and golden-brown crust make this American diner favorite an irresistible lunch choice you’ll crave again and again.
Ingredients
Main Protein:
- 2 (5-ounces / 142 grams) cans albacore tuna
Vegetables and Herbs:
- 1 stalk celery, diced
- 2 tablespoons white onions, minced
- 1 tablespoon freshly chopped parsley
Condiments and Seasonings:
- ⅓ cup mayonnaise
- 1 tablespoon dill or sweet relish
- 1 tablespoon lemon juice
- 1 teaspoon yellow mustard
- ¼ teaspoon salt
- ¼ teaspoon garlic powder
- ¼ teaspoon dry dill weed
- ¼ teaspoon freshly cracked pepper
For Tuna Melts:
- 6 slices bread
- 6 tablespoons butter
- 6 slices cheddar cheese, or American
Instructions
- Thoroughly drain canned tuna, breaking it into fine, uniform pieces using a fork to ensure smooth texture.
- In a medium mixing bowl, blend tuna with mayonnaise, finely chopped celery, minced onion, salt, and pepper until ingredients are evenly distributed and create a cohesive salad mixture.
- Heat a large skillet over medium-low temperature, adding of unsalted butter to melt smoothly across the cooking surface.
- Place bread slices into the buttered skillet, allowing each side to develop a golden-brown crisp exterior, approximately 2-3 minutes per side, creating a crunchy foundation for the sandwich.
- Remove toasted bread slices and arrange them on a clean work surface, preparing for assembly.
- Layer the prepared tuna salad generously across three bread slices, ensuring even coverage from edge to edge.
- Top each tuna-covered slice with two full slices of sharp cheddar cheese, creating a rich, melty layer.
- Complete the sandwich construction by placing the remaining toasted bread slices on top, with golden surfaces facing outward.
- Preheat the oven to 350 degrees Fahrenheit (175 degrees Celsius) and line a baking sheet with aluminum foil for easy cleanup.
- Transfer the assembled sandwiches to the prepared baking sheet, allowing sufficient space between each sandwich.
- Bake for 15-20 minutes, monitoring until cheese becomes completely melted and sandwiches are heated thoroughly throughout.
- Remove from oven, let cool for 2-3 minutes, then slice diagonally and serve immediately while warm and crispy.
Notes
- Drain tuna thoroughly to prevent soggy sandwiches and ensure a perfect texture.
- Toast bread in butter for a crispy, golden-brown exterior that adds rich flavor and satisfying crunch.
- Use medium-low heat when toasting to avoid burning and achieve even golden coloration.
- Layer cheese generously between tuna and bread for maximum melty goodness and gooey consistency.
- Bake sandwiches on a foil-lined sheet for easy cleanup and even heating.
- Allow sandwiches to rest briefly after baking to let cheese set and flavors meld together.
- Prep Time: 20 minutes
- Cook Time: 20 minutes
- Category: Lunch, Snacks
- Method: Baking
- Cuisine: American
Nutrition
- Serving Size: 6
- Calories: 404 kcal
- Sugar: 2 g
- Sodium: 640 mg
- Fat: 30 g
- Saturated Fat: 14 g
- Unsaturated Fat: 12 g
- Trans Fat: 1 g
- Carbohydrates: 18 g
- Fiber: 1 g
- Protein: 22 g
- Cholesterol: 85 mg
Liam O’Brien
Founder & Recipe Developer
Expertise
Education
Dublin Institute of Technology (now Technological University Dublin)
Ballymaloe Cookery School, County Cork, Ireland
Liam O’Brien is the co-founder and kitchen soul behind Good Tasting Meals, a chef who believes that cooking shouldn’t feel stressful or complicated.
He earned his culinary stripes at Technological University Dublin and polished his farm-to-table skills at Ballymaloe Cookery School. With over 15 years flipping pans and stirring up stories, Liam has worked in family cafés, bustling bistros, and everything in between.
At Good Tasting Meals, Liam brings you recipes that feel like home: cozy, simple, and full of flavor.