

Crispy Katsu Chicken: The Easiest Weeknight Recipe
Crispy katsu chicken brings together the perfect balance of crunch and tender meat in a mouthwatering culinary adventure.
Japanese-inspired comfort food never tasted so good with this delightful recipe that enhances ordinary chicken into an extraordinary meal.
Breading enhances plain poultry into a golden, crackling masterpiece that sings with flavor and texture.
Carefully selected ingredients elevate this dish from simple to spectacular, creating a symphony of tastes that dance across your palate.
Home cooks can easily master this technique, turning a weeknight dinner into a restaurant-worthy experience.
Each bite promises a satisfying crunch that gives way to juicy, perfectly seasoned chicken beneath the crisp exterior.
The accompanying coconut rice adds a subtle sweetness that complements the savory protein beautifully.
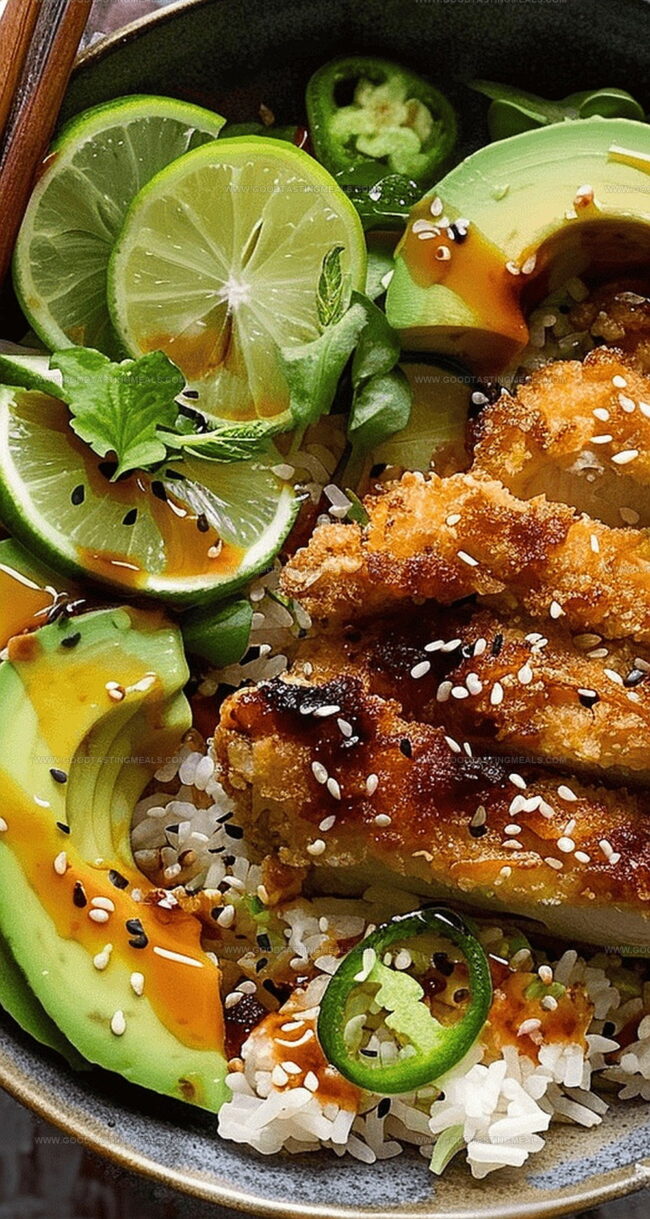
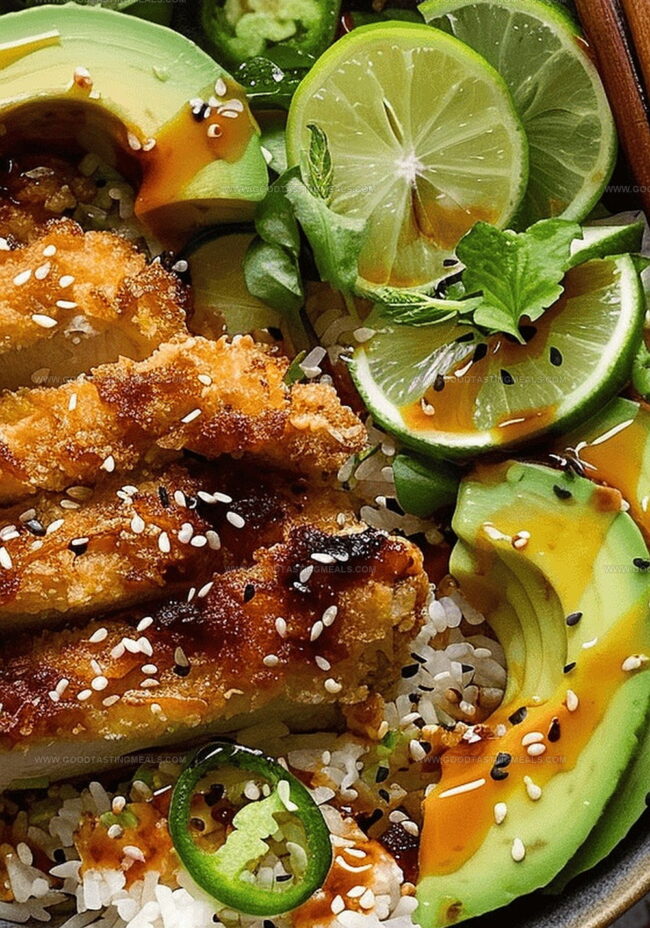
Crispy Katsu Chicken with Coconut Rice That Crunches and Comforts
Ingredients That Make This Dish Crispy and Creamy
Main Ingredients:
Chicken and Coating:Rice Components:Garnish and Additional Ingredients:How to Fry Katsu and Simmer Coconut Rice
Step 1: Prepare Coconut Rice
Cook rice in salted water following package instructions. Once cooked, drain and return to pot. Stir in coconut milk and mix thoroughly over warm (turned off) stove.
Step 2: Season and Coat Chicken
Prepare coating stations:Season chicken fillets with salt and pepper. Coat each fillet in order:Step 3: Fry Chicken Katsu
Heat pan with sesame oil. Cook chicken fillets:Step 4: Prepare Fresh Garnishes
Thinly slice cucumber and sprinkle with light salt
Slice avocado into elegant pieces
Step 5: Assemble Delicious Bowl
Layer ingredients in bowl:Garnish with:Tips to Avoid Soggy Breaded Chicken
Storage Tips for Keeping the Crunch
Perfect Pairings for Katsu Chicken
Flavor Enhancements with Spice or Sauce
Print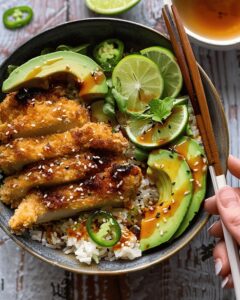
Crispy Katsu Chicken With Coconut Rice Recipe
- Total Time: 30 minutes
- Yield: 2 1x
Description
Japanese-inspired katsu chicken brings golden, crunchy perfection alongside fragrant coconut rice. Crisp panko-crusted chicken meets silky rice in a delightful harmony that whisks you straight to Tokyo’s bustling culinary streets.
Ingredients
Crispy Chicken:
- 2 chicken fillets (125 grams or 4.4 ounces each)
- 40 grams (1.4 ounces) panko breadcrumbs
- 30 grams (1.1 ounces) flour
- Salt
- Pepper
- 2 tablespoons sesame oil (for cooking)
Coconut Rice:
- 100 grams (3.5 ounces) basmati rice
- 2 tablespoons coconut milk
Garnish:
- 1 mini cucumber
- 1 avocado
- 2 tablespoons sesame seeds
- ½ lime
- Spicy oil (optional)
Instructions
- Submerge rice in generously salted water and cook following package guidelines until tender and fluffy.
- Create three distinct stations: distribute flour on one plate, breadcrumbs on another, and whisk eggs in a separate shallow dish.
- Carefully season chicken fillets with kosher salt and freshly ground black pepper, ensuring even coverage.
- Methodically coat each chicken fillet: first dredge thoroughly in flour, then dip completely in whisked eggs, finally encrust with breadcrumbs for maximum crispiness.
- Warm sesame oil in a heavy-bottomed skillet over medium-high heat until shimmering.
- Gently place breaded chicken fillets into hot oil, cooking approximately 2-3 minutes per side until achieving a golden-brown exterior.
- Reduce heat to medium and continue cooking an additional 3 minutes per side, ensuring chicken reaches an internal temperature of 165°F (74°C).
- While chicken cooks, delicately slice cucumber into translucent half-moons and sprinkle with a pinch of salt to draw out excess moisture.
- Carefully slice ripe avocado into elegant, uniform wedges.
- After rice completes cooking, drain thoroughly and return to warm pot.
- Pour coconut milk into rice, stirring gently to integrate and create creamy texture.
- Slice cooked chicken fillets into diagonal strips for attractive presentation.
- Artfully arrange coconut rice in serving bowls, layer crispy katsu chicken on top, and garnish with cucumber, avocado slices, sesame seeds, fresh lime juice, and optional spicy oil.
Notes
- Master the art of perfectly crispy chicken by maintaining the right oil temperature and avoiding overcrowding the pan.
- Ensure chicken is evenly coated with flour, egg, and breadcrumbs to create a golden, crunchy exterior that seals in moisture.
- Use fresh coconut milk for a richer, more authentic flavor in the rice, stirring quickly to prevent clumping.
- Pat chicken dry before coating to help breadcrumbs adhere better and achieve maximum crispiness.
- Choose panko breadcrumbs for an extra light and crispy texture that elevates the entire dish.
- Let the cooked chicken rest for a few minutes before slicing to help retain its juicy interior and prevent moisture loss.
- Prep Time: 10 minutes
- Cook Time: 20 minutes
- Category: Dinner, Lunch
- Method: Frying
- Cuisine: Japanese
Nutrition
- Serving Size: 2
- Calories: 582 kcal
- Sugar: 2 g
- Sodium: 340 mg
- Fat: 38 g
- Saturated Fat: 11 g
- Unsaturated Fat: 22 g
- Trans Fat: 0 g
- Carbohydrates: 35 g
- Fiber: 4 g
- Protein: 35 g
- Cholesterol: 105 mg
Liam O’Brien
Founder & Recipe Developer
Expertise
Education
Dublin Institute of Technology (now Technological University Dublin)
Ballymaloe Cookery School, County Cork, Ireland
Liam O’Brien is the co-founder and kitchen soul behind Good Tasting Meals, a chef who believes that cooking shouldn’t feel stressful or complicated.
He earned his culinary stripes at Technological University Dublin and polished his farm-to-table skills at Ballymaloe Cookery School. With over 15 years flipping pans and stirring up stories, Liam has worked in family cafés, bustling bistros, and everything in between.
At Good Tasting Meals, Liam brings you recipes that feel like home: cozy, simple, and full of flavor.