

Golden Crispy Pakora Recipe: Spicy Indian Fritters Magic
Crispy, golden, and bursting with flavor, this authentic pakora recipe delivers a taste of street-food magic straight to your kitchen.
These irresistible Indian fritters dance with spices that spark memories of bustling market stalls and vibrant culinary traditions.
Every bite of these pakoras promises a delightful crunch that shatters expectations and delights the senses.
The blend of chickpea flour and fragrant spices creates a perfect harmony of textures and taste.
Vegetable pakoras offer a simple yet spectacular snack that works beautifully as an appetizer or casual bite.
Whether you’re hosting a gathering or simply treating yourself, these pakoras will transport you to the heart of Indian street cuisine.
Dive into this recipe and unleash a world of delectable, crispy goodness that will become an instant favorite.
Quick Recipe Overview
Prep Time:
Ingredients to Create Perfect Pakora
For Batter Base:For Vegetable Mix:For Cooking and Serving:Tools for Frying Crispy Pakora
Step-by-Step to Make Indian Pakora
Gather chickpea flour and aromatic spices in a mixing bowl. Whisk these ingredients together with water until you create a smooth, silky mixture that feels like liquid velvet.
Chop an array of fresh vegetables into bite-sized pieces. Fold these colorful ingredients into your spiced batter, ensuring each morsel is generously coated with the golden-hued mixture.
Select a deep, heavy-bottomed pan and fill it with cooking oil. Heat the oil to a precise temperature that will transform your pakoras into crispy golden treasures.
Gently drop spoonfuls of the vegetable-laden batter into the hot oil. Allow each pakora to dance and sizzle, developing a beautiful bronze exterior that promises incredible crunch.
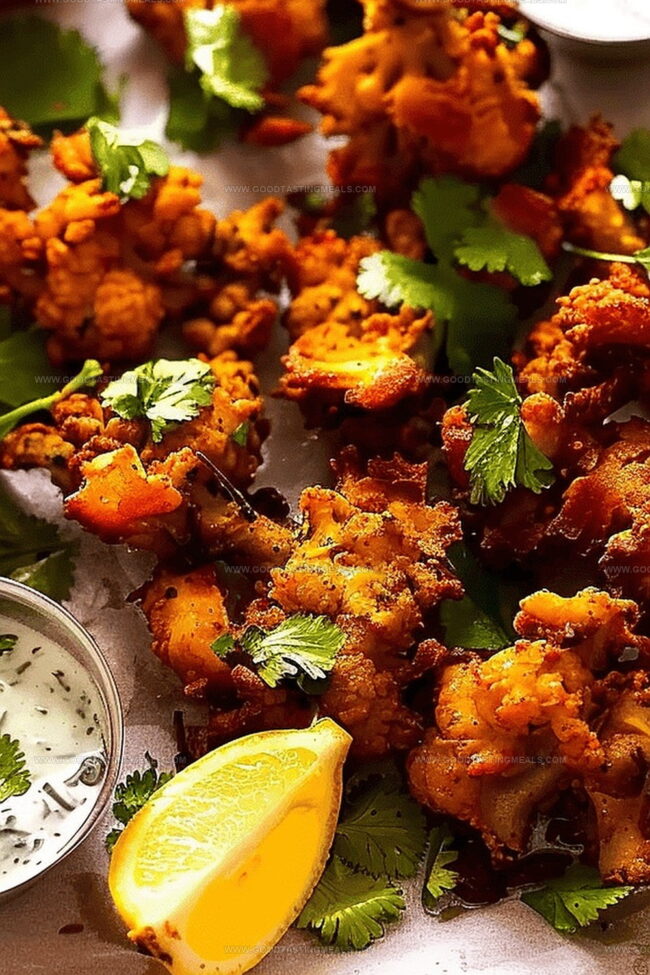
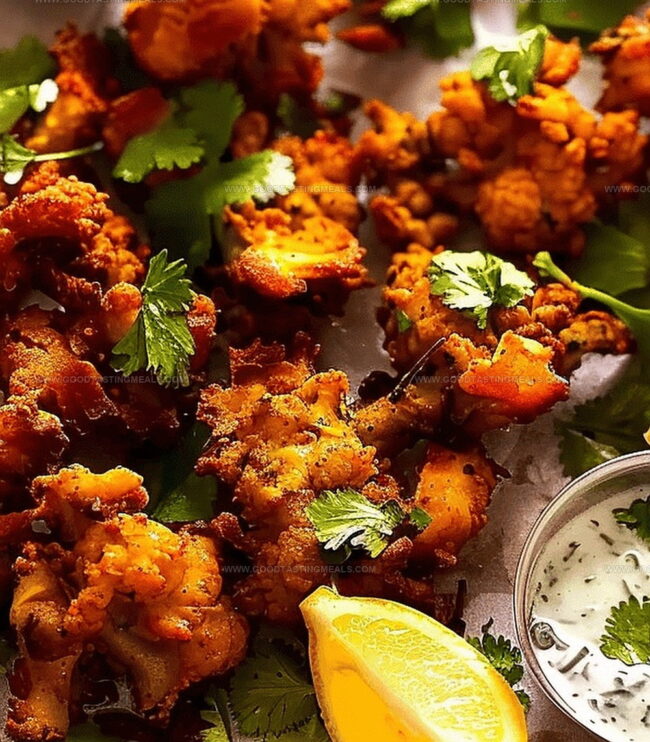
Remove the pakoras when they reach a perfect golden-brown color. Let them rest on absorbent paper to drain excess oil, creating a light and crispy texture that will delight your taste buds.
Arrange your freshly made pakoras on a beautiful platter. Accompany them with a vibrant mint or yogurt sauce that will complement their rich, spicy flavor profile.
Tips for Changing Up Your Pakora Recipe
Pakora Serving Tips for Snack Time
Save and Reheat Your Leftover Pakora
Print
Crispy Pakora Recipe
- Total Time: 0 hours
- Yield: 7 1x
Description
Crispy potato pakora from India delights taste buds with golden-brown edges and spicy, aromatic seasonings. Savory bites invite culinary exploration and promise delectable moments of pure pleasure.
Ingredients
- 2 ¼ cups (540 ml) chickpea flour
- 1 ½ cups (360 ml) onions, grated
- 2 cups (480 ml) potato, peeled and grated
- 2 ½ cups (600 ml) cauliflower, finely chopped
- 1 tsp turmeric powder
- 1 tsp cumin powder
- 1 tsp coriander powder
- 1 tsp fenugreek powder
- ½ tsp chilli powder (pure chilli powder)
- 2 tsps salt (cooking/kosher salt)
- 2 large red chillies (cayenne peppers), finely chopped
- 1 tbsp fresh ginger, finely grated
- 2 tbsps coriander/cilantro leaves, finely chopped
- ¾ cups (180 ml) + 2 ½ tbsps water
- 3 – 4 cups (720 – 960 ml) vegetable or canola oil
- 2 cups (480 ml) mint leaves
- 1 cup (240 ml) coriander/cilantro leaves
- ¼ cup (60 ml) eschalot, sliced
- 3 tbsps lime juice
- 1 tsp caster sugar
- ½ tsp cumin seeds
- ½ tsp cooking/kosher salt
- 2 ice cubes
- 1 cup (240 ml) plain yoghurt
- ½ cup (120 ml) mint leaves
Instructions
- Batter Preparation: Whisk chickpea flour with turmeric, cumin, coriander, fenugreek, and chilli, gradually incorporating water to create a silky, uniform consistency that coats the back of a spoon smoothly.
- Vegetable Integration: Thoroughly mix diced potato, cauliflower, onion, ginger, fresh chilli, and chopped coriander into the batter, ensuring each morsel is generously enrobed in the spiced mixture.
- Oil Heating: Warm oil in a heavy-bottomed pot to precisely 180°C, maintaining a consistent temperature for optimal frying conditions that guarantee crisp, golden exteriors.
- Frying Technique: Gently drop seasoned batter clusters into the hot oil, creating irregular shapes and working in small batches to preserve oil temperature and ensure even, golden-brown coloration.
- Draining and Finishing: Remove pakoras when they achieve a crisp, golden exterior, transferring to paper towels to absorb excess oil, then optionally keeping warm in a low-temperature oven.
- Sauce Preparation: Blend fresh coriander, mint, yogurt, and complementary seasonings into a smooth, creamy accompaniment that perfectly complements the spicy, crispy pakoras.
Notes
- Manage Batter Consistency: Achieve a smooth, thick texture like pancake batter to ensure vegetables adhere perfectly and create crispy, well-coated pakoras.
- Control Oil Temperature: Maintain steady 180°C heat to prevent soggy or burnt pakoras, using a thermometer for precision and consistent golden-brown results.
- Batch Frying Technique: Drop small spoonfuls into hot oil separately to maintain temperature and prevent overcrowding, guaranteeing crisp, evenly cooked pakoras.
- Drain and Rest: Use paper towels to remove excess oil immediately after frying, keeping pakoras warm in a low-temperature oven to preserve crunchiness and serving quality.
- Cook Time: 0 minutes
- Category: Snacks, Appetizer
- Method: Frying
- Cuisine: Indian
Nutrition
- Serving Size: 7
- Calories: 180
- Sugar: 2 g
- Sodium: 450 mg
- Fat: 10 g
- Saturated Fat: 1 g
- Unsaturated Fat: 9 g
- Trans Fat: 0 g
- Carbohydrates: 20 g
- Fiber: 4 g
- Protein: 6 g
- Cholesterol: 0 mg
Sophie Martin
Co-Founder & Content Creator
Expertise
Education
Stellenbosch University, South Africa
South African Chefs Academy, Cape Town
Sophie Martin is the nutrition brain and feel-good foodie at Good Tasting Meals. With a degree in Human Nutrition from Stellenbosch University and chef training from the South African Chefs Academy, Sophie brings balance to the table, literally. She loves creating meals that are easy to make, great to eat, and good for your body too.
Her recipes are made for everyday living, with a little flair and a lot of heart. Sophie’s not here to count calories, she’s here to show you how fresh, simple food can fit into your life, taste amazing, and still be nourishing.