

Crunchy Dill Delights: Irresistible Crispy Fried Pickles Recipe
Sizzling, golden, and irresistibly crunchy, these fried pickles will revolutionize your crispy fried pickles recipe game.
Southern diners and food trucks have long celebrated this addictive appetizer.
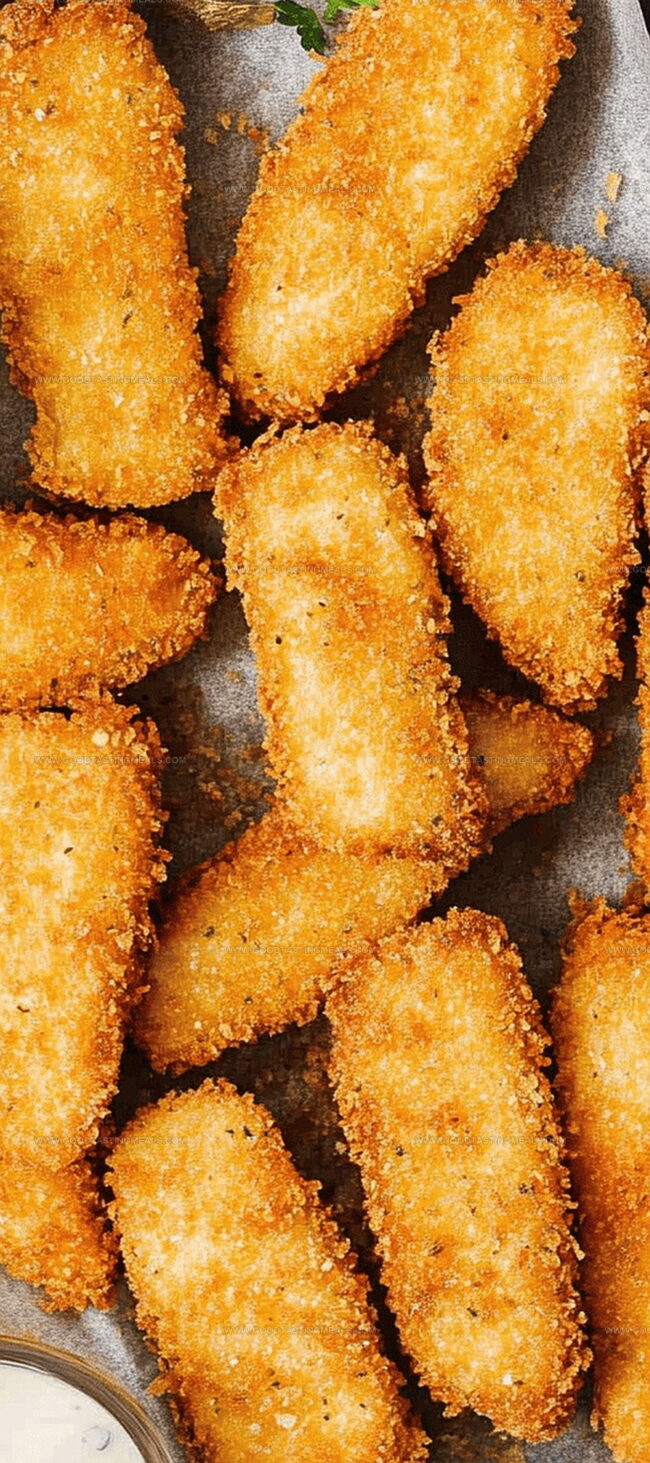
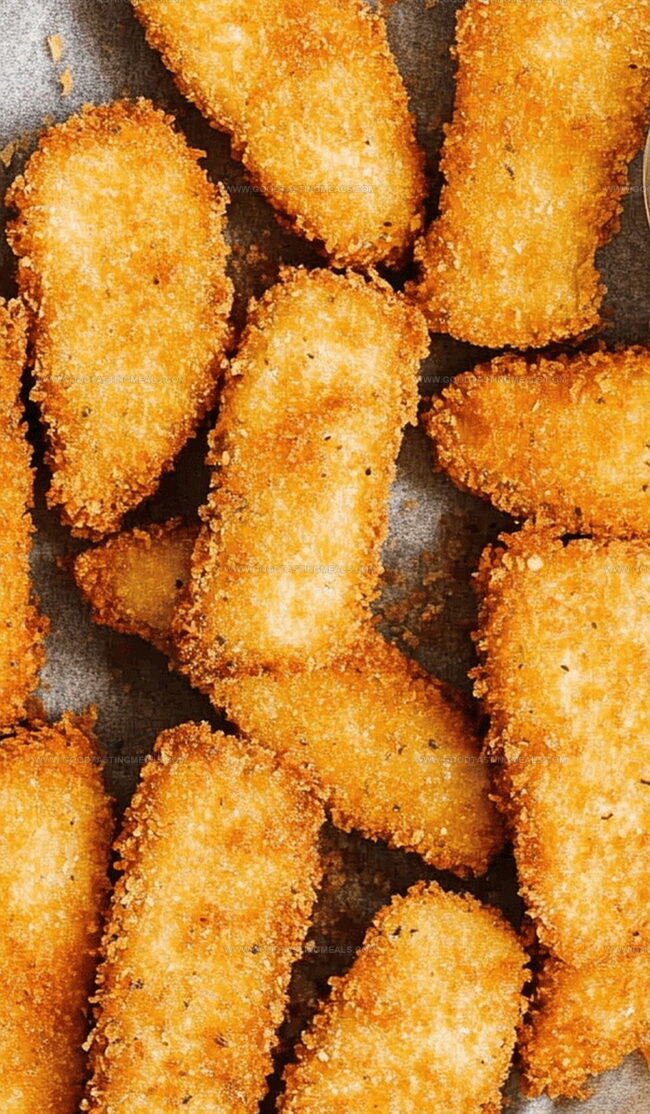
Tangy pickle slices get coated in a perfectly seasoned breading that delivers maximum crunch.
Each bite promises a delightful contrast between the sharp pickle interior and its crisp exterior.
The secret lies in the precise breading technique and oil temperature.
Quick to make and impossible to resist, these pickles turn an ordinary snack into a culinary adventure.
Dive into this crowd-pleasing recipe and watch everyone’s eyes light up with the first crispy bite.
Quick Recipe Overview
Crispy Fried Pickles Ingredient Essentials
For Batter Base:For Seasoning and Flavor:For Coating and Crunch:What You’ll Use to Fry Pickles Crispy
Making Crispy Fried Pickles at Home
Pat pickle slices completely dry with clean towels to remove excess moisture and ensure maximum crispiness.
Mix flour, milk, egg, and seasonings in a smooth blend that will perfectly coat each pickle slice with delicious flavor.
Set up two separate bowls – one with seasoned flour mixture and another with crunchy breadcrumbs for ultimate texture.
Dunk each pickle slice into the liquid batter, then roll gently through breadcrumbs, ensuring complete and even coverage.
Heat oil to a sizzling hot zone between 360-370°F, creating the perfect environment for golden, crispy exterior.
Carefully drop breaded pickle slices into hot oil, cooking in small batches for 3-4 minutes until they transform into crunchy, golden delights.
Remove pickles onto paper towels to drain excess oil, then sprinkle with a touch of salt for enhanced flavor.
Plate your crispy fried pickles alongside a creamy ranch dressing or your favorite tangy dipping sauce for a crowd-pleasing appetizer.
Tips for Crunchier Fried Pickles
Serve Fried Pickles That Get Noticed
Storing Fried Pickles After Cooking
Print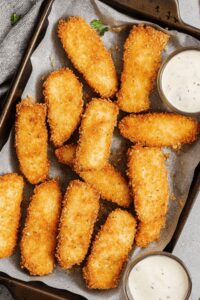
Crunchy Fried Pickles Recipe
- Total Time: 25 minutes
- Yield: 5 1x
Description
Crispy fried pickles deliver a tantalizing Southern appetizer with zesty dill flavor and crunchy golden coating. Pickle enthusiasts and casual snackers will devour these irresistible bites that showcase classic comfort cuisine.
Ingredients
- 12 sandwich-sliced dill pickles (about 12 slices)
- 1–2 cups panko breadcrumbs
- 1 cup all-purpose flour
- 1 cup milk (240 ml)
- 1 egg
- 1 tsp baking powder
- 1 tsp paprika
- ½ tsp cayenne pepper (optional)
- ½ tsp black pepper
- ½ tsp dill (optional)
- Oil for frying
Instructions
- Prep Pickles: Meticulously blot pickle slices with paper towels to eliminate moisture, guaranteeing a crisp, crunchy coating.
- Craft Batter: Whisk flour, milk, baking powder, egg, paprika, black pepper, and chopped dill in a mixing bowl until achieving a silky, uniform consistency. Let the mixture rest for 5 minutes to harmonize flavors.
- Breading Setup: Establish two coating stations – one with seasoned Panko breadcrumbs (cayenne pepper and salt), another with plain Panko. Immerse each pickle slice completely in the batter, then roll gently in seasoned breadcrumbs to create a uniform, textured exterior.
- Frying Preparation: Heat oil to a precise 360-370°F, ensuring temperature stability for optimal frying performance. Carefully lower breaded pickle slices into the oil in small batches, rotating periodically to achieve a uniform golden-brown color and maximum crispiness.
- Finishing Touches: Extract fried pickles using a slotted spoon, allowing excess oil to drain on paper towels. Sprinkle with a light salt dusting for enhanced flavor profile. Serve piping hot accompanied by ranch dressing or preferred dipping sauce, creating an irresistible appetizer experience.
Notes
- Moisture Management: Thoroughly pat pickle slices dry to prevent soggy breading and ensure maximum crispiness.
- Batter Resting Technique: Let batter sit for 5 minutes to improve coating adhesion and develop deeper flavor complexity.
- Oil Temperature Precision: Maintain oil between 360-370°F for perfect golden-brown exterior without greasy residue.
- Batch Frying Strategy: Cook pickles in small batches to prevent oil temperature drop and guarantee uniform crispiness.
- Prep Time: 10 minutes
- Cook Time: 15 minutes
- Category: Appetizer, Snacks
- Method: Frying
- Cuisine: Southern American
Nutrition
- Serving Size: 5
- Calories: 120
- Sugar: 2 g
- Sodium: 480 mg
- Fat: 7 g
- Saturated Fat: 1 g
- Unsaturated Fat: 5 g
- Trans Fat: 0 g
- Carbohydrates: 12 g
- Fiber: 0 g
- Protein: 3 g
- Cholesterol: 25 mg
Sophie Martin
Co-Founder & Content Creator
Expertise
Education
Stellenbosch University, South Africa
South African Chefs Academy, Cape Town
Sophie Martin is the nutrition brain and feel-good foodie at Good Tasting Meals. With a degree in Human Nutrition from Stellenbosch University and chef training from the South African Chefs Academy, Sophie brings balance to the table, literally. She loves creating meals that are easy to make, great to eat, and good for your body too.
Her recipes are made for everyday living, with a little flair and a lot of heart. Sophie’s not here to count calories, she’s here to show you how fresh, simple food can fit into your life, taste amazing, and still be nourishing.