

Irresistibly Smooth Chocolate Chip Cheesecake Bars Recipe
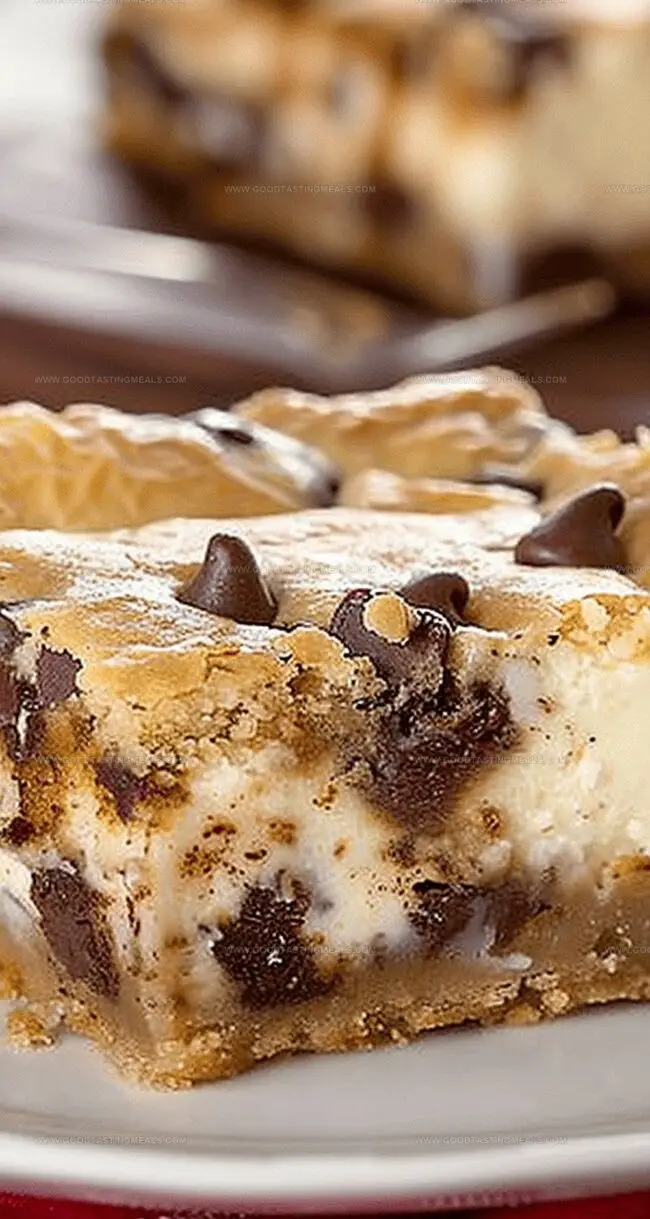
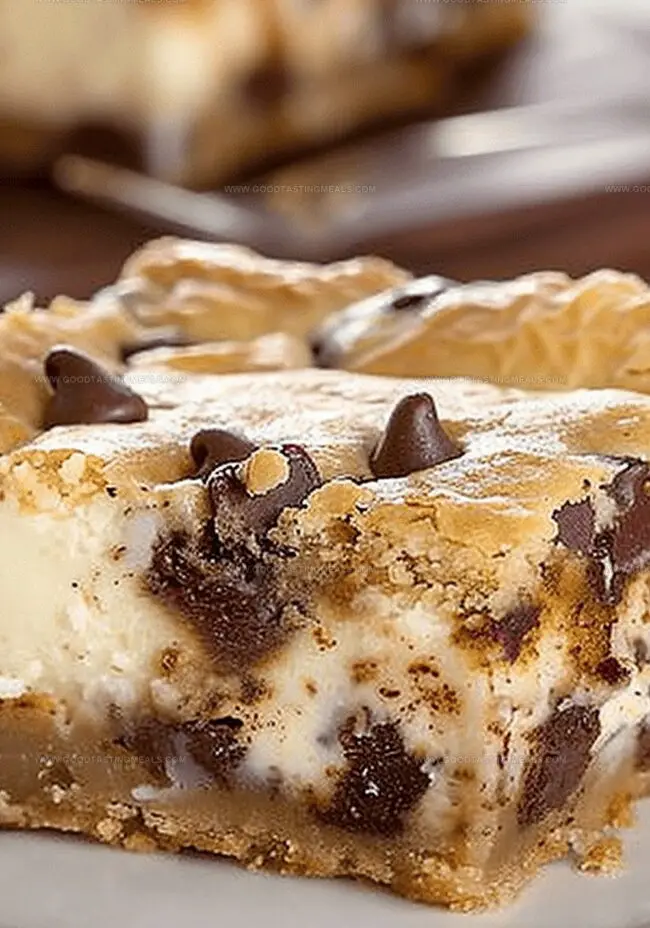
Decadent and creamy, these chocolate chip cheesecake bars bring pure dessert magic to your table.
Every bite promises a delightful dance of rich, smooth cheesecake swirled with indulgent chocolate chips.
The golden graham cracker crust provides a satisfying crunch that perfectly complements the silky filling.
Baked to golden perfection, these bars offer a luxurious twist on classic cheesecake that anyone can master.
Dessert lovers will adore how simple yet sophisticated these bars are to create.
The combination of tangy cream cheese and sweet chocolate creates an irresistible treat that disappears quickly at gatherings.
One slice will have everyone asking for the recipe—so grab your apron and get ready to impress.
Quick Recipe Overview
What Goes Into Chocolate Chip Cheesecake Bars
For The Base:For The Creamy Filling:For The Chocolate Accent:Tools That Help You Get Clean Bar Cuts
Layering and Baking Cheesecake Bars with Chips
Spread a layer of soft cookie dough across the bottom of a baking dish, creating a smooth, even canvas for the delightful dessert.
Pour a silky smooth cream cheese mixture over the cookie dough, ensuring complete coverage with a luxurious white layer.
Sprinkle remaining cookie dough pieces across the top, creating a rustic and artistic pattern that promises delicious bites.
Slide the dish into a warm oven, allowing the layers to transform into a golden, bubbling masterpiece that fills the kitchen with irresistible aromas.
Let the cheesecake bars rest and chill, allowing flavors to meld and texture to set perfectly before slicing into tempting squares.
Tips to Prevent Overbaking or Cracks
Serving Cheesecake Bars for Dessert Tables
Keep Cheesecake Bars Chilled and Tidy
Print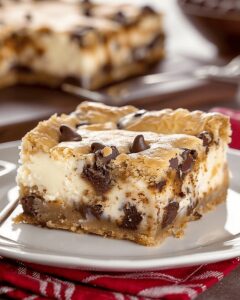
Dreamy Chocolate Chip Cheesecake Bars
- Total Time: 1 hour
- Yield: 13 1x
Description
Delectable chocolate chip cheesecake bars blend creamy richness with classic cookie charm. Chocolate lovers discover pure indulgence in each perfectly balanced, crumbly-edged square you’ll eagerly savor.
Ingredients
- 3 eggs
- 3 (8 oz/226 g) packages cream cheese, softened
- 2 (16.5 oz/467 g) rolls refrigerated chocolate chip cookie dough
- ¾ cup (150 g) sugar
- 1 tsp vanilla extract
Instructions
- Preparation: Coat a 9×13-inch glass dish with cooking spray, ensuring complete surface coverage to prevent adhesion.
- Cream Cheese Blend: Whip cream cheese, eggs, sugar, and vanilla extract into a smooth, velvety mixture that radiates uniform consistency.
- Cookie Dough Base: Slice cookie dough rolls into delicate ¼-inch rounds, meticulously arranging them edge-to-edge across the dish’s bottom, gently pressing to eliminate potential gaps.
- Layering Process: Spread the cream cheese mixture uniformly over the cookie dough foundation, using a spatula to create a balanced, comprehensive layer that embraces the entire surface.
- Top Layer Creation: Strategically position remaining cookie dough slices atop the cream cheese, guaranteeing full coverage and visual appeal.
- Baking Technique: Slide the dish into a preheated 350°F oven, baking for 45-50 minutes until the surface transforms into a golden-brown landscape and the center achieves a slightly firm texture.
- Cooling and Setting: Allow the dessert to cool completely at room temperature, then refrigerate to solidify layers and enhance flavor intensity.
- Serving Presentation: Once thoroughly chilled, slice into precise bars, unveiling the tantalizing layers of this decadent dessert creation.
Notes
- Prep Surface Carefully: Use non-stick cooking spray generously to guarantee easy bar removal and prevent frustrating sticking.
- Blend Cream Cheese Smoothly: Ensure cream cheese is at room temperature and mix thoroughly to eliminate lumps, creating a silky, uniform texture that guarantees creamy perfection.
- Layer Cookie Dough Precisely: Cut cookie dough slices consistently at ¼-inch thickness and arrange meticulously to create an even, seamless base and topping for professional-looking bars.
- Chill for Optimal Texture: Allow complete cooling at room temperature and refrigerate for several hours to set layers, enhance flavor development, and achieve the ideal firm yet creamy consistency.
- Prep Time: 10 minutes
- Cook Time: 45-50 minutes
- Category: Desserts, Snacks
- Method: Baking
- Cuisine: American
Nutrition
- Serving Size: 13
- Calories: 295
- Sugar: 11 g
- Sodium: 215 mg
- Fat: 17 g
- Saturated Fat: 8 g
- Unsaturated Fat: 9 g
- Trans Fat: 0 g
- Carbohydrates: 31 g
- Fiber: 0 g
- Protein: 4 g
- Cholesterol: 70 mg
Sophie Martin
Co-Founder & Content Creator
Expertise
Education
Stellenbosch University, South Africa
South African Chefs Academy, Cape Town
Sophie Martin is the nutrition brain and feel-good foodie at Good Tasting Meals. With a degree in Human Nutrition from Stellenbosch University and chef training from the South African Chefs Academy, Sophie brings balance to the table, literally. She loves creating meals that are easy to make, great to eat, and good for your body too.
Her recipes are made for everyday living, with a little flair and a lot of heart. Sophie’s not here to count calories, she’s here to show you how fresh, simple food can fit into your life, taste amazing, and still be nourishing.