
Quick & Delicious Eggless Chocolate Ice Cream Recipe at Home
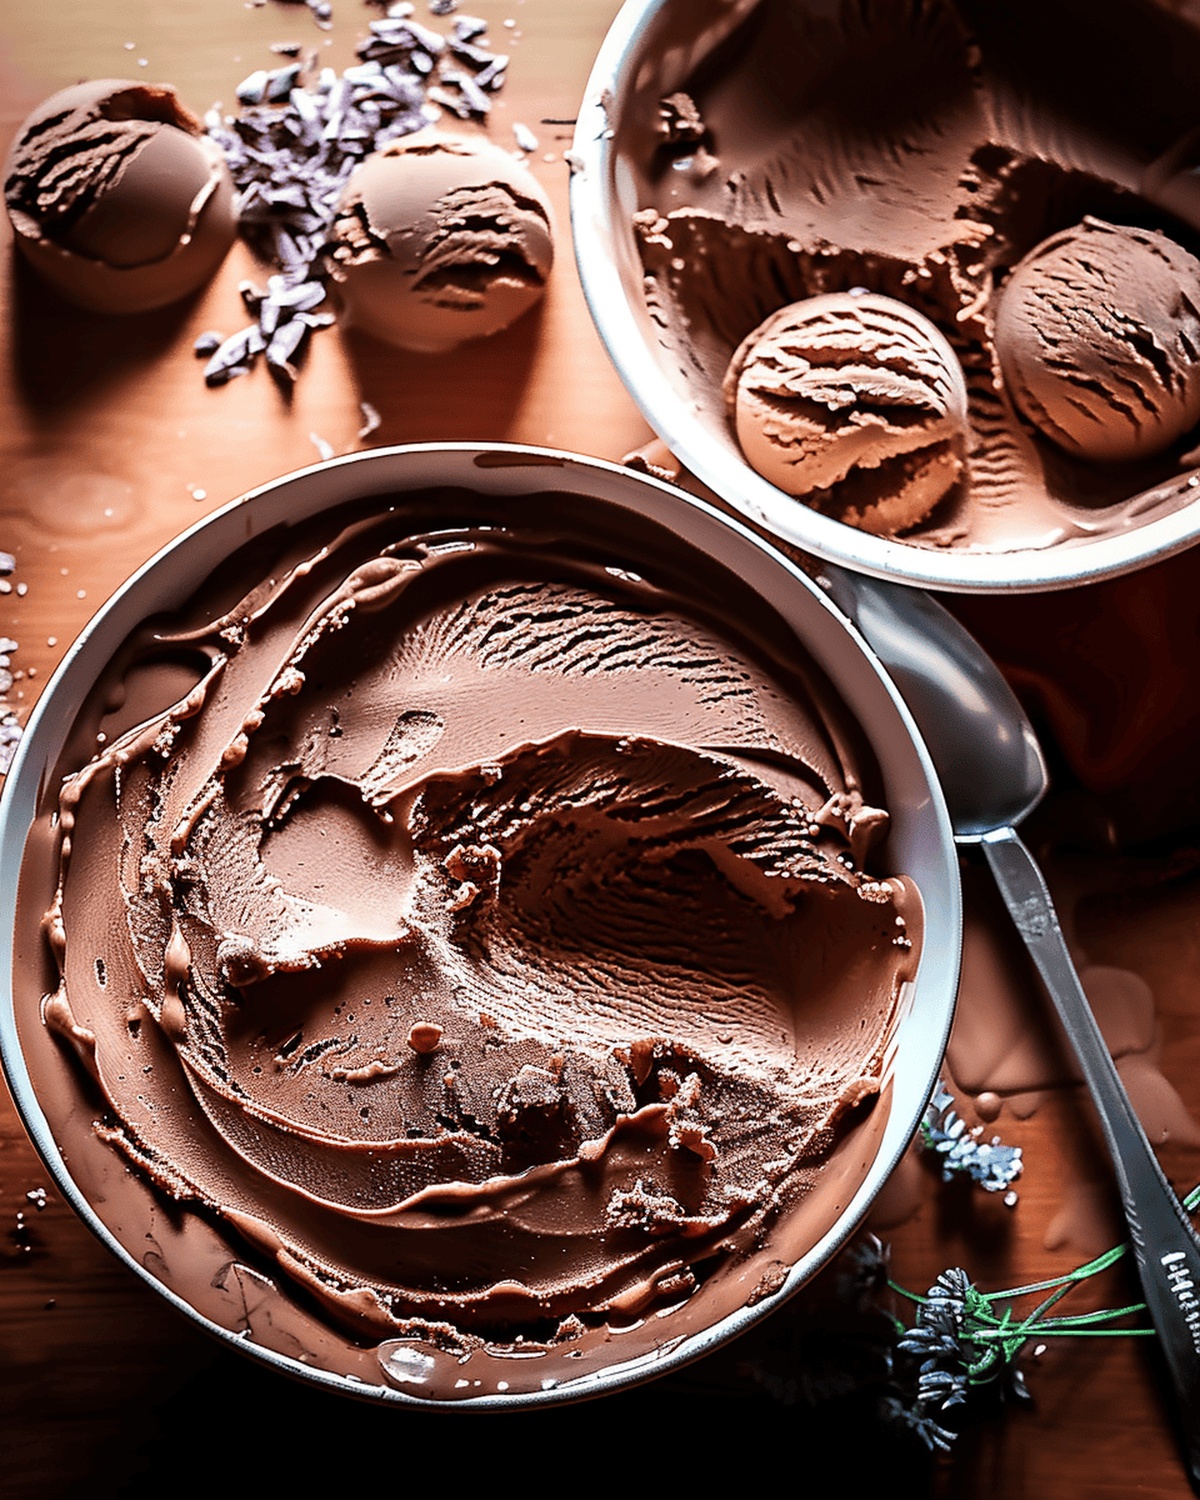
Chocolate ice cream brings pure, velvety indulgence right to your dessert bowl.
Cold, creamy treats often seem complicated for home cooks without traditional ingredients.
Crafting this smooth delicacy requires minimal kitchen skills and basic pantry staples.
Smart dessert enthusiasts know that eggless versions can taste just as luxurious as classic recipes.
Rich, silky textures emerge from clever ingredient combinations that surprise and delight.
Dairy alternatives and simple techniques reimagine ordinary components into an extraordinary frozen experience.
Anyone can master this delectable creation with confidence and a sense of culinary adventure.
Rich and Creamy Eggless Chocolate Ice Cream Experience
Ingredients for Eggless Chocolate Ice Cream Perfection
Dairy Base:Chocolate and Flavoring:Stabilizing and Enhancing Ingredients:Directions for Preparing Eggless Chocolate Ice Cream
Step 1: Create Chocolate Base
In a saucepan, whisk together:Heat the mixture over low heat, stirring constantly to prevent burning and create a smooth chocolate mixture.
Step 2: Cook Chocolate Mixture
Allow the mixture to simmer gently for 5 minutes, continuing to stir regularly.
Remove from heat and let the mixture cool to room temperature.
Step 3: Blend Cream
In a separate bowl, whip heavy cream until it forms soft, billowy peaks.
Gently fold the whipped cream into the cooled chocolate mixture.
Step 4: Chill Mixture
Transfer the combined mixture to a freezer-safe container.
Place in the refrigerator and chill for 5 hours or overnight.
Step 5: Freeze Ice Cream
If using an ice cream maker:
Churn the mixture according to manufacturer’s instructions until it reaches a soft-serve consistency.
Transfer to a freezer container and freeze for 2 hours.
If without an ice cream maker:
Place mixture in the freezer.
Every hour, remove and blend with an immersion blender to break up ice crystals.
Repeat process until ice cream becomes firm and creamy.
Step 6: Serve and Enjoy
Scoop your homemade eggless chocolate ice cream into bowls.
Garnish with optional toppings like chocolate shavings or whipped cream.
Pro Tips for Eggless Chocolate Ice Cream Success
The Best Way to Store and Reheat Eggless Chocolate Ice Cream
What Pairs Well with Eggless Chocolate Ice Cream
Fun Twists on Eggless Chocolate Ice Cream
Print
Easy Eggless Chocolate Ice Cream Recipe
- Total Time: 15 minutes
- Yield: 4 1x
Description
Classic chocolate dreams come alive without eggs in this silky, rich dessert. Creamy indulgence meets simple preparation, delivering pure chocolate bliss that delights senses and satisfies chocolate cravings with minimal effort.
Ingredients
Main Ingredients:
- 240 g high-quality dark chocolate (100 g Jivara milk chocolate and 140 g Caraïbe dark chocolate from Valrhona)
- 750 ml whole milk (or 200 ml cream and 550 ml milk)
Dry Ingredients:
- 30 g powdered milk
- 80 g sugar
Instructions
- In a medium saucepan, whisk together the dairy ingredients, cocoa powder, sugar, and cornstarch until completely smooth and free of lumps.
- Position the saucepan over medium-low heat, stirring continuously to prevent scorching and ensure even heating of the mixture.
- Allow the liquid to simmer gently, maintaining a constant gentle movement with your whisk to prevent any settling or burning at the bottom of the pan.
- Continue cooking for approximately 4 to 6 minutes, or until the mixture slightly thickens and coats the back of a spoon, indicating the cornstarch has activated and the texture is becoming pudding-like.
- Remove the saucepan from heat and transfer the chocolate base to a clean, shallow container, ensuring even distribution for faster cooling.
- Refrigerate the mixture for 5 to 6 hours, or preferably overnight, to completely chill and develop rich, deep chocolate flavors.
- If using an ice cream maker, pour the chilled mixture into the machine and churn according to manufacturer’s instructions, typically 20 to 25 minutes, until it reaches a soft-serve consistency.
- For those without an ice cream maker, pour the mixture into a freezer-safe container and stir vigorously with an immersion blender or whisk every 45 minutes to prevent large ice crystals from forming.
- After churning or manual mixing, transfer the ice cream to a sealed container and freeze for an additional 2 to 3 hours until firm and scoopable.
Notes
- Store unused ice cream in an airtight container to prevent freezer burn and maintain creamy texture.
- Whisk ingredients thoroughly to ensure smooth, lump-free base before heating.
- Chill mixture completely before churning to achieve optimal ice cream consistency.
- Use high-quality cocoa powder for rich, intense chocolate flavor.
- Consider adding a pinch of salt to enhance the chocolate’s depth and balance sweetness.
- Allow ice cream to soften at room temperature for 5-10 minutes before scooping for easier serving.
- Prep Time: 10 minutes
- Cook Time: 5 minutes
- Category: Desserts, Snacks, Drinks
- Method: Boiling
- Cuisine: Indian
Nutrition
- Serving Size: 4
- Calories: 465 kcal
- Sugar: 32 g
- Sodium: 95 mg
- Fat: 30 g
- Saturated Fat: 18 g
- Unsaturated Fat: 10 g
- Trans Fat: 0.5 g
- Carbohydrates: 45 g
- Fiber: 3 g
- Protein: 8 g
- Cholesterol: 35 mg
Liam O’Brien
Founder & Recipe Developer
Expertise
Education
Dublin Institute of Technology (now Technological University Dublin)
Ballymaloe Cookery School, County Cork, Ireland
Liam O’Brien is the co-founder and kitchen soul behind Good Tasting Meals, a chef who believes that cooking shouldn’t feel stressful or complicated.
He earned his culinary stripes at Technological University Dublin and polished his farm-to-table skills at Ballymaloe Cookery School. With over 15 years flipping pans and stirring up stories, Liam has worked in family cafés, bustling bistros, and everything in between.
At Good Tasting Meals, Liam brings you recipes that feel like home: cozy, simple, and full of flavor.