
Effortless Artisan Bread Recipe with Golden Crust and Soft Center
Artisan bread upgrades ordinary meals into extraordinary culinary experiences with its rustic charm and irresistible texture.
Crafted through traditional techniques, this bread represents a delightful intersection of skill and simplicity.
Home bakers can easily master the art of creating these gorgeous loaves without complex equipment or professional training.
Each bite promises a tantalizing blend of crispy exterior and soft, tender crumb that elevates any dining moment.
The magic lies in understanding fundamental baking principles and letting quality ingredients shine through.
Precise techniques combined with minimal handling unlock incredible flavors and textures that commercial breads rarely achieve.
You’ll be amazed how a few basic components can produce something so deliciously sophisticated.
What Makes Effortless Artisan Bread So Rewarding to Bake

Ingredients You’ll Need for Effortless Artisan Bread
Bread Base Ingredients:Yeast Activation Ingredients:Additional Ingredients:Steps to Make Effortless Artisan Bread at Home
Step 1: Activate the Yeast
Mix yeast, sugar, and warm water in a small bowl. Let the mixture sit for 5 minutes until it becomes frothy and bubbly.
Step 2: Create the Dough Base
In a large mixing bowl, combine:Add the yeast mixture and olive oil. Stir with a silicone spatula until the dough becomes fully moistened and sticky.
Step 3: First Rise
Shape the dough into a rough ball and lightly spray the top with cooking spray. Cover with saran wrap and then a dish towel. Let the dough rise in a warm spot for 2-3 hours until it doubles in size.
Step 4: Optional Flavor Development
For enhanced flavor, you can refrigerate the dough for up to 3 days.
Step 5: Prepare the Oven
Preheat the oven to 425°F with a Dutch oven inside.
Step 6: Shape the Bread
Place the dough on a floured parchment paper. Gently fold the edges toward the center to form a round ball. Let the dough rest for 45 minutes.
Step 7: Bake the First Stage
Carefully transfer the dough into the preheated Dutch oven using the parchment paper. Cover and bake for 40 minutes.
Step 8: Final Browning
Uncover the bread, brush with melted butter, and bake for an additional 10-12 minutes until golden brown.
Step 9: Cool and Slice
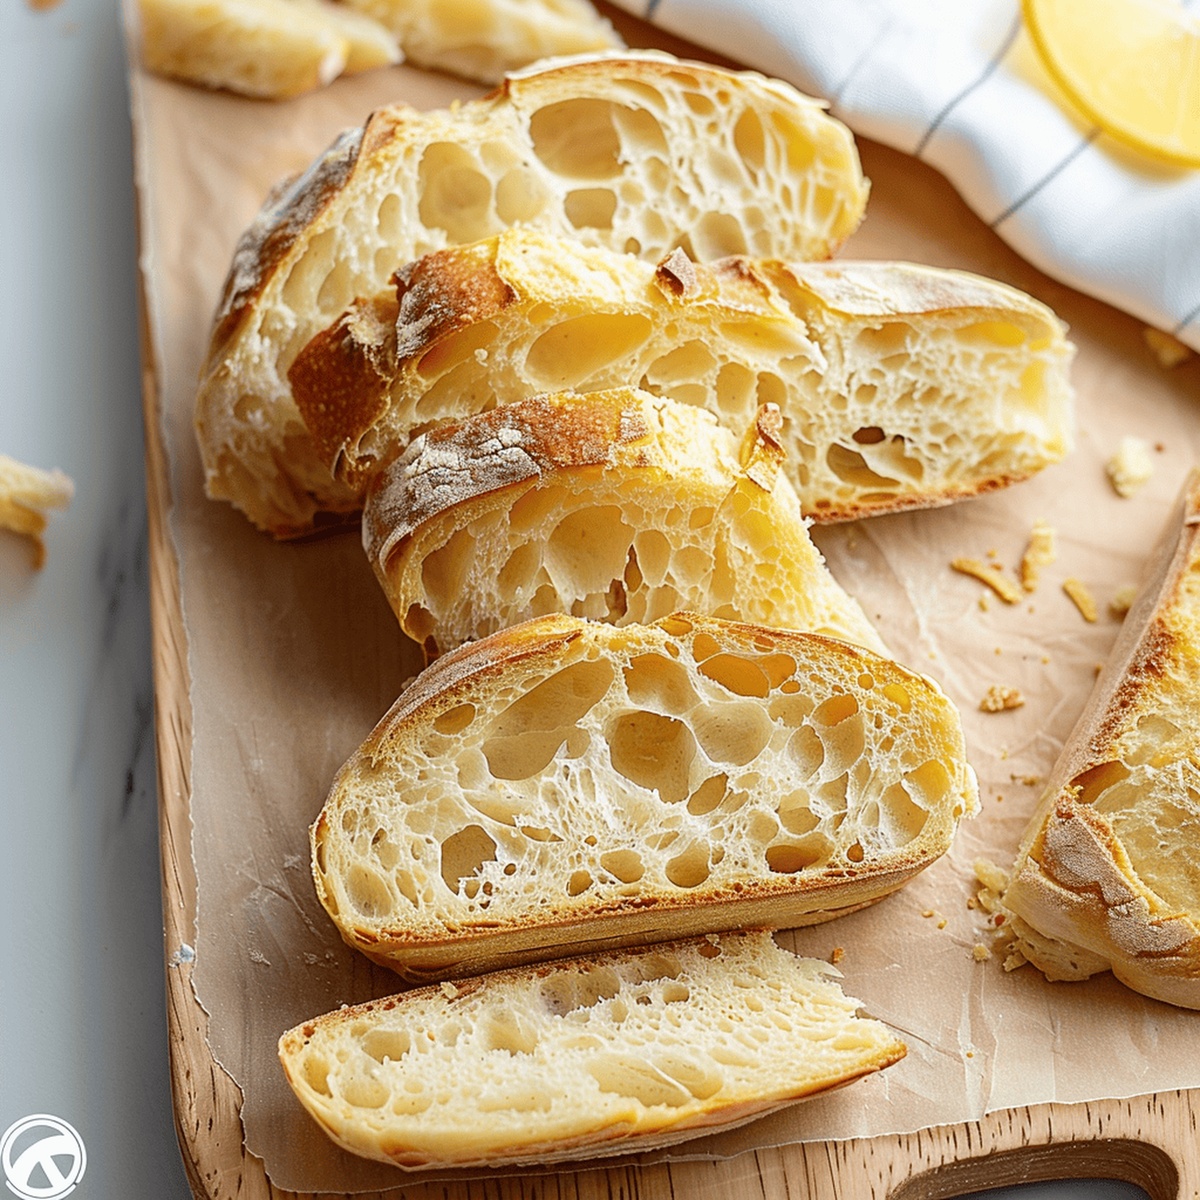
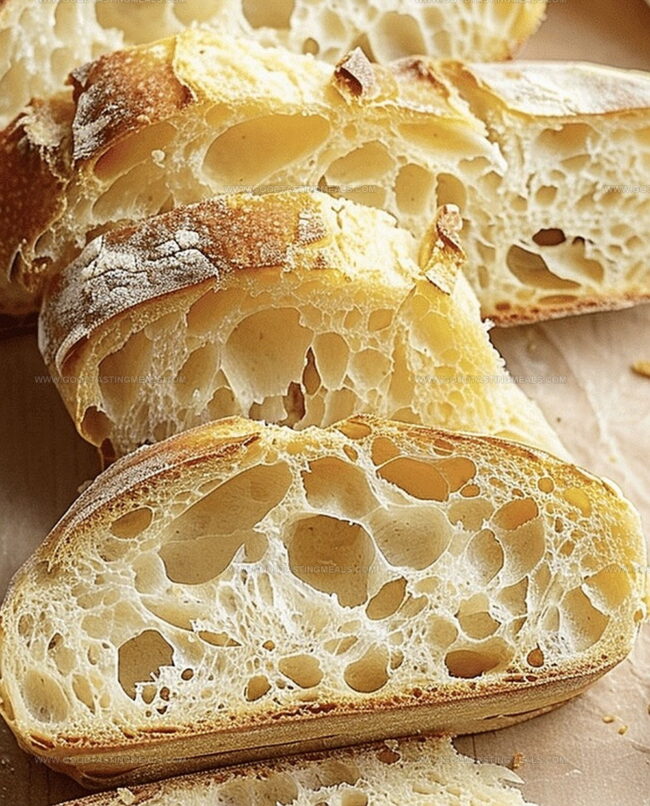
Allow the bread to cool completely before slicing to maintain its perfect texture.
Top Tips for Better Effortless Artisan Bread
How to Store and Reheat Effortless Artisan Bread the Right Way
What to Pair with Effortless Artisan Bread
Creative Variations for Effortless Artisan Bread
Print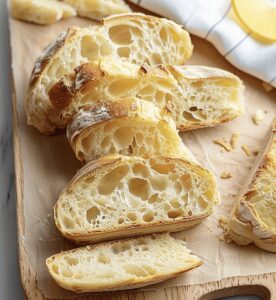
Effortless Artisan Bread Recipe
- Total Time: 1 hour 10 minutes
- Yield: 8 1x
Description
Effortless Artisan Bread brings rustic European charm to home kitchens with minimal effort. Crusty exterior and tender crumb promise a delightful experience that connects you with traditional baking magic.
Ingredients
Main Ingredients:
- 3 cups (360 grams) bread flour
- 1 ½ cups (355 milliliters) barely warm water
- 2 teaspoons salt
Leavening Agents:
- 2 teaspoons instant yeast
- 2 teaspoons sugar
Fats:
- 1 tablespoon olive oil
- 1 tablespoon butter
Instructions
- Activate the yeast by whisking together active dry yeast, granulated sugar, and lukewarm water (105-110°F or 40-43°C) in a compact vessel. Allow the mixture to bloom and become effervescent for approximately 5 minutes.
- In a spacious mixing bowl, combine high-protein bread flour and kosher salt. Create a well in the center and pour in the frothy yeast mixture along with extra virgin olive oil.
- Gently integrate the ingredients using a flexible silicone spatula until a shaggy, moist dough forms. The texture should be slightly tacky and uneven.
- Transform the dough into a loose spherical shape and lightly coat the surface with non-stick cooking spray. Encase the bowl with plastic wrap and then drape a clean kitchen towel over it.
- Position the dough in a draft-free, warm environment and permit it to proof for 2-3 hours, or until the volume has substantially increased and appears puffy.
- For enhanced flavor complexity, consider refrigerating the dough for up to 72 hours, which will develop deeper fermentation notes.
- Position a heavy cast-iron Dutch oven inside the oven and preheat to 425°F (218°C).
- Transfer the risen dough onto a parchment paper dusted with all-purpose flour. Delicately fold the edges toward the center, creating a taut round loaf.
- Allow the shaped dough to rest and relax for 45 minutes, developing additional structure.
- Carefully lower the dough into the scorching Dutch oven using the parchment paper as a transfer tool. Cover and bake for 40 minutes to create a robust crust.
- Remove the lid, delicately brush the surface with melted unsalted butter, and continue baking for an additional 10-12 minutes until achieving a rich golden-brown coloration.
- Extract from the oven and let the artisan bread cool completely on a wire rack before slicing to preserve internal moisture.
Notes
- Activate the yeast carefully with warm water and sugar to ensure a perfect rise and fluffy texture.
- Develop a sticky, wet dough by mixing ingredients gently with a silicone spatula for authentic artisan bread consistency.
- Allow ample rising time in a warm spot, potentially up to 3 days in the refrigerator, which enhances flavor complexity.
- Use parchment paper for easy dough transfer and prevent sticking when placing into the hot Dutch oven.
- Bake in a preheated Dutch oven to create a crispy, golden-brown crust with professional bakery-style results.
- Let the bread cool completely before slicing to maintain internal moisture and ideal texture.
- Prep Time: 15 minutes
- Cook Time: 55 minutes
- Category: Snacks, Dinner
- Method: Baking
- Cuisine: European
Nutrition
- Serving Size: 8
- Calories: 182 kcal
- Sugar: 1 g
- Sodium: 395 mg
- Fat: 4 g
- Saturated Fat: 1.5 g
- Unsaturated Fat: 2.5 g
- Trans Fat: 0 g
- Carbohydrates: 30 g
- Fiber: 1 g
- Protein: 6 g
- Cholesterol: 5 mg
Liam O’Brien
Founder & Recipe Developer
Expertise
Education
Dublin Institute of Technology (now Technological University Dublin)
Ballymaloe Cookery School, County Cork, Ireland
Liam O’Brien is the co-founder and kitchen soul behind Good Tasting Meals, a chef who believes that cooking shouldn’t feel stressful or complicated.
He earned his culinary stripes at Technological University Dublin and polished his farm-to-table skills at Ballymaloe Cookery School. With over 15 years flipping pans and stirring up stories, Liam has worked in family cafés, bustling bistros, and everything in between.
At Good Tasting Meals, Liam brings you recipes that feel like home: cozy, simple, and full of flavor.