
Fluffy Cream Cheese Danish Recipe for Morning Joy
Mornings sparkle with the delightful aroma of a homemade easy breakfast cheese Danish recipe wafting through the kitchen.
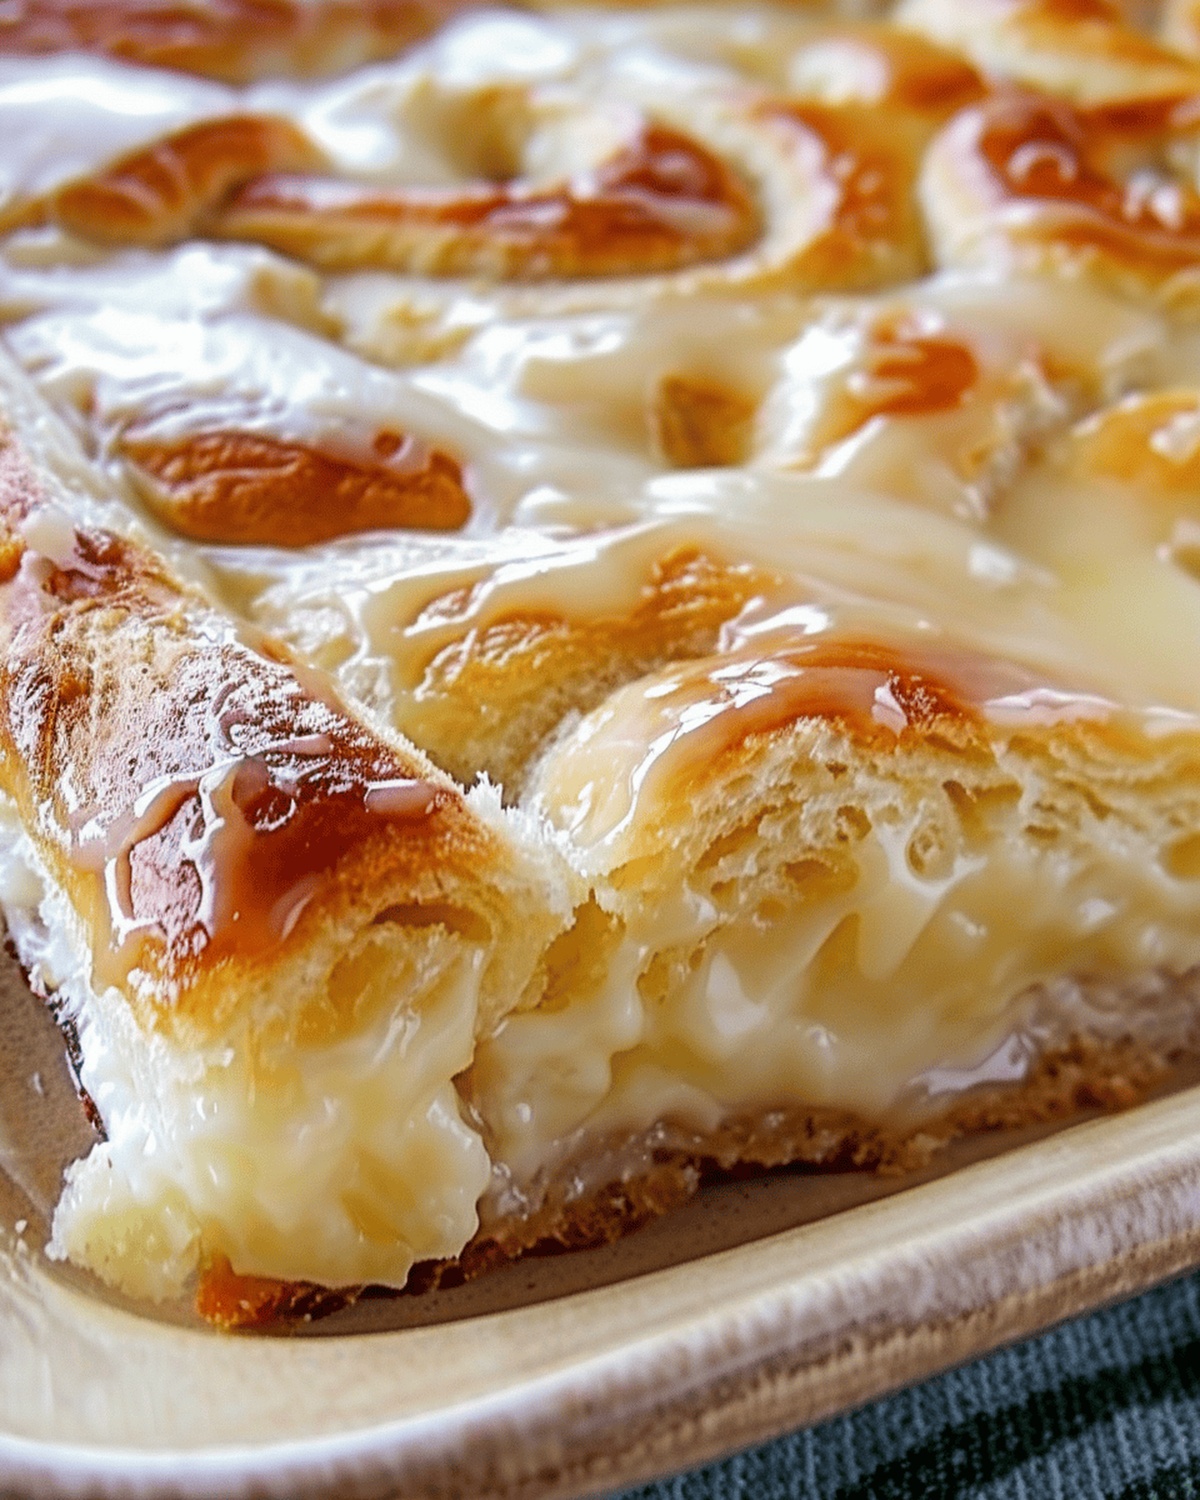
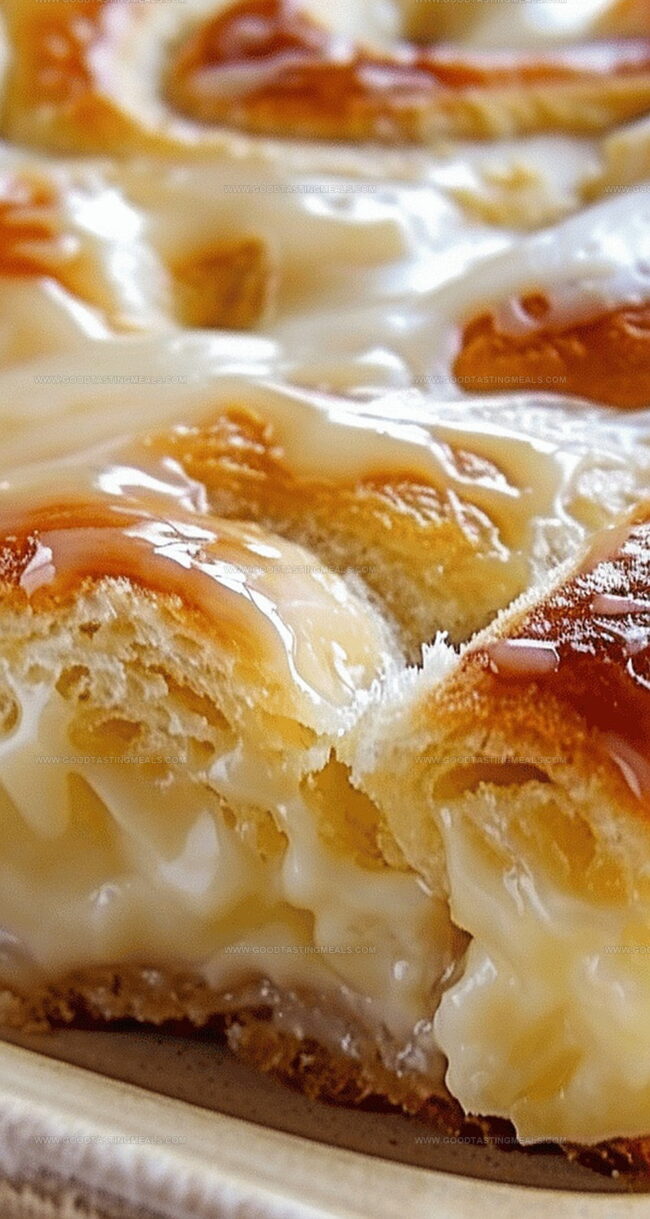
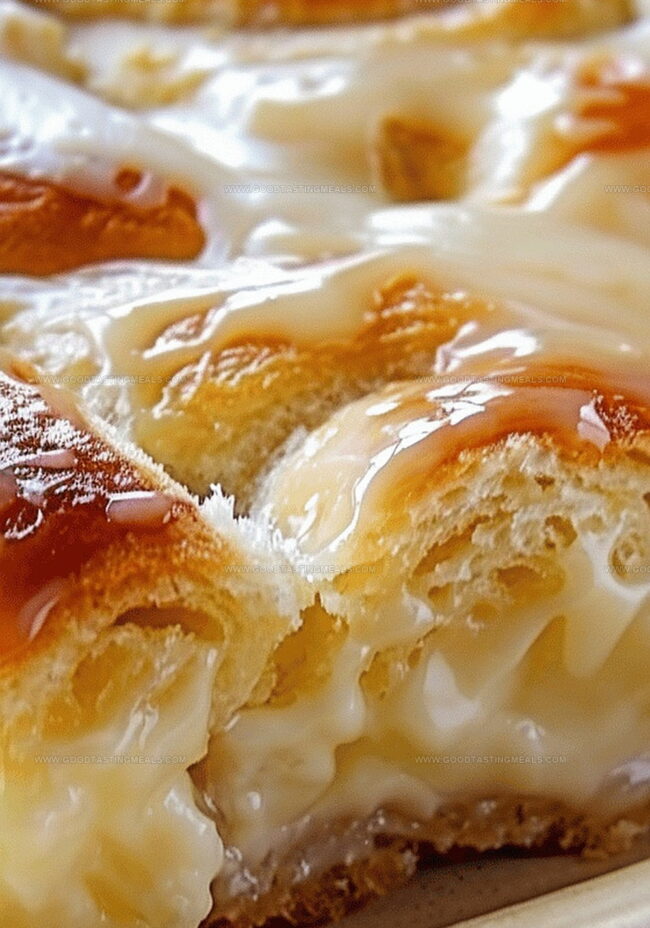
Golden pastry promises a delectable start to your day.
Flaky layers embrace a rich, creamy cheese filling that melts with each tender bite.
Crafted with simple ingredients, this Danish brings bakery-style magic to your morning table.
The recipe combines buttery croissant dough with a smooth cream cheese center that whispers pure comfort.
breakfast transforms from routine to extraordinary with this delightful pastry.
Dive into this sweet morning pleasure and savor every luxurious moment.
Quick Recipe Overview
Easy Breakfast Cheese Danish – What You’ll Need
For Base Layer:For Filling Layer:For Topping and Finishing:Equipment for Making Breakfast Cheese Danish
Instructions for Cheese Danish Pastries
Quick Morning Breakfast Delight
Set your oven to a cozy temperature and get a baking pan ready for the delicious adventure ahead.
Spread out the soft crescent roll dough across the pan, creating a smooth base that will cradle the creamy filling.
Whip up a velvety mixture of cream cheese, sweetness, and rich flavor that will make taste buds dance with joy.
Gently cover the cream cheese with another soft layer of crescent roll dough, creating a beautiful pastry blanket.
Brush the top with a light egg wash that will help the danish turn a beautiful golden brown during baking.
Let the danish bake until it becomes perfectly golden and fills the kitchen with an irresistible aroma.
Once cooled, drizzle a silky glaze over the top, adding a final burst of sweetness to this morning treat.
Tips for Perfect Breakfast Cheese Danish
How to Serve Your Cheese Danish Warm
Breakfast Cheese Danish – Storage Guide
Print
Flaky Breakfast Cheese Danish Recipe
- Total Time: 1 hour
- Yield: 9 1x
Description
Homemade cheese danish combines flaky pastry with creamy filling for a delightful morning treat. Bakery-quality results come quickly with simple ingredients and straightforward techniques when you follow this classic recipe.
Ingredients
- 2 cans refrigerated crescent rolls
- 2 (8 oz/226 g) cream cheese, softened
- 1 cup (200 g) sugar
- 1 egg
- 1 tsp vanilla extract
- 1 egg white
- ½ cup (60 g) powdered sugar
- ½ tsp vanilla extract
- 1 tbsp milk or water (for egg wash)
- 2 tbsps milk
Instructions
- Preparation: Activate the oven to 350°F (175°C) and lightly grease a 13×9-inch baking pan with coconut oil.
- Base Layer: Unfurl the first crescent roll package and meticulously spread the dough across the entire pan bottom, ensuring complete and even coverage.
- Filling Creation: Whip cream cheese, sugar, vanilla extract, and egg in a mixing bowl until achieving a luxuriously smooth and creamy texture.
- Layer Assembly: Spread the cream cheese mixture uniformly across the crescent roll base, maintaining a consistent thickness.
- Top Covering: Gently unroll the second crescent roll package and delicately position it over the cream cheese filling, completely blanketing the initial layer.
- Surface Finish: Brush the pastry surface with an egg wash composed of whisked egg white and milk to create a lustrous, appetizing sheen.
- Baking Process: Position the danish in the preheated oven and bake for 35-45 minutes, monitoring until the surface transforms into a rich, golden-brown color.
- Cooling and Glazing: After removing from the oven, allow the pastry to rest in the pan for 20 minutes, then craft a silky glaze by blending powdered sugar, vanilla extract, and milk until achieving a smooth, drizzleable consistency.
- Final Touch: Once cooled, elegantly drizzle or brush the glaze over the danish, creating a delectable and visually appealing finish ready for serving.
Notes
- Optimize Dough Placement: Press crescent roll dough gently and evenly to prevent uneven baking and ensure a consistent base for the cream cheese filling.
- Master Cream Cheese Consistency: Blend filling ingredients thoroughly until smooth to eliminate lumps and create a silky, uniform texture that enhances overall taste.
- Watch Baking Time Carefully: Monitor golden-brown coloration closely between 35-45 minutes to prevent over or underbaking, which can impact pastry texture and flavor.
- Glaze with Precision: Adjust glaze thickness by gradually adding milk or powdered sugar to achieve the perfect drizzling consistency for a professional-looking finish.
- Prep Time: 15 minutes
- Cook Time: 35-45 minutes
- Category: Breakfast, Snacks, Desserts
- Method: Baking
- Cuisine: Danish
Nutrition
- Serving Size: 9
- Calories: 296
- Sugar: 18 g
- Sodium: 295 mg
- Fat: 16 g
- Saturated Fat: 9 g
- Unsaturated Fat: 7 g
- Trans Fat: 0 g
- Carbohydrates: 31 g
- Fiber: 1 g
- Protein: 5 g
- Cholesterol: 54 mg
Sophie Martin
Co-Founder & Content Creator
Expertise
Education
Stellenbosch University, South Africa
South African Chefs Academy, Cape Town
Sophie Martin is the nutrition brain and feel-good foodie at Good Tasting Meals. With a degree in Human Nutrition from Stellenbosch University and chef training from the South African Chefs Academy, Sophie brings balance to the table, literally. She loves creating meals that are easy to make, great to eat, and good for your body too.
Her recipes are made for everyday living, with a little flair and a lot of heart. Sophie’s not here to count calories, she’s here to show you how fresh, simple food can fit into your life, taste amazing, and still be nourishing.