

Fun Homemade Strawberry Sheet Pan Pop Tart Recipe For All
Baking enthusiasts often seek the perfect strawberry sheet pan pop tart recipe that brings nostalgia and comfort to their kitchen.
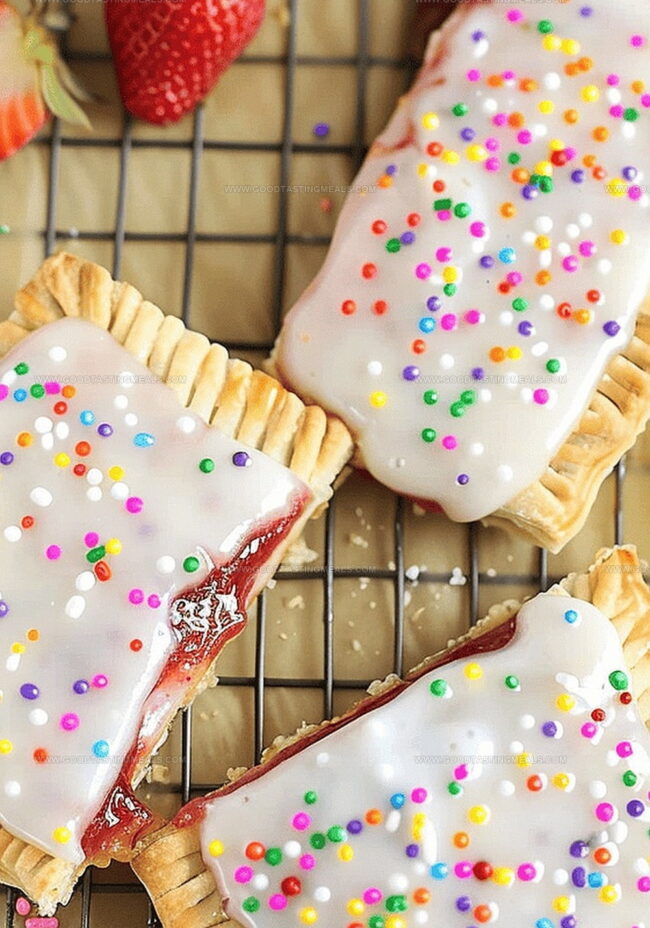
These delightful pastries burst with sweet, jammy strawberry filling wrapped in a golden, flaky crust.
Every bite transports you back to childhood mornings filled with sugary breakfast treats.
The sheet pan method simplifies the process, making these pop tarts accessible for bakers of all skill levels.
Fresh strawberry preserves create a vibrant, tangy center that pairs beautifully with the buttery pastry.
A light dusting of powdered sugar adds the final touch of sweetness to these irresistible breakfast delights.
You’ll love how easily these homemade pop tarts come together, promising a delectable morning surprise that beats any store-bought version.
Quick Recipe Overview

What You Need for Strawberry Sheet Pan Pop Tart
For Crust Base:For Filling:For Topping and Finishing:Tools for Strawberry Sheet Pan Pop Tart
Baking Instructions for Sheet Pan Pop Tart
Grab two pie crusts and merge them on a cutting board, crafting a rectangular shape that fits perfectly on your sheet pan. Smooth out any wrinkles and ensure a clean edge.
Generously spread strawberry preserves across the center of the dough, leaving a border around the edges to prevent leakage during baking.
Layer the second set of merged pie crusts over the strawberry filling, matching the shape of the bottom crust precisely.
Use gentle fingertip pressure to press the top and bottom crusts together. Create decorative crimped edges with a fork to lock in the sweet filling.
Poke delicate holes across the top crust using a toothpick, allowing steam to escape during the baking process.
Brush the surface with softened butter and bake at 375°F until the crust turns a beautiful golden brown. Rotate the pan midway to ensure even coloring.
After cooling, drizzle a simple milk and powdered sugar glaze over the center. Sprinkle playful decorations to add a touch of whimsy.
Pop Tart Tips & Filling Variations
How to Serve Strawberry Sheet Pan Pop Tart
How to Store Strawberry Sheet Pan Pop Tart
Print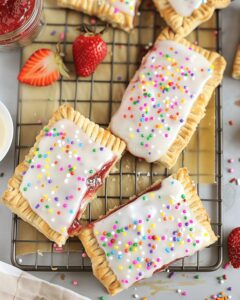
Flaky Strawberry Sheet Pan Pop Tart Recipe
- Total Time: 40 minutes
- Yield: 13 1x
Description
Homemade strawberry sheet pan pop tart elevates nostalgic childhood treats with fresh ingredients and bakery-style elegance. Buttery pastry and sweet strawberry filling create a delightful dessert you’ll crave repeatedly.
Ingredients
- 4 pie crusts (ready-to-bake)
- 1.5 cups (360 ml / 12 fl oz) strawberry preserves
- 3 tbsps (45 ml / 1.5 fl oz) softened butter
- 2 cups (240 g / 8 oz) powdered sugar
- 4 tbsps (60 ml / 2 fl oz) milk
- Sprinkles (for garnish)
Instructions
- Dough Preparation: Merge pie crust sheets on a work surface, creating a rectangular shape matching the sheet pan’s dimensions.
- Dough Placement: Transfer the rolled dough onto a greased baking sheet with precision.
- Filling Distribution: Spread strawberry preserves across the dough’s center, maintaining a border to prevent overflow.
- Top Layer Assembly: Cover the jam-laden base with the second pastry sheet, aligning edges symmetrically.
- Edge Sealing: Crimp the perimeter using fingertips, then create decorative fork impressions for a secure seal.
- Ventilation: Pierce the top crust with toothpick holes to allow steam escape and prevent structural bubbling.
- Pre-Baking Finish: Brush the entire surface with softened butter to achieve a golden, glossy appearance.
- Baking Process: Bake in a preheated 375°F oven for 25 minutes, rotating midway to ensure even browning.
- Icing Preparation: Whisk powdered sugar and milk into a smooth, luxurious icing consistency while the pastry cools.
- Final Touches: Drizzle icing across the center, leaving crimped edges exposed, and sprinkle with decorative elements.
- Serving: Slice the pop tart into individual servings and enjoy the homemade delicacy.
Notes
- Seal Edges Carefully: Press fork edges firmly to prevent jam leakage and create a professional-looking crimped border.
- Steam Escape Technique: Poke small holes with toothpick to avoid potential pastry bubbling and ensure even baking.
- Butter Brush Magic: Apply softened butter generously for a golden, glossy crust that looks bakery-professional.
- Oven Rotation Tip: Halfway through baking, rotate sheet pan to guarantee uniform browning and prevent uneven cooking.
- Prep Time: 15 minutes
- Cook Time: 25 minutes
- Category: Breakfast, Snacks, Desserts
- Method: Baking
- Cuisine: American
Nutrition
- Serving Size: 13
- Calories: 249
- Sugar: 34 g
- Sodium: 170 mg
- Fat: 10 g
- Saturated Fat: 6 g
- Unsaturated Fat: 4 g
- Trans Fat: 0 g
- Carbohydrates: 37 g
- Fiber: 1 g
- Protein: 2 g
- Cholesterol: 16 mg
Sophie Martin
Co-Founder & Content Creator
Expertise
Education
Stellenbosch University, South Africa
South African Chefs Academy, Cape Town
Sophie Martin is the nutrition brain and feel-good foodie at Good Tasting Meals. With a degree in Human Nutrition from Stellenbosch University and chef training from the South African Chefs Academy, Sophie brings balance to the table, literally. She loves creating meals that are easy to make, great to eat, and good for your body too.
Her recipes are made for everyday living, with a little flair and a lot of heart. Sophie’s not here to count calories, she’s here to show you how fresh, simple food can fit into your life, taste amazing, and still be nourishing.