

Scrumptious Canadian Butter Tarts Recipe for Sweet Smiles
Sweet, gooey, and utterly irresistible, these classic Canadian butter tarts burst with nostalgic charm from the moment you take a bite.
Generations of home bakers have perfected this beloved dessert that captures the heart of Canadian culinary tradition.
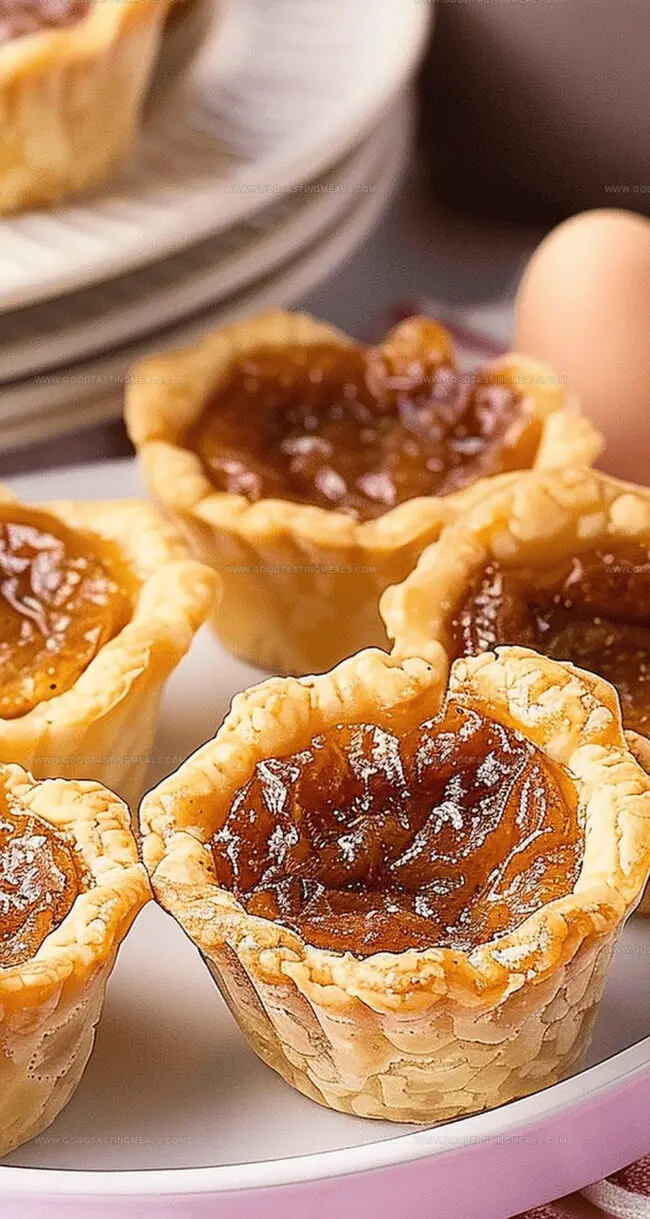
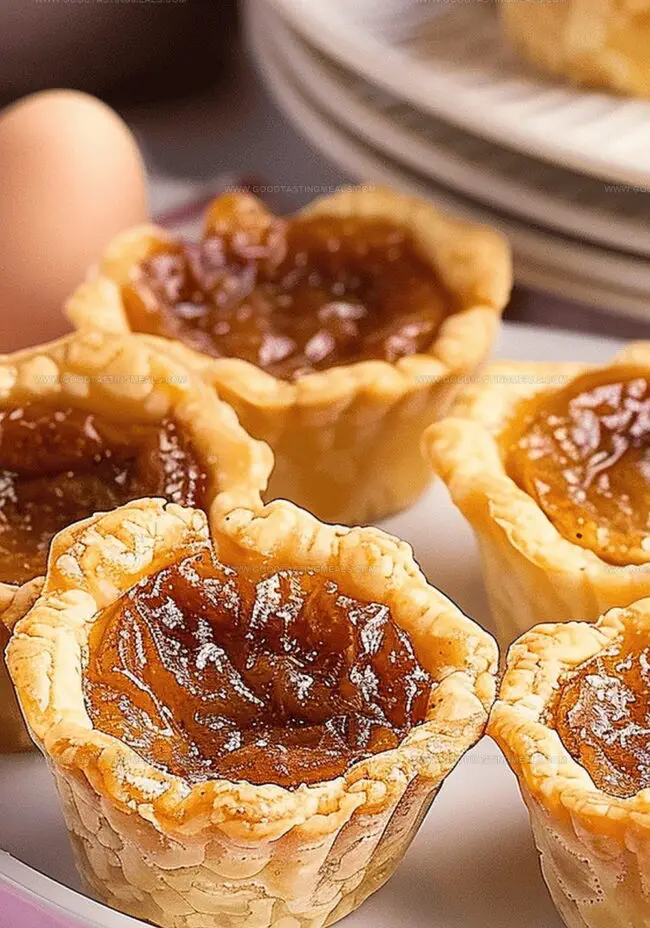
The rich, caramelized filling nestled in a flaky pastry shell creates a mouthwatering experience that beckons you closer.
Each tart tells a story of comfort and warmth, passed down through decades of kitchen memories.
Regional variations add depth to this iconic treat, making every bite a delightful exploration of flavor.
You’ll fall in love with the simplicity and decadence of these traditional tarts that showcase the best of Canadian baking.
Dive into this recipe and savor a sweet piece of Canadian heritage.
Quick Recipe Overview
Canadian Butter Tarts: What You’ll Need
For Crust:For Filling:For Optional Add-Ins:Must-Have Tools for Baking Butter Tarts
How to Make Classic Canadian Butter Tarts
Sweet Canadian Pastry Delights
Create a tender, flaky crust by blending flour mixture in a food processor. Add chilled butter pieces and pulse gently until crumbly. Introduce cold water slowly, allowing dough to form naturally.
Wrap dough discs in plastic and chill for one hour. Roll out on lightly powdered surface until thin. Cut delicate circles and nestle into buttered muffin tins, ensuring gentle placement.
Whip softened butter with rich brown sugar until creamy. Gently incorporate eggs, followed by maple syrup, salt, and vanilla essence. Blend until smooth and silky.
Warm oven to a cozy 350°F. Fill each pastry shell approximately two-thirds full with luxurious mixture. Bake until edges turn golden and center remains slightly jiggly, around 25 minutes.
Allow tarts to rest briefly in pan, then transfer to cooling rack. These delectable treats will develop a gorgeous caramelized texture as they cool, promising a melt-in-your-mouth experience that captures the heart of Canadian baking tradition.
Butter Tart Upgrades to Try
Serve Canadian Butter Tarts with Style
Save Your Butter Tarts
Print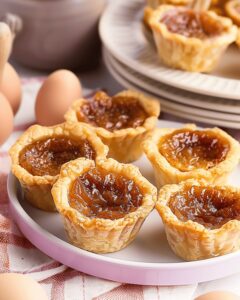
Heavenly Canadian Butter Tarts Recipe
- Total Time: 1 hour 40 minutes
- Yield: 9 1x
Description
Sweet Canadian butter tarts offer a delightful pastry experience with rich, caramelized filling nestled in flaky crust. Canadians cherish this classic dessert that promises pure comfort and nostalgic charm for anyone craving a delectable treat.
Ingredients
- 2.5 cups (315 g) flour
- 1 cup (227 g) unsalted butter (cold)
- 1 cup (250 ml) maple syrup
- ½ cup (100 g) brown sugar
- 2 eggs
- ¼ cup (57 g) unsalted butter (room temperature)
- ¾ cup (180 ml) water (cold)
- 1 tbsp sugar
- 1 tsp vanilla extract
- ¼ tsp fine sea salt
- 1 tsp fine sea salt
Instructions
- Pastry Preparation: Pulse flour, sugar, and salt in a food processor, then add cold butter chunks, processing until mixture resembles coarse crumbs.
- Dough Formation: Gradually introduce cold water, pulsing until dough coheres, then divide into two discs, wrap in plastic, and refrigerate for one hour to firm up.
- Crust Shaping: Roll chilled dough to 1/8-inch thickness, cut 15 circles using a 4-inch round cutter, and carefully line muffin pan, pressing to create smooth shells.
- Filling Creation: Cream butter and brown sugar until fluffy, then blend in eggs, maple syrup, salt, and vanilla extract until smooth and well-incorporated.
- Assembly and Baking: Fill chilled crusts two-thirds full with filling, then bake in a preheated 350°F (175°C) oven for 25 minutes until filling sets but remains slightly soft.
- Cooling and Finishing: Let tarts rest in pan for 5 minutes, then transfer to a cooling rack to complete setting, allowing the Canadian butter tarts to develop their signature texture and flavor.
Notes
- Chill Dough Strategically: Refrigerate pastry dough for at least one hour to develop robust flavor and prevent shrinkage during baking.
- Master Butter Integration: Pulse butter into flour mixture until it resembles coarse pea-sized crumbs for the most tender, flaky crust.
- Fill Precisely: Do not overfill tart shells; aim for two-thirds full to prevent messy overflow and ensure consistent baking.
- Temperature Watch: Keep oven at exact 350°F and monitor baking time closely, as tarts can quickly transition from perfectly golden to overdone.
- Prep Time: 1 hour 15 minutes
- Cook Time: 25 minutes
- Category: Desserts
- Method: Baking
- Cuisine: Canadian
Nutrition
- Serving Size: 9
- Calories: 360
- Sugar: 25 g
- Sodium: 230 mg
- Fat: 22 g
- Saturated Fat: 14 g
- Unsaturated Fat: 7 g
- Trans Fat: 0 g
- Carbohydrates: 40 g
- Fiber: 1 g
- Protein: 3 g
- Cholesterol: 70 mg
Sophie Martin
Co-Founder & Content Creator
Expertise
Education
Stellenbosch University, South Africa
South African Chefs Academy, Cape Town
Sophie Martin is the nutrition brain and feel-good foodie at Good Tasting Meals. With a degree in Human Nutrition from Stellenbosch University and chef training from the South African Chefs Academy, Sophie brings balance to the table, literally. She loves creating meals that are easy to make, great to eat, and good for your body too.
Her recipes are made for everyday living, with a little flair and a lot of heart. Sophie’s not here to count calories, she’s here to show you how fresh, simple food can fit into your life, taste amazing, and still be nourishing.