

The Best Homemade Honey Buns Recipe for Sweet Morning Magic
Sweet homemade honey buns represent a delightful morning treat that reinvents ordinary breakfast routines.
Soft, pillowy dough infused with golden nectar creates an irresistible aroma that fills kitchens with warmth.
Bakers passionate about crafting delectable pastries understand the magicalalchemy of flour, yeast, and natural sweetness.
Each ingredient plays a crucial role in developing rich, complex flavors that dance across taste buds.
These tender rounds offer comfort and nostalgia, connecting generations through a shared love of freshly baked goodness.
Subtle notes of floral sweetness complement the rich, buttery texture that melts effortlessly in your mouth.
Crafting these delectable pastries requires patience, practice, and a genuine love for baking.
What Makes Homemade Honey Buns So Soft and Sweet
What You’ll Need to Bake Homemade Honey Buns
Dough Ingredients:Coating and Frying Ingredients:Glaze Ingredients:Step-by-Step Baking for Homemade Honey Buns
Step 1: Activate the Yeast
In a stand mixer bowl, combine water, a pinch of sugar, and yeast. Whisk gently until blended. Let the mixture rest for 5 minutes until it becomes frothy and bubbly.
Step 2: Create the Dough Base
Switch to a dough hook attachment. Add the remaining ingredients:Knead the mixture on medium speed for 8 minutes. The dough will be sticky but stretchy when pulled.
Step 3: First Dough Rise
Transfer the dough to a clean, lightly oiled bowl. Cover with plastic wrap or a kitchen towel. Allow the dough to rise in a warm spot for 1 hour until it doubles in size.
Step 4: Prepare Cinnamon Sugar Coating
In a small bowl, whisk together:Set aside for later use.
Step 5: Shape the Dough
Roll out the risen dough on a floured surface into a 12-inch long and 8-inch wide rectangle. Sprinkle the cinnamon sugar mixture evenly across the surface. Gently press the sugar into the dough.
Step 6: Cut and Prepare Honey Buns
Roll the dough from the long side. Position the roll diagonally. Score and cut into 8 pieces. Trim the ends slightly. Place the pieces on a parchment-lined baking sheet, leaving 2 inches between each bun. Shape each piece with fingers and let rise for 45 minutes until puffy.
Step 7: Fry the Honey Buns
Heat oil in a large pan to 365°F (185°C). Carefully lower a few buns into the hot oil. Fry for 90 seconds on each side until golden brown. Avoid overcrowding the pan.
Step 8: Create the Glaze
In a medium bowl, whisk together:Add warm water gradually until you reach the desired glaze consistency.
Step 9: Glaze the Buns
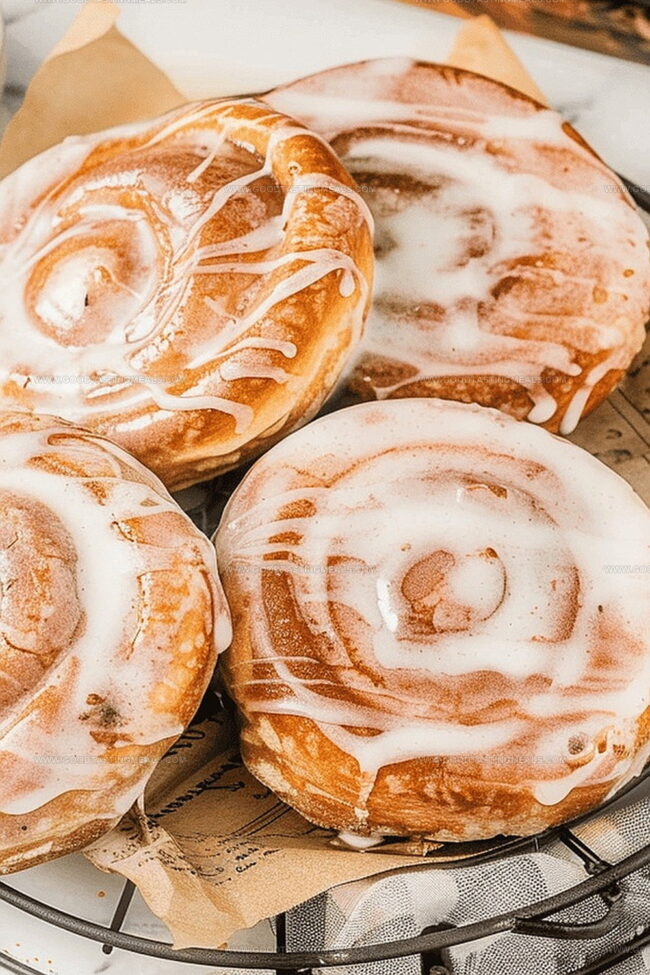
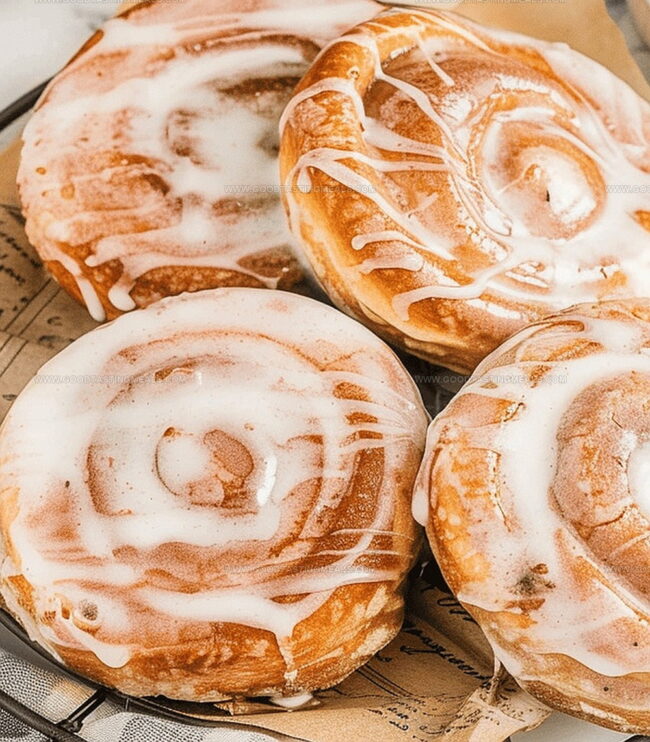
Transfer fried buns to a wire rack. Gently press to flatten. Immediately dip each bun into the prepared glaze for a crisp, sweet finish.
Step 10: Complete the Batch
Repeat the frying and glazing process with remaining dough pieces.
Serve and enjoy your freshly made homemade honey buns!
Best Tips for Fluffy Homemade Honey Buns
Storing and Reheating Homemade Honey Buns for Later
What Goes Well with Homemade Honey Buns
Flavor Add-Ons for Homemade Honey Buns
Print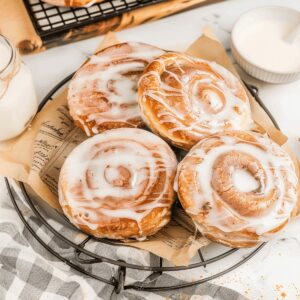
Homemade Honey Buns Recipe
- Total Time: 2 hours 5 minutes
- Yield: 12 1x
Description
Sweet, pillowy homemade honey buns bring warmth from Grandma’s kitchen to your table. Delicate dough brushed with golden honey promises comfort in each tender, melt-in-your-mouth bite, inviting you to savor pure, nostalgic pleasure.
Ingredients
Main Ingredients:
- 4 ⅔ cups powdered sugar
- 2 ½ tablespoons honey
Binding Ingredients:
- 1 tablespoon melted butter
Additional Ingredients:
- ½ teaspoon vanilla extract
- ¼ teaspoon salt
- Warm water (as needed)
Instructions
- Activate yeast by mixing it with water and a small portion of sugar in a stand mixer. Allow the mixture to become frothy and develop for approximately 5 minutes.
- Attach the dough hook and incorporate remaining sugar, flour, honey, shortening, egg yolks, vanilla, and salt into the mixture. Knead thoroughly until the dough becomes elastic and slightly translucent when stretched.
- Transfer the dough to a lightly greased bowl, ensuring complete coverage. Let the dough rest and expand in a warm environment until its volume doubles, approximately one hour.
- Prepare the cinnamon sugar mixture by thoroughly blending ground cinnamon and granulated sugar in a separate container.
- Gently deflate the risen dough and roll it out on a floured surface into a rectangular shape. Evenly distribute the cinnamon sugar across the surface, pressing it lightly into the dough.
- Roll the dough from its longest side, creating a compact log. Slice the log diagonally into uniform sections, trimming the uneven edges. Position the pieces on a parchment-lined baking sheet, allowing sufficient space between each section.
- Allow the shaped dough to prove for roughly 45 minutes, developing a puffy texture without completely doubling in size.
- Heat oil in a deep pan to 365°F, maintaining a consistent temperature. Carefully lower the honey buns into the hot oil, frying each side for approximately 90 seconds until achieving a golden-brown color.
- Craft the glaze by whisking powdered sugar, honey, melted butter, vanilla, and salt. Gradually introduce warm water until reaching a smooth, pourable consistency.
- Remove fried honey buns and place them on a wire rack. Immediately dunk each bun into the prepared glaze, ensuring complete coverage for a crisp, sweet exterior.
- Repeat the frying and glazing process with remaining dough sections, maintaining consistent oil temperature and glaze application.
Notes
- Choose high-quality ingredients like pure honey and fresh eggs for the best flavor and texture.
- Ensure yeast is fresh and active by checking the frothy reaction during proofing, which indicates proper fermentation.
- Maintain precise oil temperature at 365°F for perfect golden-brown exterior without burning or undercooking.
- Allow sufficient rising time for dough to develop rich flavor and soft, tender texture.
- Use a wire cooling rack when glazing to prevent soggy bottoms and ensure even coating.
- Work in small batches during frying to maintain consistent oil temperature and prevent overcrowding.
- Prep Time: 1 hour 50 minutes
- Cook Time: 15 minutes
- Category: Breakfast, Snacks, Desserts
- Method: Frying
- Cuisine: American
Nutrition
- Serving Size: 12
- Calories: 236
- Sugar: 38 g
- Sodium: 21 mg
- Fat: 3 g
- Saturated Fat: 2 g
- Unsaturated Fat: 1 g
- Trans Fat: 0 g
- Carbohydrates: 58 g
- Fiber: 0 g
- Protein: 0 g
- Cholesterol: 6 mg
Liam O’Brien
Founder & Recipe Developer
Expertise
Education
Dublin Institute of Technology (now Technological University Dublin)
Ballymaloe Cookery School, County Cork, Ireland
Liam O’Brien is the co-founder and kitchen soul behind Good Tasting Meals, a chef who believes that cooking shouldn’t feel stressful or complicated.
He earned his culinary stripes at Technological University Dublin and polished his farm-to-table skills at Ballymaloe Cookery School. With over 15 years flipping pans and stirring up stories, Liam has worked in family cafés, bustling bistros, and everything in between.
At Good Tasting Meals, Liam brings you recipes that feel like home: cozy, simple, and full of flavor.