
Sweet Fusion: Peanut Butter and Jelly Pie Recipe
Dessert lovers rejoice as this classic peanut butter and jelly pie recipe brings nostalgic childhood flavors to life with a decadent twist.
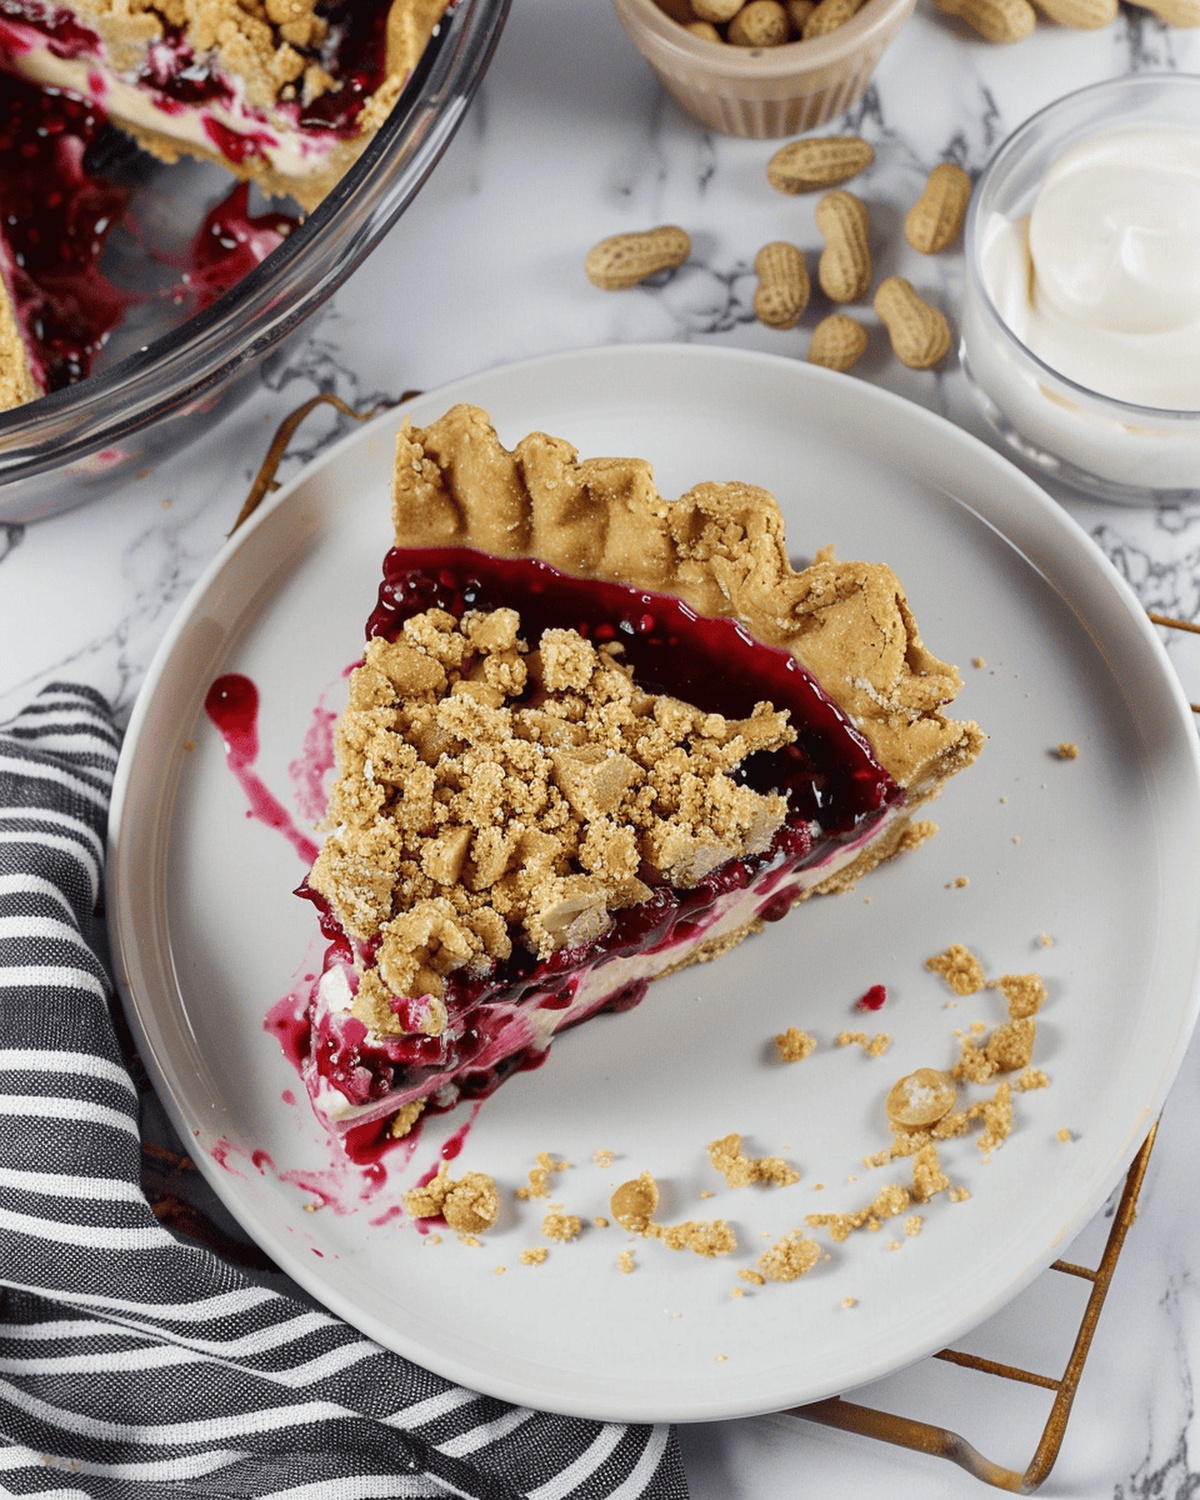
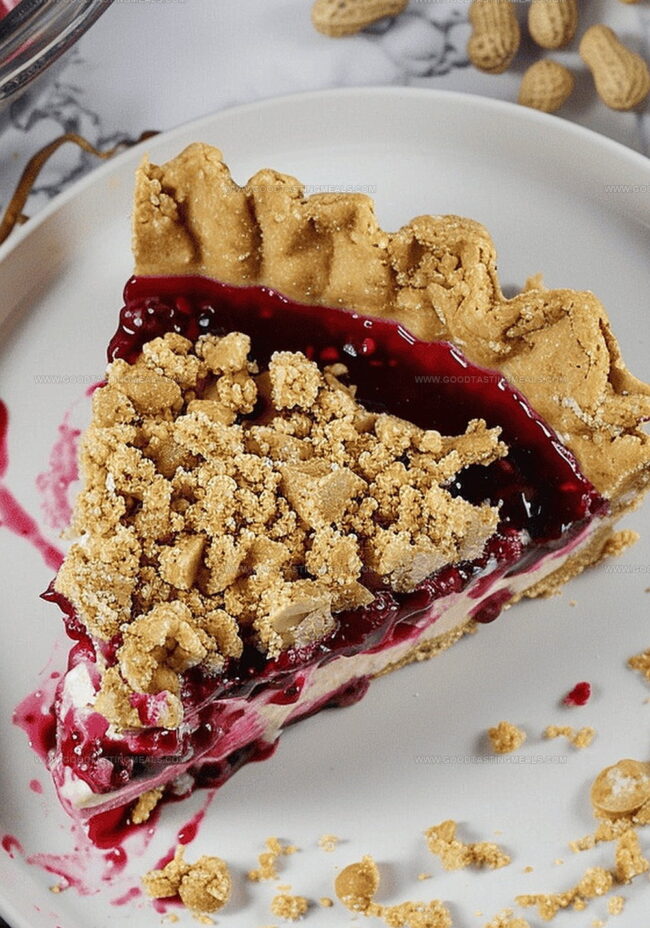
Creamy peanut butter mingles with sweet, fruity jam in a buttery graham cracker crust that promises pure indulgence.
Every forkful delivers a perfect balance of rich, smooth textures that dance across your palate.
The combination of silky peanut butter filling and vibrant berry jam creates a dessert that feels both familiar and exciting.
Crafted with simple ingredients, this pie requires minimal effort but delivers maximum satisfaction.
Layers of comfort and creativity make this treat a showstopper at any gathering.
Prepare to fall in love with a dessert that transforms a classic sandwich into an irresistible pie experience.
Quick Recipe Overview
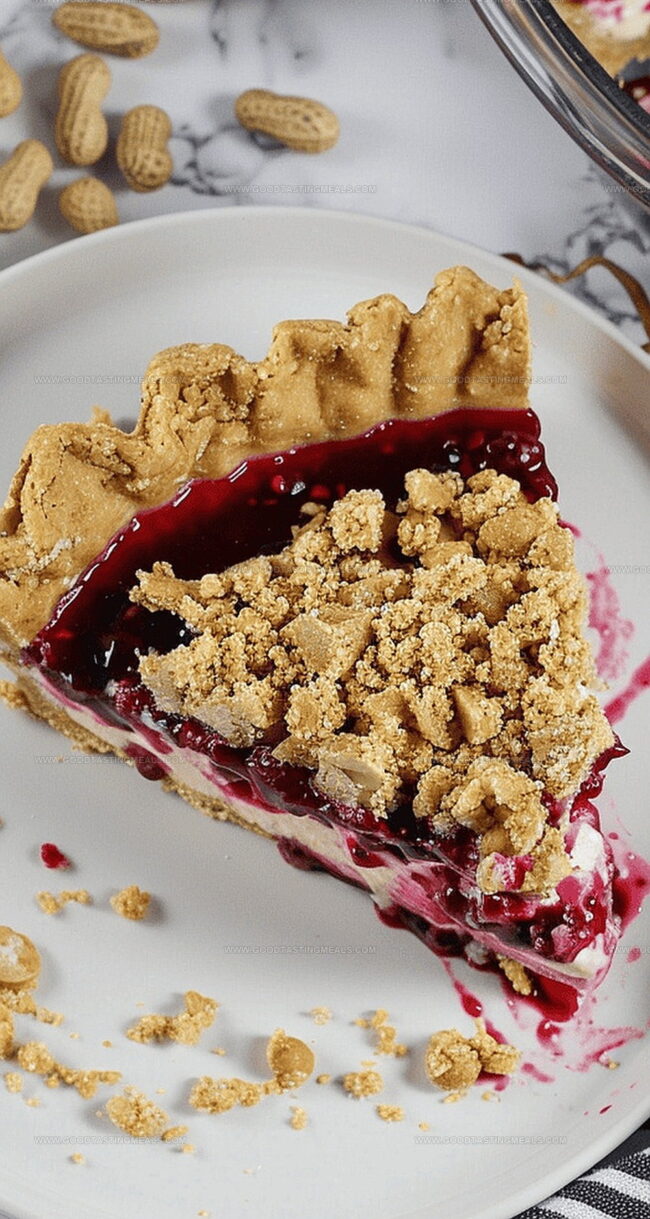
What’s in Peanut Butter and Jelly Pie
For Crust Ingredients:For Filling Ingredients:For Raspberry Jelly Ingredients:Tools to Make Peanut Butter and Jelly Pie
Simple Steps for Peanut Butter and Jelly Pie
Raspberry Jelly Base
A vibrant fruity foundation that brings tangy sweetness to the pie. Blend thawed raspberries until silky smooth, then strain to remove seeds. Combine raspberry mixture with sugar on gentle heat, stirring constantly until thickened. Incorporate gelatin for perfect texture. Refrigerate until completely set.
Peanut Butter Cookie Foundation
A crispy, nutty base that provides delicious crunch. Crush peanut butter cookies into fine crumbs. Mix with chopped peanuts and melted butter. Press firmly into pie dish, creating a sturdy platform for the creamy layers. Chill until firm.
Peanut Butter Cloud Filling
A luxurious, airy cream that melts in your mouth. Whip cream to billowy peaks. Separately, blend cream cheese, peanut butter, and powdered sugar until silky. Gently fold whipped cream into mixture, creating a light, dreamy texture.
Crumbly Peanut Topping
A golden, crunchy sprinkle that adds irresistible texture. Combine flour, sugars, and peanut powder. Bake until perfectly golden and crisp. These delicate crumbs will crown your spectacular pie.
Pie Symphony
Layer the creamy peanut butter filling into the cookie crust. Swirl raspberry jelly through the layers, creating beautiful marbled patterns. Generously scatter crunchy peanut crumbs between and on top. Chill thoroughly to let flavors meld and set. Slice and enjoy this decadent dessert masterpiece.
Tips for Balancing Sweetness in PB&J Pie
Serving Peanut Butter and Jelly Pie with Flair
Saving Slices of Peanut Butter and Jelly Pie
Print
Luscious Peanut Butter and Jelly Pie Recipe
- Total Time: 7 hours (including chilling)
- Yield: 9 1x
Description
Rich, nostalgic peanut butter and jelly pie brings childhood memories to delightful dessert form. Creamy peanut butter filling and sweet berry jam create a perfect balance of comfort and culinary creativity you’ll savor with each delectable slice.
Ingredients
- 3 cups (720 ml) frozen raspberries, thawed
- 8 oz (225 g) cream cheese, softened
- 1 cup creamy peanut butter
- 225 g peanut butter cookies (about 6 large cookies)
- 1 ½ cups (360 ml) whipping cream
- 1 cup powdered icing sugar
- ½ cup (100 g) sugar
- ⅓ cup (67 g) sugar
- 3 tbsps packed brown sugar
- 2 tbsps sugar
- 1 tbsp cornstarch
- ¾ tsp unflavoured gelatin
- ½ cup all-purpose flour
- ¼ cup PB2 powder
- ½ tsp baking powder
- 1 ½ tsp water
- 1 tsp vanilla extract
- ¼ cup salted peanuts, chopped
- ½ tsp kosher salt
- 6 tbsps unsalted butter, melted
- 4 tbsps unsalted butter, melted
Instructions
- Raspberry Purée Preparation: Transform thawed raspberries into a smooth purée using a food processor, then strain through a fine mesh sieve to remove seeds.
- Raspberry Filling Development: Combine raspberry mixture with sugar, cornstarch, and salt in a saucepan, dissolving gelatin separately. Simmer on medium-low heat, whisking continuously until the mixture thickens and becomes glossy.
- Crumb Base Creation: Blend dry ingredients including sugars, flour, PB2 powder, baking powder, and salt in a mixer. Drizzle melted butter to form delicate, sandy-textured crumbs. Spread evenly on a parchment-lined baking sheet and bake at 250°F / 120°C until golden and crisp, approximately 20 minutes.
- Crust Construction: Pulse peanut butter cookies in a food processor to create fine crumbs. Mix with chopped peanuts, sugar, and salt, then bind with melted butter. Press firmly into a greased 9-inch pie plate to form an even, compact crust.
- Cream Mixture Preparation: Whip cream until forming sturdy peaks. In a separate bowl, blend cream cheese, peanut butter, powdered sugar, and vanilla until silky. Gently fold whipped cream into the peanut butter mixture in three careful additions.
- Layering and Assembly: Create alternating layers of peanut butter cream and raspberry jelly filling in the prepared crust. Sprinkle peanut butter crumbs between layers, pressing lightly to adhere. Finish with an elegant swirl of raspberry filling and a final garnish of crumbs.
- Chilling and Setting: Refrigerate the pie for 6-8 hours, allowing flavors to meld and the structure to set completely before serving.
Notes
- Precise Straining: Remove all raspberry seeds by thoroughly pressing purée through a fine mesh sieve for ultra-smooth filling texture.
- Gelatin Technique: Dissolve gelatin completely before integrating into raspberry mixture to prevent lumpy inconsistencies and ensure smooth set.
- Crumb Baking Tip: Watch peanut butter crumbs closely during baking to achieve golden color without burning, which can create bitter undertones.
- Chilling Importance: Allow minimum 6-8 hours refrigeration time to guarantee proper flavor melding and structural stability of the pie.
- Prep Time: 45 minutes
- Cook Time: 20 minutes
- Category: Desserts, Snacks
- Method: Baking
- Cuisine: American
Nutrition
- Serving Size: 9
- Calories: 480
- Sugar: 38 g
- Sodium: 310 mg
- Fat: 30 g
- Saturated Fat: 10 g
- Unsaturated Fat: 18 g
- Trans Fat: 0 g
- Carbohydrates: 47 g
- Fiber: 3 g
- Protein: 9 g
- Cholesterol: 40 mg
Sophie Martin
Co-Founder & Content Creator
Expertise
Education
Stellenbosch University, South Africa
South African Chefs Academy, Cape Town
Sophie Martin is the nutrition brain and feel-good foodie at Good Tasting Meals. With a degree in Human Nutrition from Stellenbosch University and chef training from the South African Chefs Academy, Sophie brings balance to the table, literally. She loves creating meals that are easy to make, great to eat, and good for your body too.
Her recipes are made for everyday living, with a little flair and a lot of heart. Sophie’s not here to count calories, she’s here to show you how fresh, simple food can fit into your life, taste amazing, and still be nourishing.