
Irresistible Chocolate Hazelnut Thumbprint Cookies Recipe
When the sweet aroma of chocolate hazelnut thumbprint cookies wafts through your kitchen, magic happens.
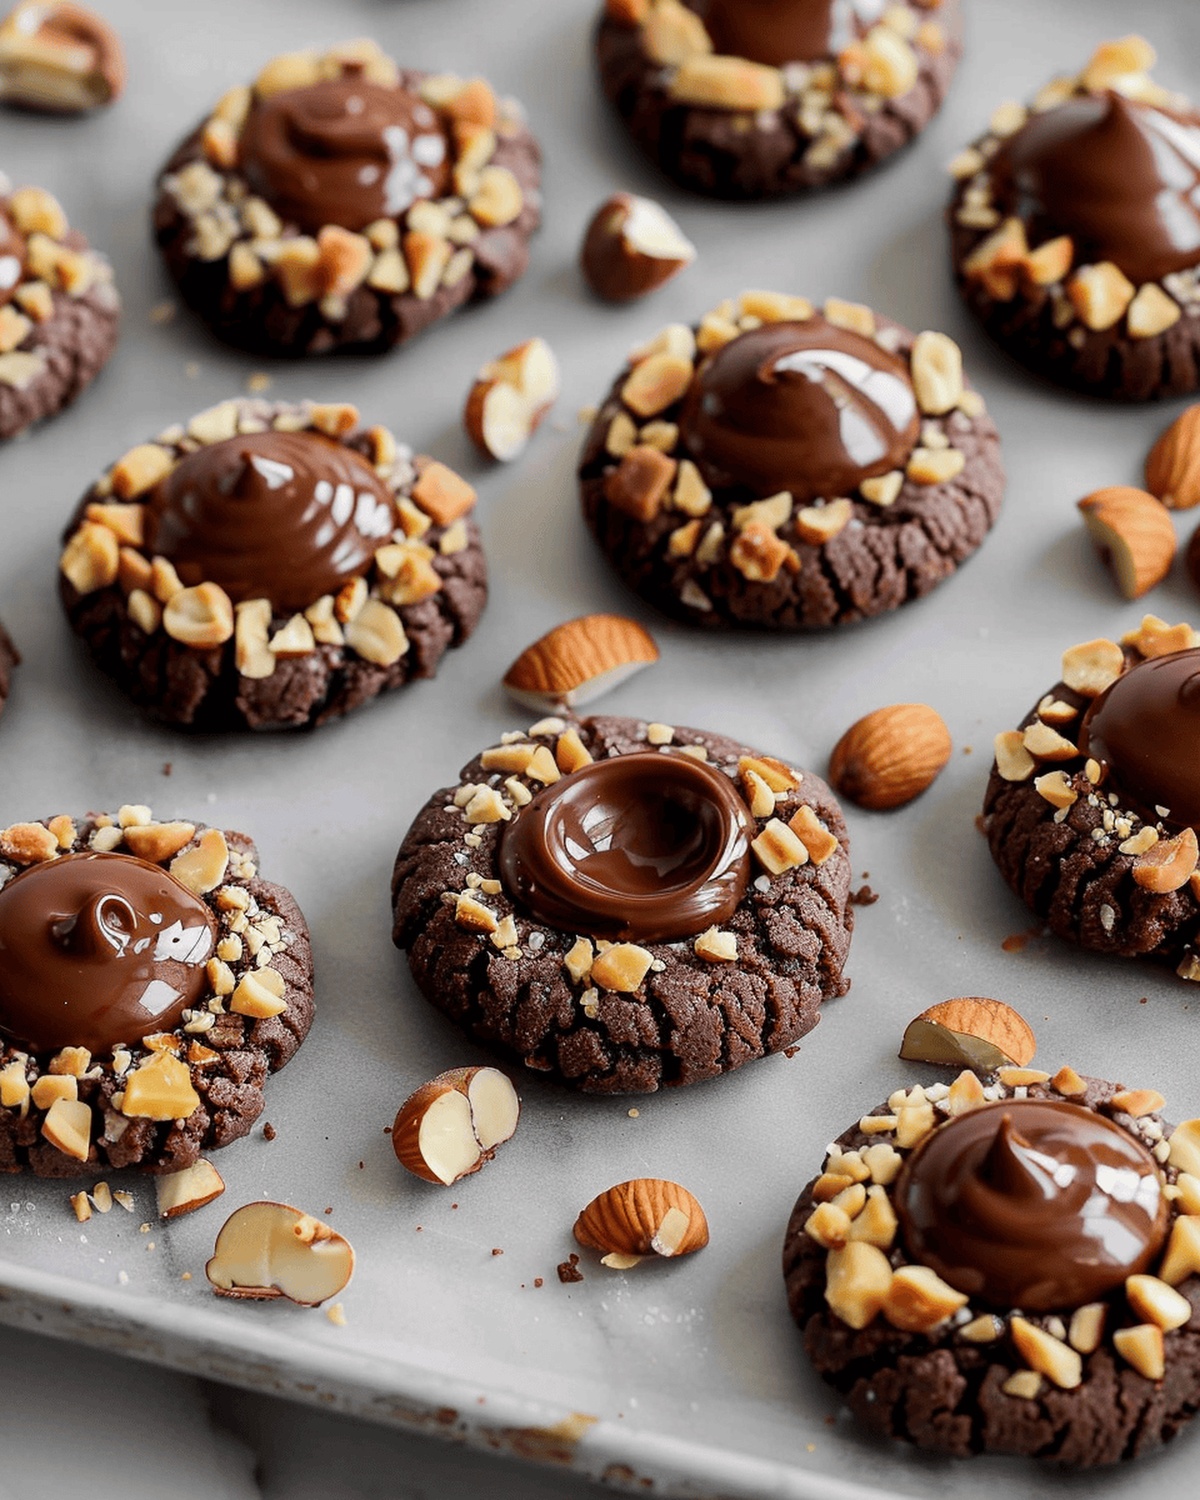
These delectable treats blend rich, nutty flavors with a delightful texture that melts in your mouth.
Crisp edges give way to soft, buttery centers filled with luscious chocolate hazelnut spread.
Each cookie is a miniature work of art, carefully crafted with love and precision.
The simple ingredients come together effortlessly, creating a dessert that looks impressive yet requires minimal baking skill.
Baking these cookies promises moments of pure joy and indulgence that will have everyone asking for seconds.
Get ready to become the star baker with this irresistible recipe that turns an ordinary afternoon into a celebration of sweetness.
Quick Recipe Overview

Ingredients Used in Chocolate Hazelnut Thumbprint Cookies
For Dry Ingredients:For Wet and Binding Ingredients:For Coating and Filling Ingredients:Equipment for Thumbprint Cookies with Chocolate Hazelnut
Baking Instructions for Hazelnut Thumbprint Cookies

Blend flour, cocoa, and salt in a mixing bowl creating a rich dry foundation for the cookies.
Whip softened butter and sugar until the mixture transforms into a fluffy cloud-like texture.
Fold in vanilla, egg yolks, and melted dark chocolate, stirring until the batter becomes smooth and glossy.
Gently incorporate dry ingredients into wet mixture, forming a soft and pliable cookie dough.
Roll dough into small balls and lovingly roll them through chopped hazelnuts, creating a crunchy exterior.
Place coated dough balls in refrigerator for two hours to firm up and develop deep flavors.
Bake cookies in preheated oven, watching them turn from soft dough to crisp delights.
Create gentle indentations in warm cookies using a spoon, preparing space for luscious filling.
Generously dollop chocolate hazelnut spread into cookie centers, creating a decadent surprise.
Allow cookies to cool completely, letting the flavors meld and textures settle into perfect harmony.
Tips to Perfect Chocolate Hazelnut Thumbprint Cookies
How to Serve Hazelnut Thumbprint Cookies Neatly
Storage Advice for Hazelnut Thumbprint Cookies
Print
Magical Chocolate Hazelnut Thumbprint Cookies Recipe
- Total Time: 35 minutes (plus 2 hours chilling)
- Yield: 22 1x
Description
Rich chocolate hazelnut thumbprint cookies blend European baking traditions with nutty, sweet indulgence. Delicate cookies with hazelnut crumble and smooth chocolate center offer delightful sensory pleasures you will savor completely.
Ingredients
- 1 ¼ cups (187 g) all-purpose flour, sifted
- ⅓ cup (30 g) cocoa powder, sifted
- 1 cup (125 g) hazelnuts, toasted and finely chopped
- ⅔ cup (165 g) unsalted butter, softened
- ⅔ cup (140 g) caster sugar
- 2 egg yolks
- 1 ½ tsp vanilla extract
- ⅔ cup (133 g) dark chocolate, melted
- ¼ tsp salt
- ½ cup (150 g) chocolate hazelnut spread (such as Nutella)
Instructions
- Preparation: Blend cocoa powder, flour, and salt in a medium bowl, ensuring a uniform dry mixture for the cookie base.
- Creaming: Whip butter and sugar with an electric mixer until the mixture becomes pale and fluffy, developing a light texture.
- Wet Ingredients: Integrate vanilla extract, egg yolks, and melted dark chocolate into the butter mixture, creating a smooth, consistent blend.
- Dough Formation: Gently fold dry ingredients into the wet mixture, forming a cohesive dough that combines all components seamlessly.
- Coating and Chilling: Roll dough into small spheres, meticulously coat with finely chopped hazelnuts, and refrigerate for 2 hours to intensify flavors and firm up the texture.
- Oven Preparation: Preheat oven to 160°C (fan-forced) or 170°C (conventional), lining baking trays with parchment paper to prevent sticking.
- Baking Process: Distribute hazelnut-coated dough balls on prepared trays, ensuring adequate spacing. Bake individually on the middle rack for about 8 minutes, monitoring to prevent over-browning.
- Shaping and Filling: Once cooled, create a gentle indentation in each cookie’s center using a measuring spoon. Fill the wells precisely with chocolate hazelnut spread using a spoon or piping bag.
- Finishing: Allow cookies to set completely, permitting the spread to stabilize and flavors to harmonize before serving.
Notes
- Chill for Flavor Depth: Refrigerating the dough for 2 hours helps develop rich, complex flavors and prevents cookies from spreading too much during baking.
- Hazelnut Coating Trick: Roll dough balls generously in chopped hazelnuts for a delightful crunch and beautiful textural contrast.
- Precise Indentation Technique: Use the back of a measuring spoon to create uniform, clean centers without cracking the cookie surface.
- Spread Application Pro: Use a piping bag for clean, precise filling of chocolate hazelnut spread, ensuring a professional and elegant final presentation.
- Prep Time: 25 minutes (plus 2 hours chilling time)
- Cook Time: 8 minutes per batch
- Category: Desserts, Snacks
- Method: Baking
- Cuisine: American
Nutrition
- Serving Size: 22
- Calories: 150
- Sugar: 9 g
- Sodium: 50 mg
- Fat: 10 g
- Saturated Fat: 5 g
- Unsaturated Fat: 4 g
- Trans Fat: 0 g
- Carbohydrates: 15 g
- Fiber: 1 g
- Protein: 2 g
- Cholesterol: 40 mg
Sophie Martin
Co-Founder & Content Creator
Expertise
Education
Stellenbosch University, South Africa
South African Chefs Academy, Cape Town
Sophie Martin is the nutrition brain and feel-good foodie at Good Tasting Meals. With a degree in Human Nutrition from Stellenbosch University and chef training from the South African Chefs Academy, Sophie brings balance to the table, literally. She loves creating meals that are easy to make, great to eat, and good for your body too.
Her recipes are made for everyday living, with a little flair and a lot of heart. Sophie’s not here to count calories, she’s here to show you how fresh, simple food can fit into your life, taste amazing, and still be nourishing.