
Quick & Crispy Crunch Cake Recipe Everyone Will Love
Dessert lovers rejoice as this irresistible crunch cake recipe promises a delightful blend of textures and flavors that dance on your palate.
Layers of moist cake meet a crisp, golden topping that adds an unexpected twist to every delectable bite.
The magic happens when buttery, caramelized nuts mingle with soft, tender cake layers, creating a symphony of sensations.
Each slice tells a story of comfort and indulgence, drawing you into a world of sweet satisfaction.
The recipe balances simplicity with sophistication, making it perfect for both novice bakers and seasoned dessert enthusiasts.
Warm ovens and rich aromas await you, promising a treat that will become an instant favorite at any gathering.
Let this crunch cake be your next baking adventure.
Quick Recipe Overview
Crunch Cake Ingredient Checklist
For Crust Base:For Creamy Filling:For Finishing Touch:Tools to Build a Crunch Cake That Stands Out
How to Put Together Crunch Cake Like a Pro
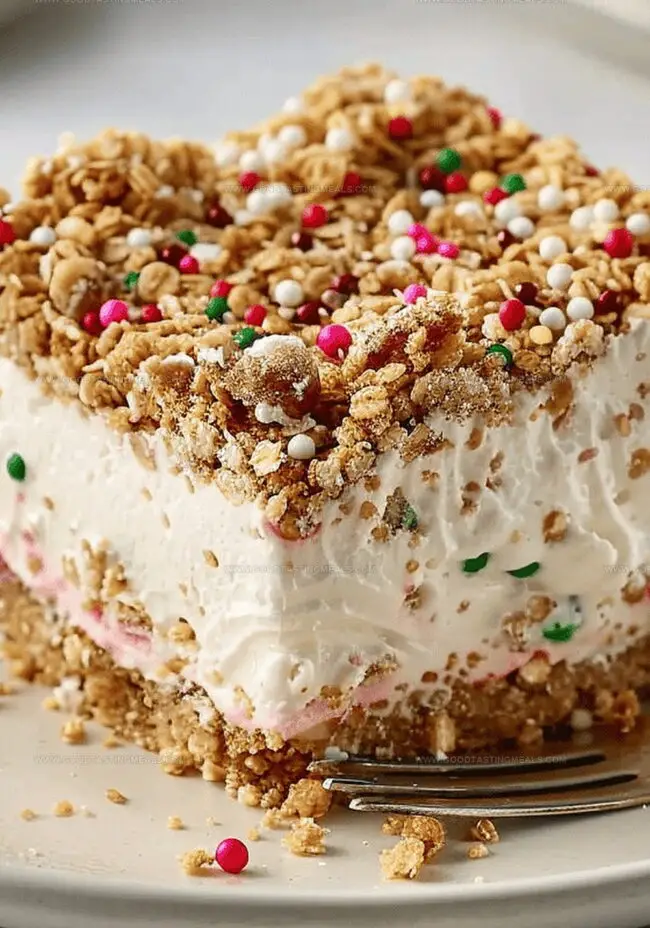
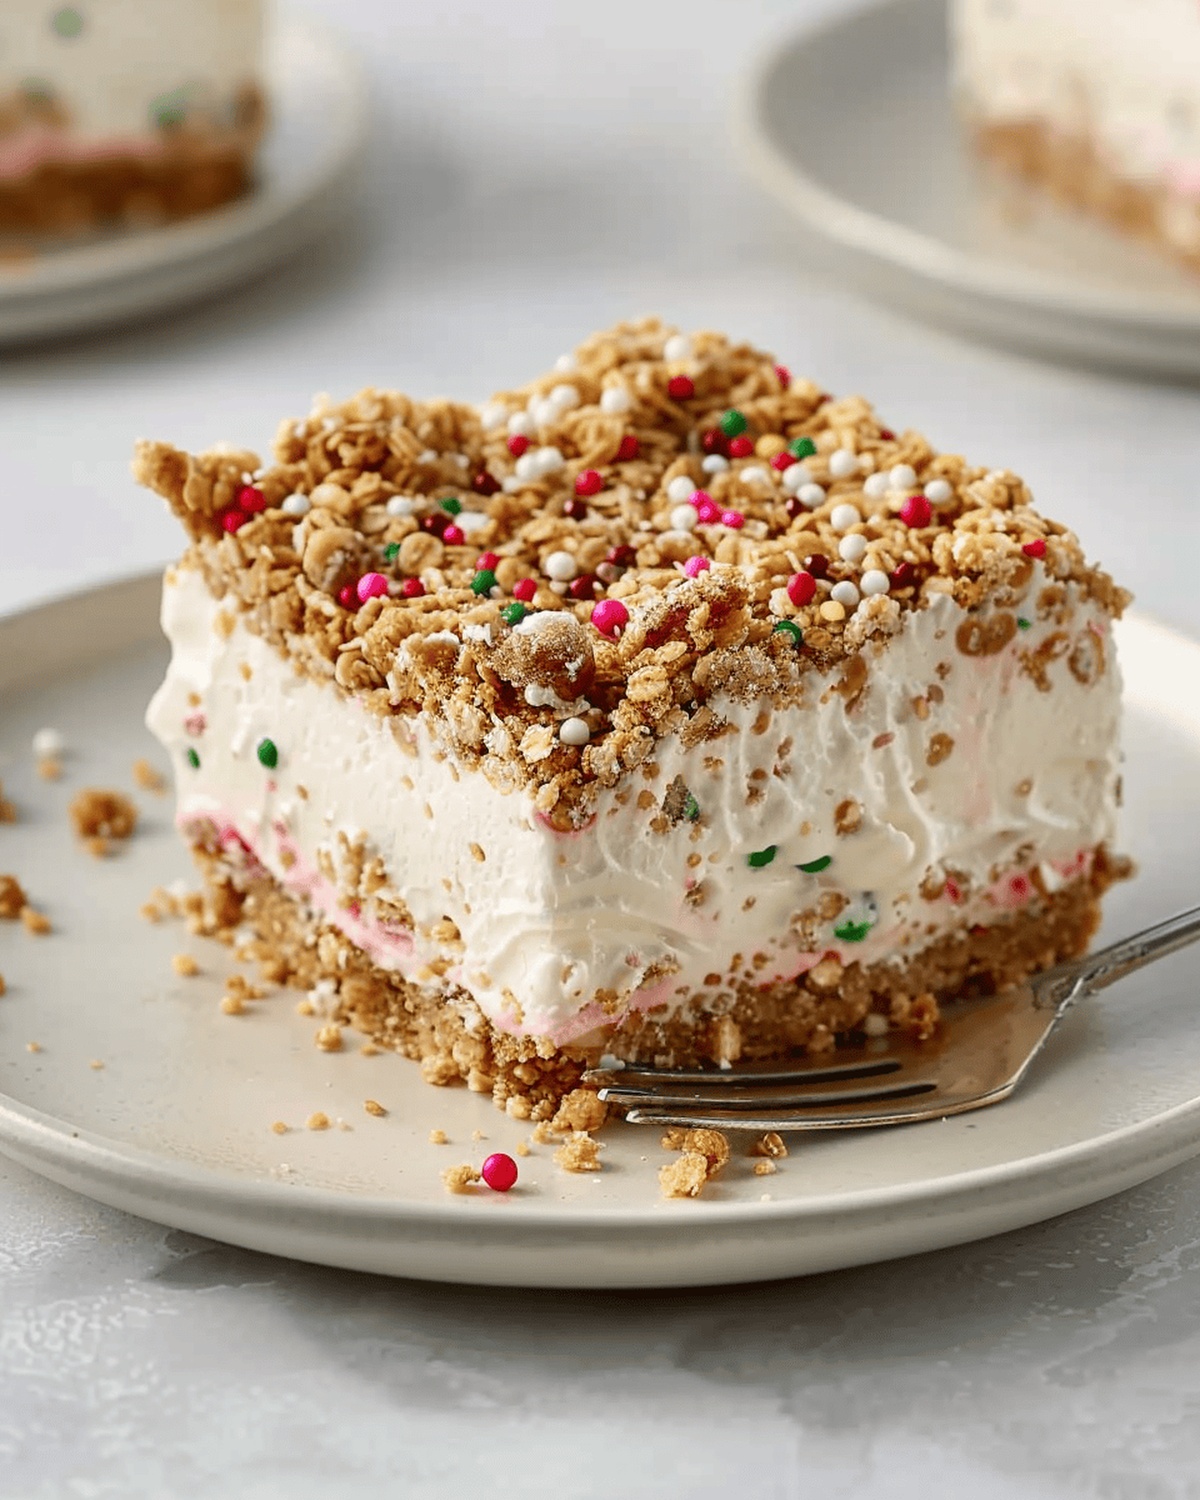
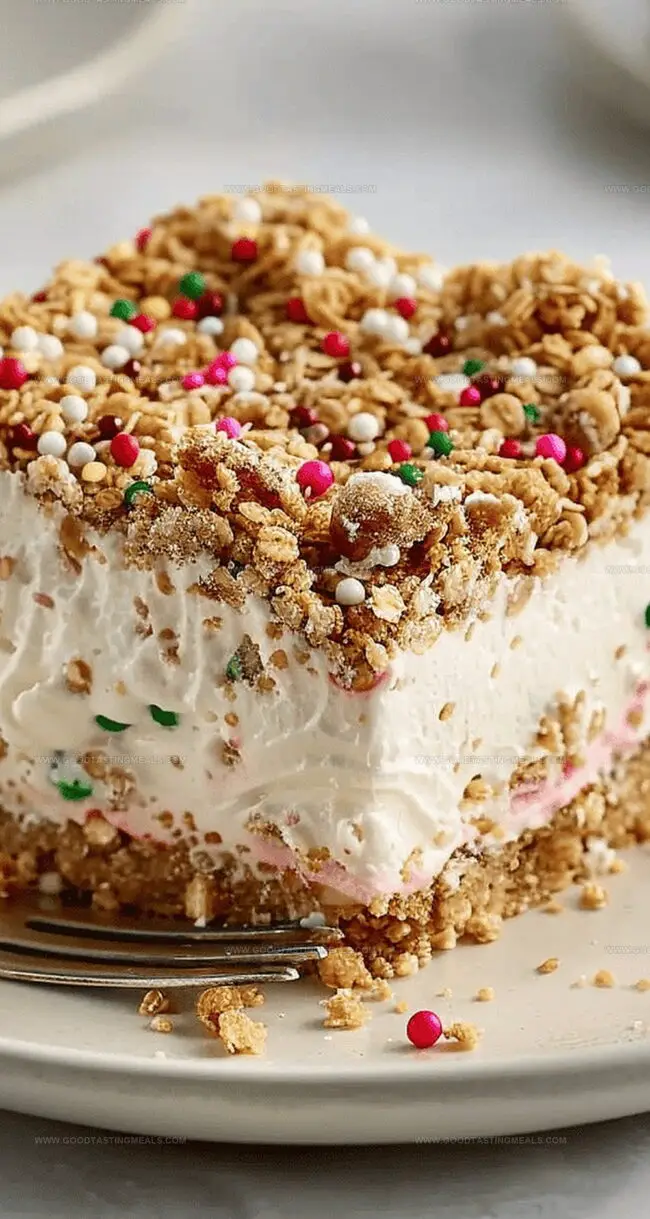
Create a delightful base by crushing granola bars and mixing with melted butter and sugar. Press this mixture firmly into a baking pan, creating a golden, textured foundation for your dessert.
Whip together cream cheese, sweetened condensed milk, and whipped topping until ultra-smooth. Add a splash of almond extract and rum or vanilla for an unexpected flavor twist. Gently stir in colorful nonpareils to create playful bursts of excitement.
Spread the luxurious cream mixture evenly over the granola crust. Sprinkle the remaining granola crumbs on top and dot with reserved nonpareils for a festive finish.
Pop the pan into the freezer and let the magic happen. After 4-6 hours, your dessert will transform into a cool, creamy treat that’s ready to delight.
Slice the chilled cake into beautiful pieces and serve immediately. Each bite promises a symphony of crunchy, creamy textures that will make taste buds dance.
Tips to Add Extra Crunch and Flavor
Ways to Serve Crunch Cake Creatively
How to Store Crunch Cake Without Soggy Bits
Print
Moist Crunch Cake Recipe
- Total Time: 4 hours 15 minutes
- Yield: 13 1x
Description
Moist crunch cake delivers a delightful blend of textures and flavors from classic American bakeries. Sweet layers combine with crisp topping, offering you a memorable dessert experience.
Ingredients
- 2 blocks (8 oz or 226 g) cream cheese, softened
- 1 can (14 oz or 397 g) sweetened condensed milk
- 1 container (8 oz or 226 g) extra creamy whipped topping
- ½ cup (113 g or 1 stick) butter, melted
- ⅔ cup (133 g) sugar
- 16 Nature Valley™ crunchy granola bars Oats ‘n Honey, crushed
- 1 tbsp spiced rum or vanilla
- ½ tsp pure almond extract
- ⅓ cup Betty Crocker™ Decorating Decors nonpareils (red, white, and green)
- Nonstick baking spray
Instructions
- Crust Creation: Pulverize granola bars and meld with melted butter and sugar, forming a cohesive crumbly mixture.
- Pan Preparation: Distribute half the granola mixture into a lightly greased 9×9-inch baking pan, compressing firmly to establish a robust base.
- Cream Composition: Whip cream cheese to silky smoothness, gradually blending in sweetened condensed milk, whipped topping, almond extract, and rum or vanilla until achieving a luxurious, uniform texture.
- Decorative Fusion: Fold nonpareils into the cream mixture, reserving a small portion for final garnishing.
- Layer Assembly: Spread the creamy mixture evenly across the granola foundation, ensuring complete coverage.
- Finishing Touches: Scatter remaining granola crumbs over the cream layer, then delicately sprinkle reserved nonpareils for a vibrant, celebratory appearance.
- Freezing Process: Envelop the pan in plastic wrap and nestle in the freezer for 4-6 hours until thoroughly set and solidified.
- Serving Suggestion: Remove from freezer, slice into elegant portions, and serve while maintaining a perfect chilled state.
Notes
- Crumb Foundation Technique: Press granola mixture firmly and evenly to ensure a stable, compact base that won’t crumble when serving.
- Cream Mixing Wisdom: Whip cream cheese thoroughly to eliminate lumps, creating a silky-smooth texture that blends seamlessly with other ingredients.
- Freezing Precision: Allow full 4-6 hour freezing time for optimal set, preventing a runny or soft consistency that could compromise the cake’s structure.
- Decorative Finish: Sprinkle nonpareils just before serving to maintain their vibrant color and prevent color bleeding into the cream mixture.
- Prep Time: 15 minutes
- Cook Time: 0 minutes
- Category: Desserts, Snacks
- Method: Freezing
- Cuisine: American
Nutrition
- Serving Size: 13
- Calories: 320
- Sugar: 22 g
- Sodium: 180 mg
- Fat: 18 g
- Saturated Fat: 10 g
- Unsaturated Fat: 6 g
- Trans Fat: 0 g
- Carbohydrates: 34 g
- Fiber: 1 g
- Protein: 4 g
- Cholesterol: 50 mg
Sophie Martin
Co-Founder & Content Creator
Expertise
Education
Stellenbosch University, South Africa
South African Chefs Academy, Cape Town
Sophie Martin is the nutrition brain and feel-good foodie at Good Tasting Meals. With a degree in Human Nutrition from Stellenbosch University and chef training from the South African Chefs Academy, Sophie brings balance to the table, literally. She loves creating meals that are easy to make, great to eat, and good for your body too.
Her recipes are made for everyday living, with a little flair and a lot of heart. Sophie’s not here to count calories, she’s here to show you how fresh, simple food can fit into your life, taste amazing, and still be nourishing.