Peanut Butter Balls with Rice Krispies Recipe

Irresistible Peanut Butter Balls with Rice Krispies Recipe

Peanut butter balls dance with crispy, sweet magic in this irresistible treat that enhances simple ingredients into delightful bites of pure indulgence.

Munching these delectable morsels feels like unwrapping a childhood memory wrapped in creamy, crunchy perfection.

Their incredible texture combines smooth richness with a satisfying crackle that makes taste buds sing with excitement.

Rich, velvety peanut butter mingles effortlessly with light, airy cereal, creating a harmonious blend that tempts even the most disciplined snacker.

Small spheres of happiness promise a quick escape from ordinary desserts, offering a playful twist on traditional confections.

Compact and portable, these energy-packed nuggets work beautifully for casual gatherings or spontaneous sweet cravings.

No fancy kitchen skills required – just a handful of pantry staples and a dash of culinary enthusiasm.

Peanut Butter Balls Meet Krispies for the Best Bite

  • Crunch and Smoothness Combo: Experience the delightful contrast between crispy Rice Krispies and creamy peanut butter in every single bite.
  • Super Quick No-Bake Treat: Whip up these delicious balls in under 30 minutes without turning on the oven, making them perfect for last-minute dessert cravings.
  • Chocolate-Coated Indulgence: The rich melted chocolate coating transforms simple peanut butter balls into an irresistible gourmet-style snack that looks impressive and tastes incredible.
  • Kid and Adult Friendly: These versatile treats appeal to all ages, work great for parties, school lunches, potlucks, or casual weekend snacking with minimal kitchen skills required.

All the Ingredients for That Signature Snap

Base Ingredients:
  • Peanut Butter: Creamy and rich base that provides the main flavor and binding for the balls.
  • Butter: Softened butter adds richness and helps create a smooth, cohesive mixture.
  • Vanilla Extract: Enhances the overall flavor with a warm, sweet undertone.
Sweetener and Binding:
  • Powdered Sugar: Provides sweetness and helps bind the ingredients together for a perfect texture.
Crispy Element:
  • Rice Krispies Cereal: Adds a delightful crunch and light texture to the peanut butter mixture.
Coating Ingredients:
  • Chocolate Melting Wafers: Smooth chocolate that creates a glossy, crisp exterior for the balls, best when choosing high-quality chocolate for better flavor.
Optional Variations:
  • Salt: A pinch can enhance the overall flavor profile if desired.

How to Shape and Coat Peanut Butter Balls with Crunch

Step 1: Whip Up the Base

Create a creamy foundation by blending:
  • Peanut butter
  • Softened butter
  • Vanilla extract

Mix thoroughly until the ingredients transform into a silky, smooth mixture.

Step 2: Sweeten the Blend

Gradually incorporate powdered sugar into the mixture:
  • Add sugar in small increments
  • Stir completely after each addition
  • Ensure a consistent, well-integrated texture

Step 3: Introduce Crispy Crunch

Gently fold Rice Krispies cereal into the mixture:
  • Distribute evenly
  • Maintain the mixture's soft consistency
  • Avoid crushing the cereal

Step 4: Shape Delightful Spheres

Transform the mixture into perfect bite-sized treats:
  • Use a cookie scoop for consistent sizing
  • Roll each portion between palms
  • Create smooth, round balls
  • Place on a parchment-lined baking sheet

Step 5: Prepare Chocolate Coating

Melt chocolate using microwave technique:
  • Select wide-mouth bowl
  • Heat in 30-second intervals
  • Stir between each heating cycle
  • Achieve smooth, fully melted chocolate

Step 6: Enrobe in Chocolate

Dip each peanut butter ball:
  • Completely submerge in melted chocolate
  • Gently tap to remove excess coating
  • Return to parchment-lined sheet

Step 7: Let Chocolate Set

Allow truffles to solidify:
  • Rest at room temperature
  • Alternatively, refrigerate for 15 minutes
  • Chocolate should become firm and glossy

Serving Suggestion: Store in an airtight container in the refrigerator for up to one week. Perfect for parties, gifts, or a delightful personal treat!

Tricks to Avoid Soggy or Sticky Centers

  • Chill the Mixture: Refrigerate the peanut butter mixture for 15-20 minutes before rolling to make handling easier and prevent sticking.
  • Use Consistent Size: Employ a cookie scoop for uniform balls, ensuring even coating and professional-looking treats.
  • Prevent Chocolate Clumping: Add a teaspoon of coconut oil to melted chocolate for smoother, shinier coating that drips more cleanly.
  • Control Chocolate Dipping: Use a fork to gently lower and lift balls from melted chocolate, allowing excess to drain effortlessly.
  • Store Smartly: Keep peanut butter balls in an airtight container between parchment layers in the refrigerator for up to two weeks, maintaining their delicious texture and freshness.

Keep Peanut Butter Krispie Balls Tasting Fresh

  • Refrigerate: Store peanut butter balls in an airtight container between layers of parchment paper for up to 1 week. Keep them chilled to maintain their shape and texture.
  • Freeze: Wrap individual balls tightly in plastic wrap, then place in a freezer-safe container. Frozen treats will last up to 3 months without losing flavor or quality.
  • Thaw: Remove desired number of balls from freezer and let sit at room temperature for 15-20 minutes before enjoying. Avoid microwaving to prevent chocolate coating from melting.

What Matches These Sweet-and-Crispy Treats

  • Pair with Creamy Milk: Indulge in a cold glass of whole milk that perfectly complements the rich, nutty peanut butter flavor and balances the sweetness of these chocolate-coated treats.
  • Match with Coffee Companions: Enjoy these peanut butter balls alongside a smooth cappuccino or dark roast coffee, letting the robust coffee notes enhance the chocolate and peanut butter combination.
  • Create a Dessert Platter: Serve these balls with a scoop of vanilla ice cream or alongside other bite-sized desserts like chocolate truffles or caramel squares for a delightful sweet spread that offers variety and texture.
  • Wine Pairing Adventure: Select a sweet dessert wine like port or a crisp late-harvest Riesling to cut through the richness and provide a sophisticated counterpoint to the peanut butter and chocolate flavors.

Tasty Variations for Peanut Butter Ball Fans

  • Nutty Coconut Crunch: Replace Rice Krispies with toasted coconut flakes for added tropical flavor and extra texture, keeping the peanut butter base intact.
  • Chocolate Almond Remix: Mix crushed almonds into the peanut butter mixture and use dark chocolate coating for a richer, more intense flavor profile.
  • Salted Caramel Swirl: Incorporate a small amount of caramel sauce into the peanut butter mixture and sprinkle sea salt on top of the chocolate coating for a sweet and salty combination.
  • Graham Cracker Classic: Substitute Rice Krispies with finely crushed graham cracker crumbs to create a different crumbly texture and subtle graham undertone.
Print
clock clock iconcutlery cutlery iconflag flag iconfolder folder iconinstagram instagram iconpinterest pinterest iconfacebook facebook iconprint print iconsquares squares iconheart heart iconheart solid heart solid icon
Peanut Butter Balls with Rice Krispies Recipe

Peanut Butter Balls with Rice Krispies Recipe


5 Stars 4 Stars 3 Stars 2 Stars 1 Star

4.9 from 34 reviews

  • Total Time: 35 minutes
  • Yield: 24 1x

Description

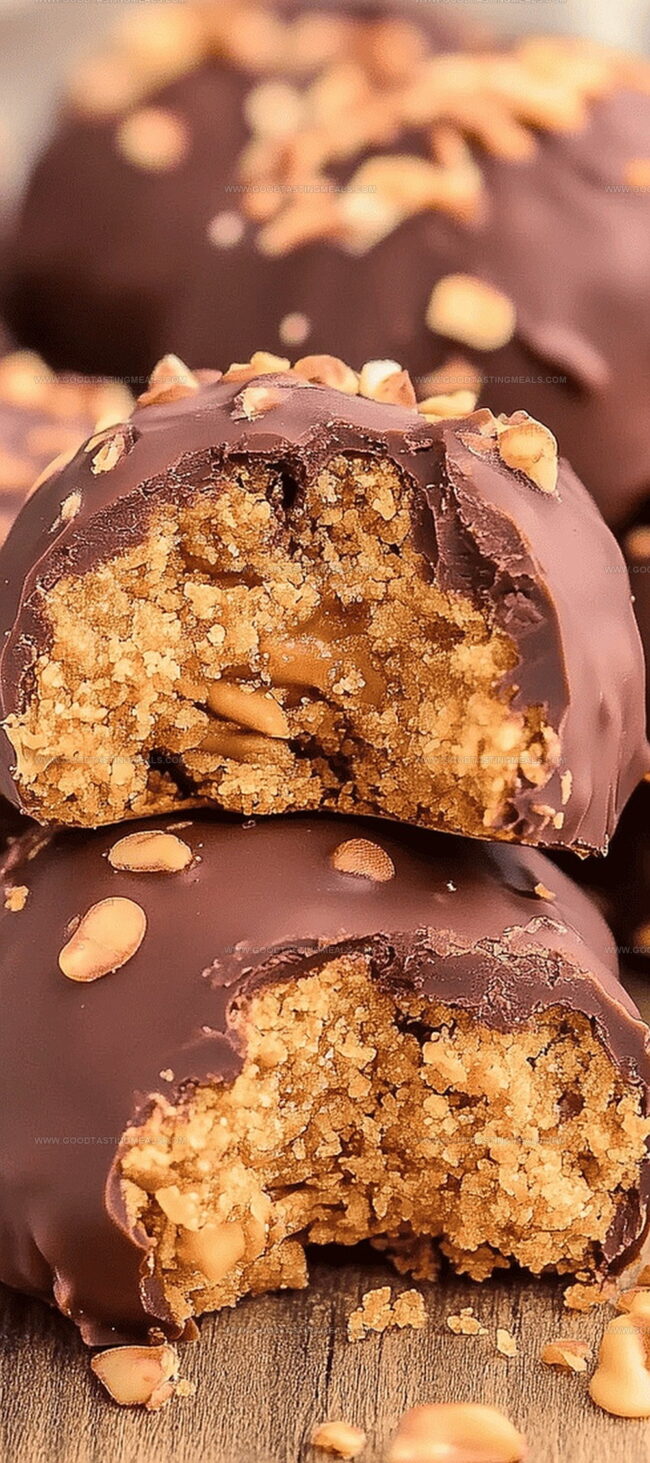
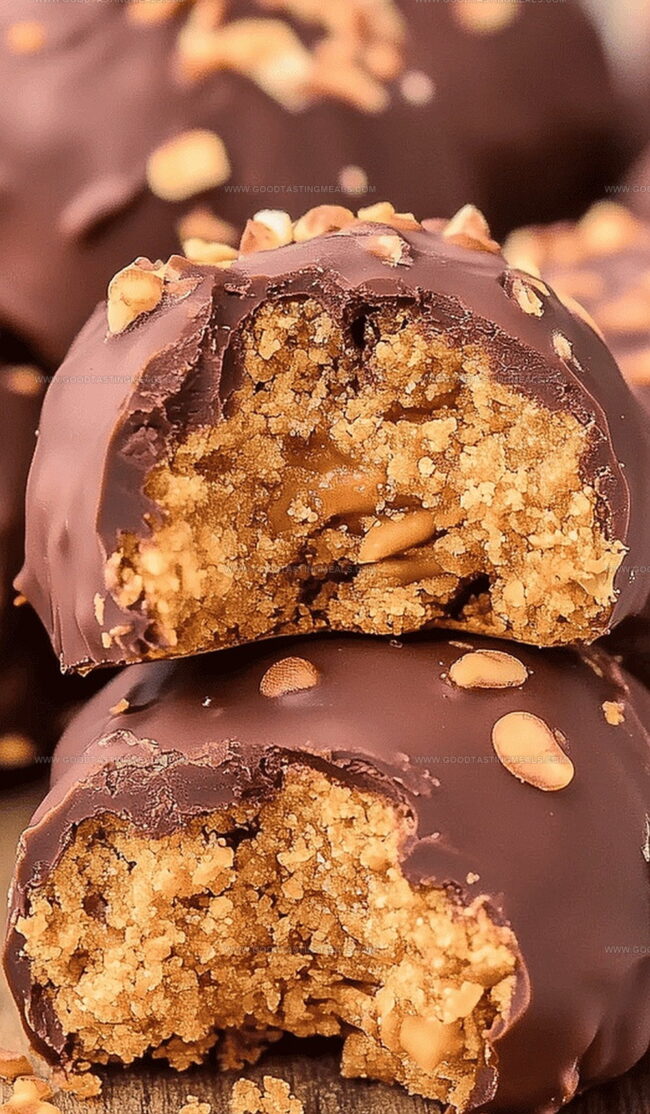
Creamy peanut butter balls with crispy rice krispies offer a delightful no-bake treat that melds sweet and crunchy textures. Chocolate-dipped and irresistibly addictive, you’ll find these bite-sized morsels perfect for any gathering or personal indulgence.


Ingredients

Scale

Main Ingredients:

  • 2 cups peanut butter (creamy or crunchy)
  • 3 ½ cups Rice Krispies cereal
  • 20 ounces (567 grams) chocolate melting wafers

Binding Ingredients:

  • ½ cup (113 grams) salted butter, softened
  • 2 cups powdered sugar

Flavor Enhancers:

  • 2 teaspoons vanilla extract

Instructions

  1. Whisk peanut butter, softened butter, and vanilla extract in a spacious mixing bowl until the mixture achieves a silky, uniform consistency.
  2. Incrementally incorporate powdered sugar, stirring thoroughly after each addition to create a cohesive blend without lumps.
  3. Gently fold Rice Krispies cereal into the peanut butter mixture, ensuring even distribution for consistent texture throughout.
  4. Utilize a cookie scoop to create uniform portions, then roll each scoop between palms to craft smooth, perfectly rounded spheres.
  5. Create a chocolate coating by melting wafers in a microwave-safe container, heating in brief intervals and stirring between each to prevent scorching.
  6. Carefully immerse each peanut butter sphere into the molten chocolate, allowing excess to cascade off before positioning on a parchment-lined surface.
  7. Allow chocolate-enrobed balls to solidify at ambient temperature, or expedite the setting process by placing in refrigerator for approximately 15 minutes until chocolate hardens completely.

Notes

  • Chill the mixture for 30 minutes before rolling to make handling easier and prevent sticking.
  • Use a fork or dipping tool to smoothly coat balls in chocolate, ensuring even coverage without clumping.
  • Store these treats in an airtight container in the refrigerator for up to a week to maintain freshness.
  • Choose creamy peanut butter for smoother texture, avoiding natural varieties that separate easily.
  • Drizzle extra melted chocolate on top for a decorative finish that adds visual appeal.
  • Allow chocolate to set completely at room temperature for the best glossy appearance and snap.
  • Prep Time: 20 minutes
  • Cook Time: 15 minutes
  • Category: Snacks, Desserts
  • Method: Blending
  • Cuisine: American

Nutrition

  • Serving Size: 24
  • Calories: 163
  • Sugar: 7 g
  • Sodium: 83 mg
  • Fat: 9 g
  • Saturated Fat: 4 g
  • Unsaturated Fat: 5 g
  • Trans Fat: 0 g
  • Carbohydrates: 20 g
  • Fiber: 1 g
  • Protein: 3 g
  • Cholesterol: 10 mg
Liam O'Brien

Liam O’Brien

Founder & Recipe Developer

Expertise

  • Traditional Irish Dishes
  • Farm-to-Table Cooking
  • Recipe Creation
  • Teaching Cooking Skills
  • Sustainable Food Practices

Education

Dublin Institute of Technology (now Technological University Dublin)

  • Program: Bachelor of Arts in Culinary Arts
  • Focus: Hands-on training in cooking techniques, kitchen management, and exploring both Irish and international cuisines.

Ballymaloe Cookery School, County Cork, Ireland

  • Program: 12-Week Certificate Course
  • Focus: Farm-to-table cooking, emphasizing the use of fresh, local ingredients and traditional cooking methods.

Liam O’Brien is the co-founder and kitchen soul behind Good Tasting Meals, a chef who believes that cooking shouldn’t feel stressful or complicated.

He earned his culinary stripes at Technological University Dublin and polished his farm-to-table skills at Ballymaloe Cookery School. With over 15 years flipping pans and stirring up stories, Liam has worked in family cafés, bustling bistros, and everything in between.

At Good Tasting Meals, Liam brings you recipes that feel like home: cozy, simple, and full of flavor.

Leave a Reply

Your email address will not be published. Required fields are marked *

Recipe rating 5 Stars 4 Stars 3 Stars 2 Stars 1 Star