

Quick & Tangy Pickle Grilled Cheese Sandwiches Recipe
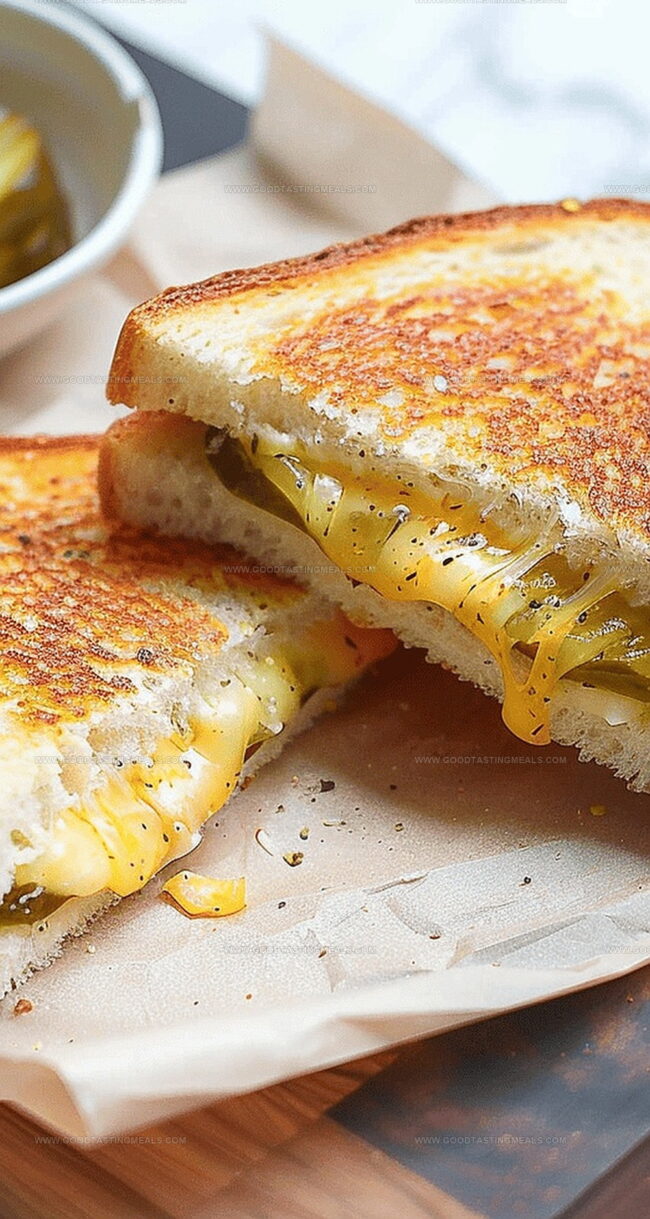
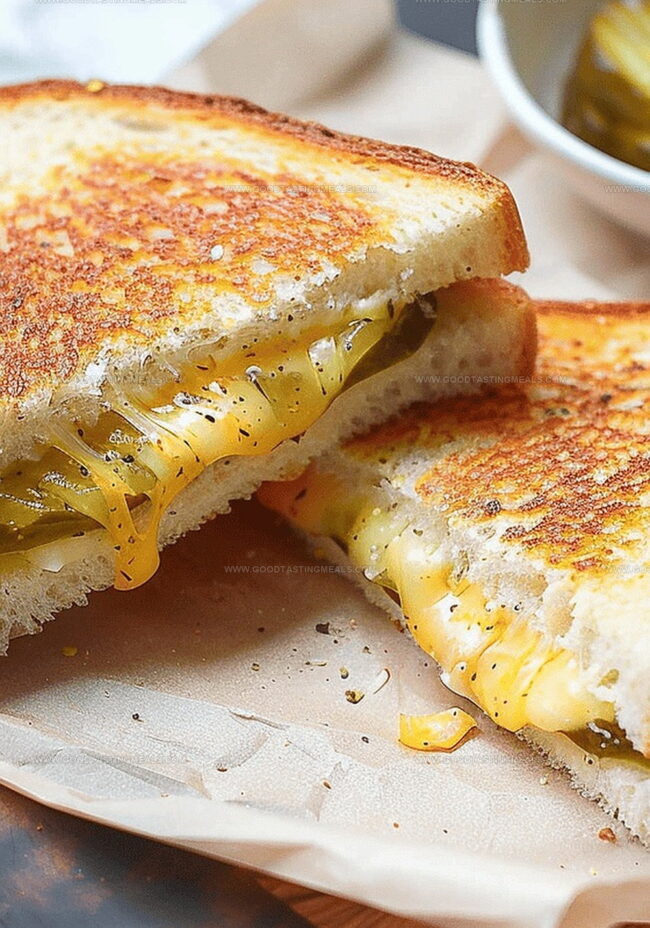
Pickle grilled cheese sandwiches offer a tangy twist on a classic comfort food that reinvents ordinary meals into extraordinary experiences.
Sharp cheese and crisp pickles create a remarkable flavor combination that challenges traditional sandwich expectations.
Countless home cooks have discovered this delightful culinary fusion that balances creamy and acidic notes perfectly.
Each bite delivers a surprising crunch and zesty undertone that elevates the humble sandwich to gourmet status.
Rich, melted cheese blends seamlessly with briny pickle slices, creating a harmonious profile that excites taste buds.
Sophisticated yet simple, this recipe bridges childhood nostalgia with contemporary culinary creativity.
The magic happens when carefully selected ingredients merge into something greater than their individual components.
Why Pickle Grilled Cheese Is So Popular Right Now
What You’ll Need for Pickle Grilled Cheese
Bread Base:Cheese and Pickle Filling:Fat and Seasoning:How to Make Crunchy Pickle Grilled Cheese
Step 1: Prepare the Skillet
Warm a large nonstick skillet over medium-low heat. Ensure the pan is evenly heated but not scorching hot.
Step 2: Butter the Bread
Grab your bread slices and spread a thin, even layer of butter on one side of each slice. The buttered side will create a golden, crispy exterior.
Step 3: Layer the First Cheese Base
Place two bread slices unbuttered-side up. Sprinkle a generous layer of shredded cheese across the bread:Step 4: Add Pickle Magic
Arrange crisp pickle slices over the cheese layer:Step 5: Complete the Cheese Topping
Cover the pickles with another layer of shredded cheese for extra gooey goodness.
Step 6: Top and Seal the Sandwich
Place the remaining bread slices on top, buttered side facing up, creating a perfect sandwich package.
Step 7: Slow Grill to Perfection
Carefully transfer sandwiches to the preheated skillet. Cook slowly for 10 to 15 minutes, allowing cheese to melt and bread to turn deep golden brown.
Step 8: Adjust Heat as Needed
If bread browns too quickly, lower the heat and cover the skillet to ensure even melting.
Step 9: Flip and Finish
Gently flip sandwiches and cook an additional 3 to 5 minutes until both sides are golden and cheese is completely melted.
Step 10: Serve Immediately
Transfer to plates, slice diagonally, and enjoy the crispy, cheesy, pickle-packed delight while it’s hot!
Tips for That Gooey-Crispy Sandwich Perfection
Save and Reheat Pickle Sandwiches the Smart Way
What Tastes Great with Pickle Grilled Cheese
Bold Twists on Grilled Cheese with Pickles
Print
Pickle Grilled Cheese Sandwiches Recipe
- Total Time: 30 minutes
- Yield: 2 1x
Description
Zesty pickle grilled cheese sandwiches combine tangy dill pickles with melted cheddar between crispy, buttered sourdough bread. Creamy, crunchy layers deliver a mouthwatering twist that elevates classic comfort fare for sandwich enthusiasts seeking bold flavor combinations.
Ingredients
Main Ingredients:
- 4 slices bread (such as Texas toast or Italian bread)
- 3 ounces (85 grams) cheddar cheese, coarsely shredded
- 10–12 bread and butter pickle slices, drained and patted dry
Seasoning and Preparation:
- 2 tablespoons (30 milliliters) salted butter, very soft or almost melted
Instructions
- Prepare a large nonstick skillet, warming it to a gentle medium-low temperature for optimal grilled cheese preparation.
- Select bread slices and delicately coat the exterior surfaces with a thin, even layer of butter, ensuring complete coverage.
- Position two bread slices with unbuttered sides facing upward on the work surface.
- Distribute half of the shredded cheese uniformly across the bread surfaces, creating a foundational cheese layer.
- Carefully arrange pickle slices atop the initial cheese layer, providing a tangy and textural element.
- Sprinkle the remaining cheese over the pickles, creating a complete cheese encasement.
- Crown the sandwiches with the remaining bread slices, positioning the buttered sides facing upward.
- Gently transfer the assembled sandwiches to the preheated skillet, maintaining a consistent moderate temperature.
- Allow sandwiches to cook slowly, monitoring closely for approximately 10-15 minutes until cheese begins melting and bottom surfaces transform into a rich golden brown.
- If bread browns excessively quickly, reduce heat and cover the skillet to control cooking intensity.
- Carefully flip sandwiches and continue cooking for an additional 3-5 minutes, ensuring even browning and complete cheese melting.
- Remove sandwiches from skillet, slice diagonally, and serve immediately while warm and crispy.
Notes
- Pick a sturdy bread that can hold melted cheese and withstand grilling without falling apart.
- Slice pickles thinly to ensure even distribution and prevent sandwich from becoming too chunky or difficult to eat.
- Use low and slow cooking method to achieve perfectly golden-brown exterior without burning the bread.
- Shred cheese manually for better melting and more consistent coverage throughout the sandwich.
- Cover skillet while cooking helps cheese melt evenly and prevents bread from burning too quickly.
- Let sandwich rest for a minute after cooking to allow cheese to set and make cutting easier.
- Prep Time: 10 minutes
- Cook Time: 20 minutes
- Category: Lunch, Snacks
- Method: Frying
- Cuisine: American
Nutrition
- Serving Size: 2
- Calories: 465
- Sugar: 4g
- Sodium: 940mg
- Fat: 24g
- Saturated Fat: 14g
- Unsaturated Fat: 8g
- Trans Fat: 0g
- Carbohydrates: 43g
- Fiber: 2g
- Protein: 18g
- Cholesterol: 55mg
Liam O’Brien
Founder & Recipe Developer
Expertise
Education
Dublin Institute of Technology (now Technological University Dublin)
Ballymaloe Cookery School, County Cork, Ireland
Liam O’Brien is the co-founder and kitchen soul behind Good Tasting Meals, a chef who believes that cooking shouldn’t feel stressful or complicated.
He earned his culinary stripes at Technological University Dublin and polished his farm-to-table skills at Ballymaloe Cookery School. With over 15 years flipping pans and stirring up stories, Liam has worked in family cafés, bustling bistros, and everything in between.
At Good Tasting Meals, Liam brings you recipes that feel like home: cozy, simple, and full of flavor.