

Frosty No Bake Peppermint Oreo Cheesecake Recipe Magic
Indulgent desserts often spark joy, and this no bake peppermint Oreo cheesecake recipe promises a delightful twist on classic flavors.
Creamy layers of cool peppermint dance with rich chocolate Oreo crumbs, creating a decadent treat that melts in your mouth.
The magic happens without turning on the oven, making this dessert a stress-free option for holiday gatherings or spontaneous sweet cravings.
Crushed oreos form a delectable crust that provides a satisfying crunch beneath silky smooth cheesecake filling.
peppermint adds a refreshing note that cuts through the richness, balancing each luxurious bite.
Chilled to perfection, this dessert requires minimal effort but delivers maximum flavor and impressive presentation.
Dive into this delectable creation and watch as it becomes the star of any dessert table.
Quick Recipe Overview
No Bake Peppermint Oreo Cheesecake Ingredient List
For Crust Base:For Creamy Filling:For Topping and Finishing:Tool You’ll Want for No Bake Peppermint Oreo Cheesecake
Quick Prep for No Bake Peppermint Oreo Cheesecake
Crush Oreo cookies and blend with melted butter. Press the mixture into a baking dish, creating a solid base that will hold the creamy layers. Refrigerate while preparing the next stage.
Whip cream cheese with sugar and flavor extracts until silky smooth. The mixture should feel light and airy, promising a delightful texture.
Gently heat peppermint chips until they transform into a glossy, liquid cascade. Work carefully to avoid burning the delicate chocolate.
Fold the molten peppermint chips into the cream cheese mixture. Incorporate whipped topping gently, creating a marbled, dreamy landscape of white and pale pink.
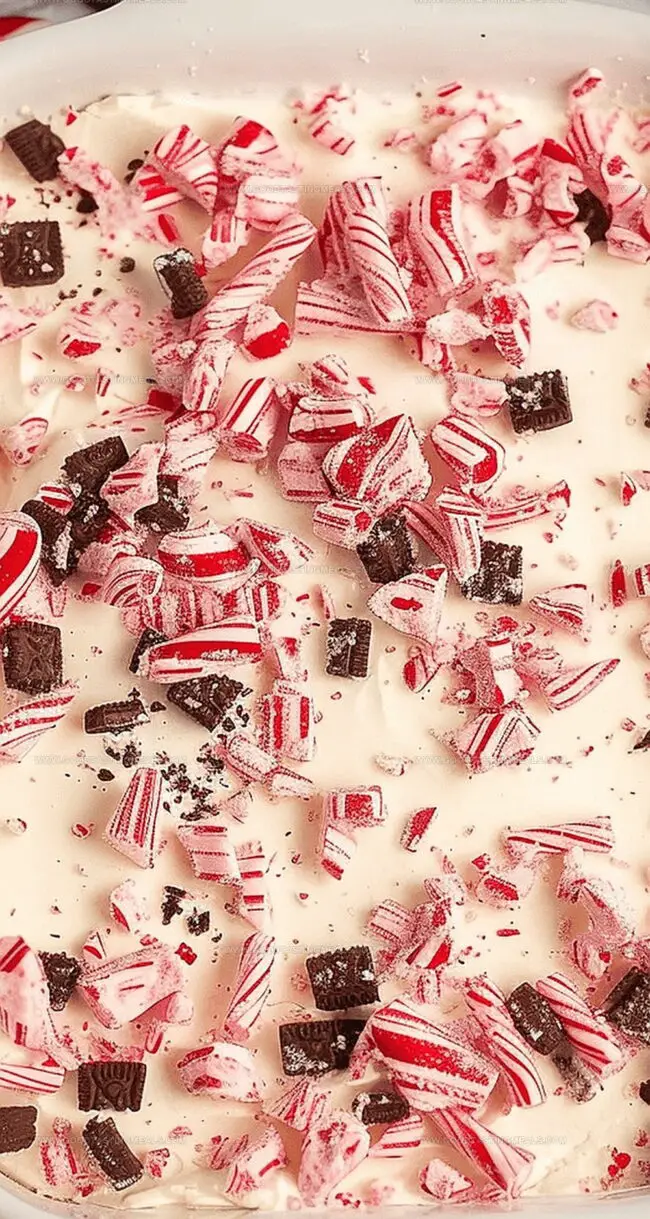
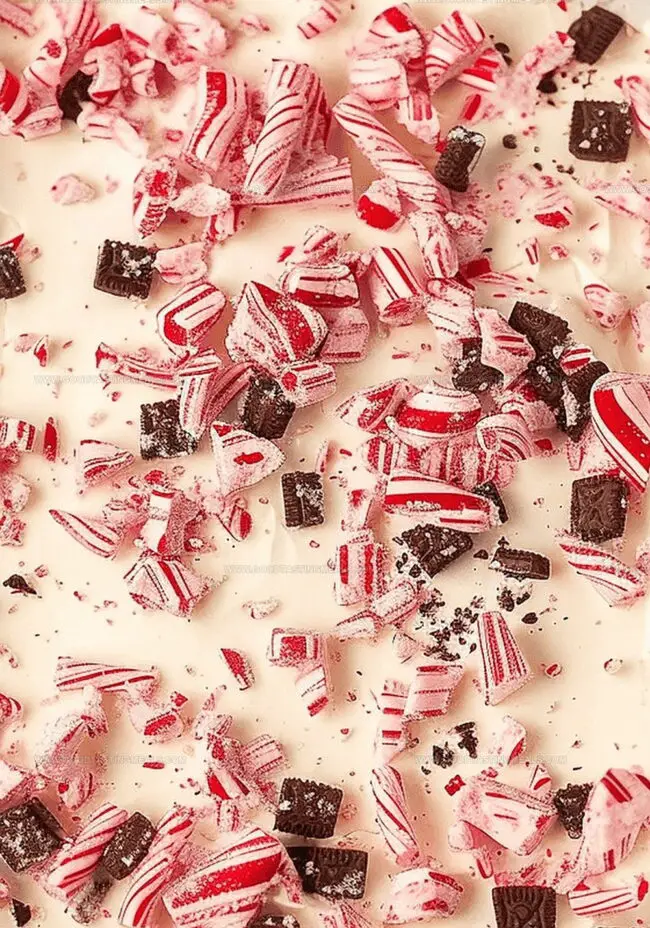
Spread the peppermint cream evenly across the Oreo foundation. Top with a cloud-like layer of whipped cream, creating a winter wonderland of dessert.
Refrigerate the cheesecake until it sets into a firm, slice-ready treat. Sprinkle with remaining peppermint chips for a festive finish. Cut into squares and enjoy the cool, creamy sensation.
Tricks to Change Up Your Peppermint Oreo Cheesecake
Peppermint Oreo Cheesecake Serving Tips
Save and Store No Bake Peppermint Oreo Cheesecake
Print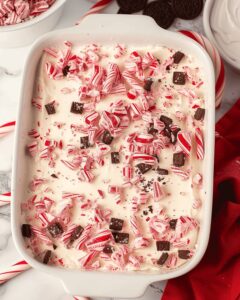
Rich Peppermint Oreo Cheesecake Recipe
- Total Time: 1 hour 20 minutes (including chilling time)
- Yield: 13 1x
Description
Cool peppermint cheesecake nestles smoothly between layers of chocolate cookie crumbs and creamy filling. Delightful holiday dessert promises refreshing mint notes balanced with rich cream cheese for guests seeking indulgent seasonal treats.
Ingredients
- 2 packages (16 oz/452 g) cream cheese, softened
- 2 containers (16 oz/454 g) Cool Whip, thawed
- 3 cups (710 ml) oreo cookie crumbs
- 2 cups (340 g) andes peppermint crunch chips
- ½ cup (113 g) unsalted butter, melted
- ¼ cup (50 g) granulated sugar
- 1 tsp vanilla extract
- ½ tsp peppermint extract
- 2 tsps shortening
Instructions
- Prepare Base: Pulverize Oreo cookies into fine crumbs, mixing thoroughly with melted butter until texture resembles wet sand. Press mixture firmly into rectangular dish, creating a compact and even foundation.
- Chill Crust: Refrigerate base while preparing filling to help solidify and stabilize the foundation.
- Create Filling: Whip cream cheese until silky smooth, blending in granulated sugar, vanilla, and peppermint extract until glossy and uniform. Melt peppermint chips with shortening in microwave, stirring carefully between intervals until completely liquid.
- Combine Ingredients: Incorporate molten peppermint mixture into cream cheese base, stirring vigorously to create a marbled filling. Gently fold in Cool Whip, maintaining a light and airy consistency.
- Layer and Decorate: Spread peppermint cream cheese filling evenly across chilled Oreo crust. Top with a pristine layer of Cool Whip and sprinkle remaining peppermint chips for festive crunch.
- Chill and Serve: Refrigerate dessert for 1-2 hours to set layers and meld flavors. Slice into neat squares and serve chilled, storing any leftovers in a sealed container in the refrigerator.
Notes
- Crush Cookies Carefully: Ensure Oreo cookies are ground into fine, uniform crumbs without large pieces for a smooth, consistent crust texture.
- Chill Crust Strategically: Refrigerating the base helps solidify the butter-cookie mixture, creating a sturdy foundation for the creamy filling.
- Melt Peppermint Chips Gradually: Use short microwave intervals and stir frequently to prevent burning and achieve a silky, smooth melted consistency.
- Fold Gently with Cool Whip: Incorporate whipped topping delicately to maintain the light, airy texture of the cheesecake filling.
- Prep Time: 20 minutes
- Cook Time: 0 minutes
- Category: Desserts
- Method: None
- Cuisine: American
Nutrition
- Serving Size: 13
- Calories: 471
- Sugar: 32 g
- Sodium: 291 mg
- Fat: 30 g
- Saturated Fat: 18 g
- Unsaturated Fat: 10 g
- Trans Fat: 0 g
- Carbohydrates: 47 g
- Fiber: 1 g
- Protein: 5 g
- Cholesterol: 57 mg
Sophie Martin
Co-Founder & Content Creator
Expertise
Education
Stellenbosch University, South Africa
South African Chefs Academy, Cape Town
Sophie Martin is the nutrition brain and feel-good foodie at Good Tasting Meals. With a degree in Human Nutrition from Stellenbosch University and chef training from the South African Chefs Academy, Sophie brings balance to the table, literally. She loves creating meals that are easy to make, great to eat, and good for your body too.
Her recipes are made for everyday living, with a little flair and a lot of heart. Sophie’s not here to count calories, she’s here to show you how fresh, simple food can fit into your life, taste amazing, and still be nourishing.