

Effortless No-Bake Pumpkin Mini Cheesecakes Recipe
Autumn whispers sweet promises of comfort, and these no bake pumpkin mini cheesecakes bring pure seasonal magic right to your dessert table.
Creamy textures blend seamlessly with warm spices in each delightful bite.
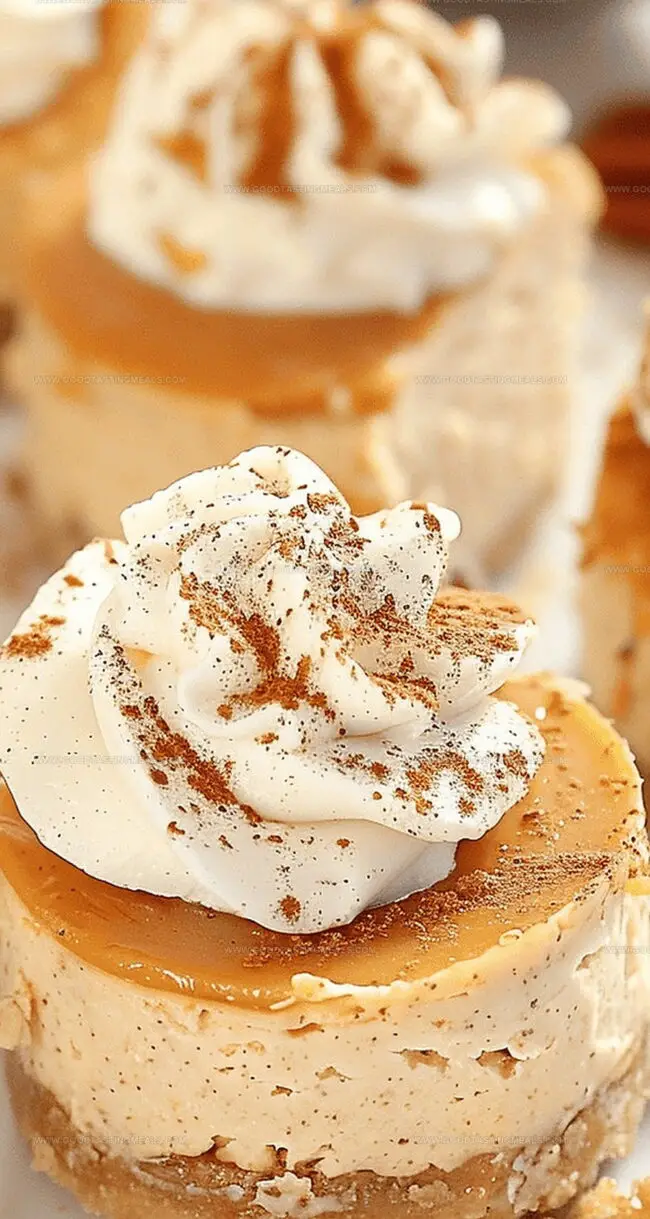
The silky smooth filling nestles perfectly atop a buttery graham cracker base, creating a dessert that screams cozy indulgence.
pumpkin lovers will swoon over the rich, velvety layers packed with classic fall flavors.
These mini cheesecakes require zero baking, making them an effortless treat for busy home bakers.
Simple ingredients and minimal effort result in an impressive dessert that looks like you spent hours crafting perfection.
Dive into these mini delights and let the pumpkin spice enchantment begin.
Quick Recipe Overview
No Bake Pumpkin Mini Cheesecakes Ingredient List
For The Crust:For The Filling:For Topping and Garnish:Tools for Making No Bake Pumpkin Mini Cheesecakes
Steps to Assemble No Bake Pumpkin Mini Cheesecakes

Pumpkin Mini Cheesecake Magic
Crush graham crackers into a fine powder and mix with warm, melted butter. Press the mixture firmly into mini baking cups, creating a perfectly compact base that will hold your dreamy cheesecake layers.
Grab cold heavy cream and transform it into fluffy cloud-like peaks using an electric mixer. This light and airy whipped cream will become the secret weapon in your dessert.
Blend softened cream cheese with powdered sugar until silky smooth. Stir in rich pumpkin puree and warming spices that capture the essence of autumn’s cozy spirit.
Carefully fold the whipped cream into the pumpkin mixture, creating a delicate dance of textures that promises incredible smoothness in every single bite.
Spoon the luxurious filling into your prepared crusts, smoothing the tops with gentle strokes. Refrigerate these little delights for several hours, allowing them to set into a decadent dessert.
Before serving, crown your mini cheesecakes with optional toppings like a dollop of whipped cream, drizzle of caramel, or sprinkle of crushed pecans to elevate the presentation.
Tips to Customize Pumpkin Mini Cheesecakes
How to Serve No Bake Pumpkin Mini Cheesecakes
Storing Pumpkin Mini Cheesecakes the Way
Print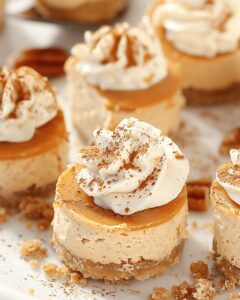
Silky Pumpkin Mini Cheesecakes
- Total Time: 15 minutes
- Yield: 13 1x
Description
Creamy no bake pumpkin mini cheesecakes offer a delightful autumn dessert that blends smooth cream cheese with warm spices. Fall gatherings become memorable when you serve these charming individual treats with graham cracker crusts.
Ingredients
- ¾ cup (180 milliliters) pumpkin puree
- 8 oz (226 grams) cream cheese, room temperature
- ½ cup (120 milliliters) heavy whipping cream, cold
- 1 cup (240 milliliters) graham cracker crumbs (7–8 whole crackers)
- 5 tbsps (75 milliliters) unsalted butter, melted
- ½ cup (120 milliliters) powdered sugar
- 2 ½ tsps pumpkin pie spice
- 2 tbsps (30 milliliters) granulated sugar
- 1 tsp vanilla extract
- ¼ tsp ground cinnamon
Instructions
- Crust Formation: Pulverize graham crackers with sugar, cinnamon, and melted butter, creating a cohesive mixture. Compress the crumb base into each baking cup using a shot glass, ensuring a dense, uniform foundation.
- Cream Preparation: Whip heavy cream with an electric mixer until peaks form robustly, then set aside. In a separate bowl, blend cream cheese and powdered sugar until silky smooth.
- Flavor Infusion: Fold pumpkin puree, vanilla extract, and pumpkin pie spice into the cream cheese mixture, ensuring complete integration. Gently incorporate the whipped cream, maintaining a light, airy texture.
- Assembly and Chilling: Evenly distribute the pumpkin cheesecake filling across the prepared crusts, smoothing the surface with a spatula. Refrigerate for 3-4 hours to achieve a firm, luxurious consistency.
- Garnishing: Prior to serving, embellish with optional toppings like additional whipped cream, salted caramel drizzle, graham cracker crumbs, or chopped pecans to elevate visual and flavor dimensions.
Notes
- Crust Perfection: Press graham cracker mixture firmly using a shot glass to create a compact, uniform base that won’t crumble when serving.
- Cream Whipping Technique: Whip heavy cream until stiff peaks form to ensure a light, airy texture that maintains structural integrity in the cheesecake filling.
- Smooth Mixing Strategy: Blend cream cheese mixture thoroughly to eliminate lumps, creating a silky-smooth consistency that guarantees a professional-quality dessert.
- Chilling Magic: Allow minimum 3-4 hours refrigeration to set cheesecakes completely, developing rich flavor and perfect texture for an impressive no-bake treat.
- Prep Time: 15 minutes
- Cook Time: 0 minutes
- Category: Desserts, Snacks
- Method: None
- Cuisine: American
Nutrition
- Serving Size: 13
- Calories: 210
- Sugar: 10 g
- Sodium: 150 mg
- Fat: 15 g
- Saturated Fat: 9 g
- Unsaturated Fat: 6 g
- Trans Fat: 0 g
- Carbohydrates: 19 g
- Fiber: 1 g
- Protein: 3 g
- Cholesterol: 40 mg
Sophie Martin
Co-Founder & Content Creator
Expertise
Education
Stellenbosch University, South Africa
South African Chefs Academy, Cape Town
Sophie Martin is the nutrition brain and feel-good foodie at Good Tasting Meals. With a degree in Human Nutrition from Stellenbosch University and chef training from the South African Chefs Academy, Sophie brings balance to the table, literally. She loves creating meals that are easy to make, great to eat, and good for your body too.
Her recipes are made for everyday living, with a little flair and a lot of heart. Sophie’s not here to count calories, she’s here to show you how fresh, simple food can fit into your life, taste amazing, and still be nourishing.