

Fluffy Stovetop Custard Cream Buns Recipe for Beginners
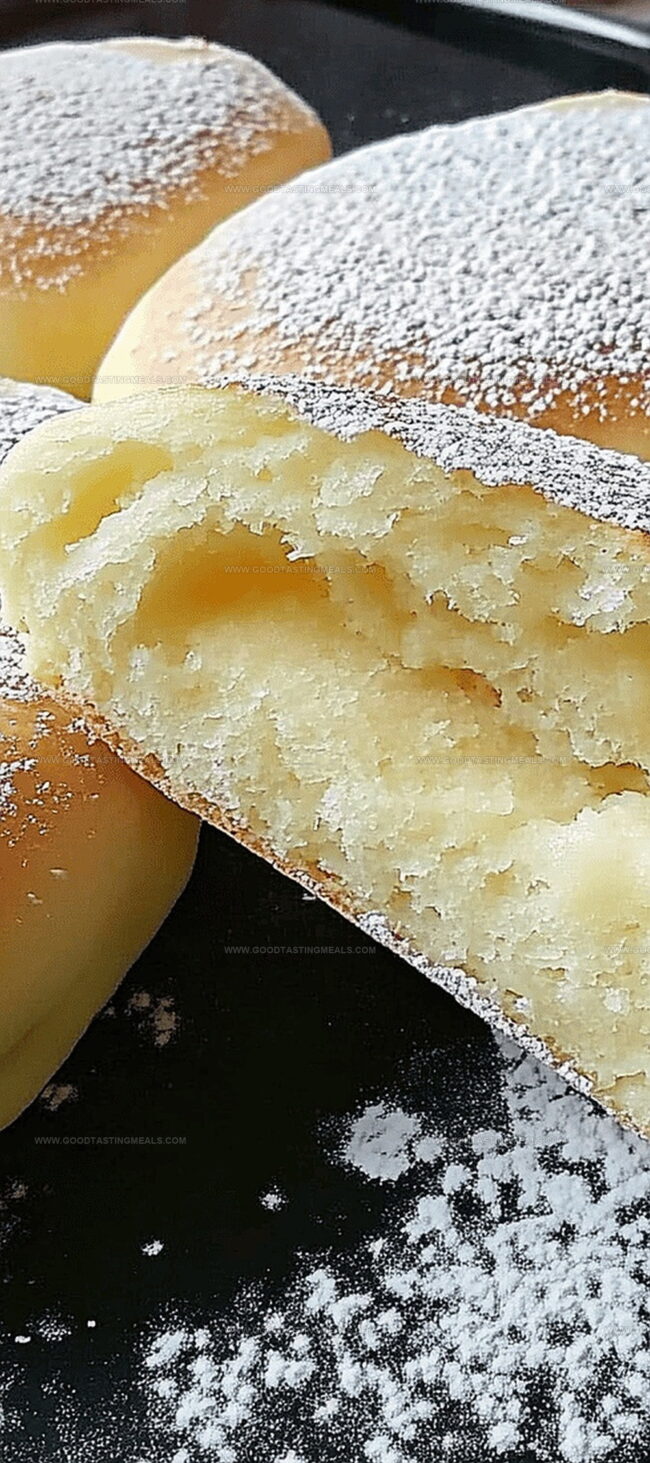
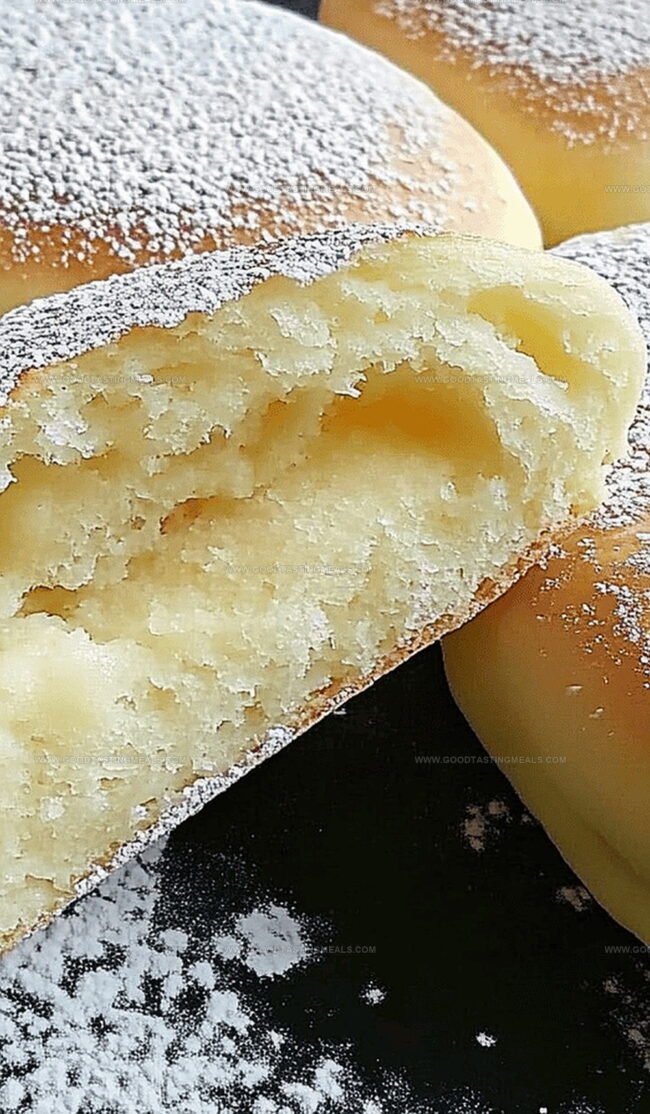
Soft, pillowy buns filled with silky stovetop custard cream will transport you to a bakery in Hong Kong.
These delectable treats blend tender dough with a luscious, creamy filling that melts in your mouth.
Making these buns requires simple ingredients and a touch of culinary magic.
The homemade custard cream emerges as the star, promising a rich and luxurious experience.
Warm, freshly steamed buns cradle the smooth custard, creating a delightful contrast of textures.
Each bite delivers a comforting burst of sweetness that lingers deliciously.
Let’s dive into this irresistible recipe that turns an ordinary afternoon into a special moment of pure indulgence.
Quick Recipe Overview
Everything in Stovetop Custard Cream Buns
For Dough Base:For Liquid Ingredients:For Custard Filling:Tools to Make Stovetop Custard Cream Buns
Cooking Instructions for Stovetop Custard Cream Buns
Gather flour, yeast, sugar, and salt in a spacious mixing bowl. Warm water, milk, and oil blend together creating a liquid base. Pour gradually into dry ingredients, mixing until a cohesive mixture forms. Knead the soft dough smoothly for several minutes until it becomes elastic and supple.
Cover the dough with a soft cloth and allow it to relax in a cozy, warm space. Let the mixture rise and develop flavor for about an hour, watching it transform and expand.
Gently warm milk in a small pan. Whisk egg yolks with sugar and cornstarch in a separate container. Slowly incorporate warm milk while continuously stirring. Return the mixture to the pan, cooking over medium heat until it thickens into a luxurious cream. Remove from heat and add vanilla for extra depth.
After the dough has risen, gently press it down and reshape. Divide into equal portions and roll into delicate circles. Spoon cooled custard onto one half of each circle, then fold and seal the edges carefully.
Heat a non-stick pan on low temperature. Lightly brush with oil. Place the buns gently, cooking slowly until golden brown on each side. Once done, let them rest briefly before serving. A light dusting of powdered sugar adds a delightful finishing touch.
Tips for Custard Cream Bun Perfection
Serve Stovetop Custard Cream Buns Warm
How to Store Custard Cream Buns
Print
Silky Stovetop Custard Cream Buns Recipe
- Total Time: 1 hour 35 minutes
- Yield: 13 1x
Description
Classic Chinese stovetop custard cream buns offer delightful comfort with silky filling and pillowy dough. Sweet pastry lovers relish this authentic treat that connects culinary heritage with delicious satisfaction you’ll savor completely.
Ingredients
- 1 ¾ cups (220 grams) all-purpose or cake flour
- 1 egg yolk
- 1 tsp instant dry yeast
- 1 tbsp white granulated or castor sugar
- 2 tbsps sugar (for custard)
- ½ cup (120 mL/milliliters) warm water
- ½ cup (120 mL/milliliters) milk
- 1 tbsp milk
- 1 tbsp canola or sunflower oil
- ⅓ tsp salt
- 1 tbsp cornstarch
- 1 tsp vanilla extract
Instructions
- Dough Preparation: Blend flour, yeast, sugar, and salt in a large mixing bowl, creating a solid dry foundation.
- Liquid Integration: Warm milk, water, and oil, then seamlessly fold into dry ingredients to form a unified dough mixture.
- Kneading Process: Energetically work the dough for 5-7 minutes until achieving a smooth, elastic consistency with a silky sheen.
- First Fermentation: Cover dough with a clean cloth, allowing it to rise in a warm, draft-free zone for approximately one hour until doubled in volume.
- Custard Creation: Gently heat milk in a saucepan, then whisk egg yolks, sugar, and cornstarch in a separate bowl to form a velvety custard base.
- Custard Development: Gradually stream warm milk into egg mixture, continuously whisking, then return to saucepan and cook over medium heat until the mixture transforms into a thick, pudding-like consistency.
- Custard Finishing: Remove from heat, incorporate vanilla extract, and allow custard to cool completely to room temperature.
- Dough Shaping: Deflate risen dough with gentle kneading, divide into 12 equal portions, and roll each into perfect circles.
- Filling and Sealing: Position a generous custard dollop on one half of each dough circle, fold carefully, and seal edges completely.
- Proofing and Cooking: Let assembled buns rest for 15 minutes, then cook in a lightly oiled non-stick pan over low heat, flipping midway to achieve uniform golden-brown coloration.
- Final Touches: Transfer cooked buns to a cooling rack and optionally dust with a delicate layer of powdered sugar before serving warm.
Notes
- Dough Hydration Tip: Gradually add warm liquid to flour mixture for smoother, more elastic dough texture that prevents clumping.
- Custard Consistency Check: Continuously whisk milk and egg mixture to avoid lumps and achieve silky, pudding-like custard without curdling.
- Low Heat Cooking Technique: Maintain gentle, low heat when pan-frying buns to ensure even golden-brown exterior without burning.
- Proofing Patience: Allow dough and filled buns to rest in warm area, which develops deeper flavor and ensures soft, fluffy texture.
- Prep Time: 20 minutes
- Cook Time: 15 minutes
- Category: Desserts, Snacks
- Method: Frying
- Cuisine: Chinese
Nutrition
- Serving Size: 13
- Calories: 120
- Sugar: 6 g
- Sodium: 70 mg
- Fat: 3.5 g
- Saturated Fat: 0.5 g
- Unsaturated Fat: 3 g
- Trans Fat: 0 g
- Carbohydrates: 19 g
- Fiber: 0.5 g
- Protein: 3 g
- Cholesterol: 15 mg
Sophie Martin
Co-Founder & Content Creator
Expertise
Education
Stellenbosch University, South Africa
South African Chefs Academy, Cape Town
Sophie Martin is the nutrition brain and feel-good foodie at Good Tasting Meals. With a degree in Human Nutrition from Stellenbosch University and chef training from the South African Chefs Academy, Sophie brings balance to the table, literally. She loves creating meals that are easy to make, great to eat, and good for your body too.
Her recipes are made for everyday living, with a little flair and a lot of heart. Sophie’s not here to count calories, she’s here to show you how fresh, simple food can fit into your life, taste amazing, and still be nourishing.