

Easy Spicy Tuna Onigiri Recipe: Savory Japanese Comfort Snacks
Spicy tuna onigiri reinvents ordinary rice into a vibrant culinary adventure that captures the essence of Japanese street food.
Compact yet bursting with flavor, this handheld delicacy combines the rich umami of seafood with a tantalizing heat that dances across your palate.
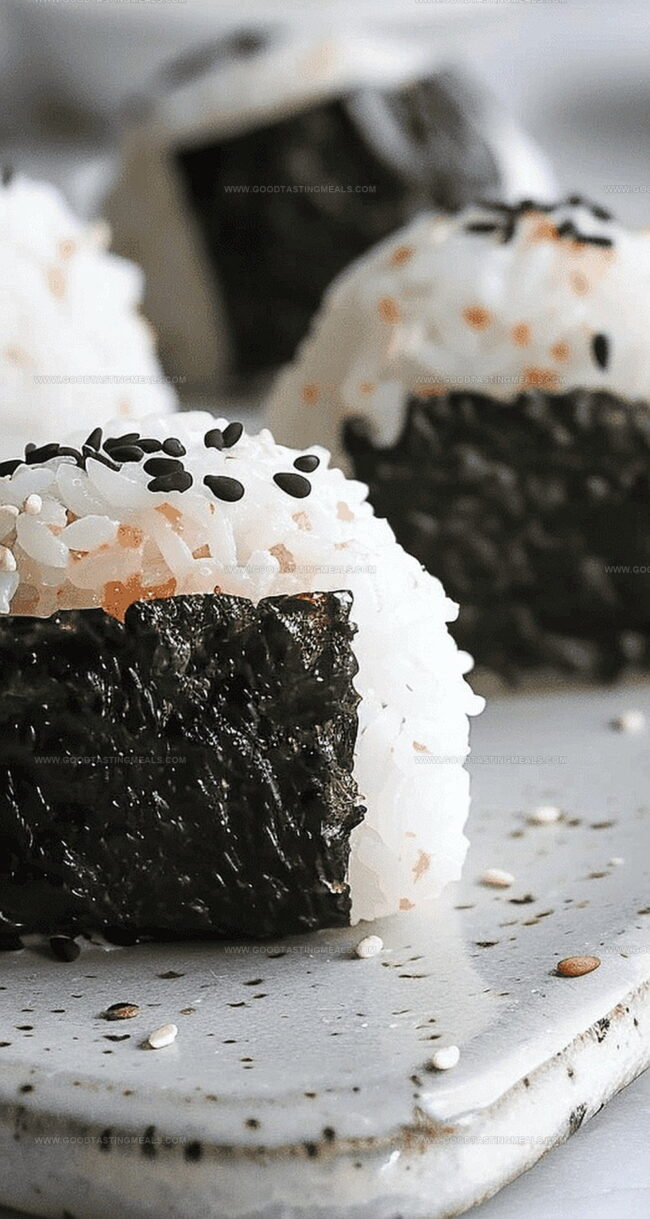
Triangular pockets of seasoned rice cradle a zesty tuna mixture, creating a perfect balance between texture and taste.
Traditional techniques merge with bold contemporary ingredients, elevating this simple snack into a gourmet experience.
Japanese home cooks and professional chefs alike treasure these portable delights for their versatility and intense flavor profile.
Carefully selected spices and fresh ingredients distinguish this version from standard rice preparations.
Each bite promises a harmonious blend of heat, freshness, and comfort that will transport you to bustling Tokyo street markets.
Spicy Tuna Onigiri With a Kick Inside
What You’ll Need to Wrap Up These Tuna Bites
Rice Ingredients:Filling Ingredients:Wrapping and Garnish Ingredients:How to Shape and Fill Spicy Tuna Onigiri
Step 1: Prepare Rice Base
Rinse sushi rice under cold water until water runs clear. Cook rice in a rice cooker or pot following package instructions. Transfer cooked rice to a large bowl, season with salt, mix thoroughly, and let cool to room temperature.
Step 2: Create Spicy Tuna Filling
In a small bowl, combine ingredients for tuna mixture:Mix well and set aside.
Step 3: Set Up Workspace
Lay a 15 x 15 inch piece of cling film on a clean surface. Keep a rice paddle nearby and moisten with water.
Step 4: Shape Rice Base
Divide cooled rice into four equal portions. Place one portion on cling film and gently flatten into a circle about ½ to ¾ inch thick.
Step 5: Add Tuna Filling
Spoon a portion of spicy tuna mixture into the center of the rice circle.
Step 6: Form Onigiri Ball
Lift the corners of cling film and twist to create a ball, ensuring tuna filling is completely enclosed.
Step 7: Shape Into Triangle
Gently press down to flatten the ball into a 2-inch thick disc. Use thumb and index finger to shape into a triangular form.
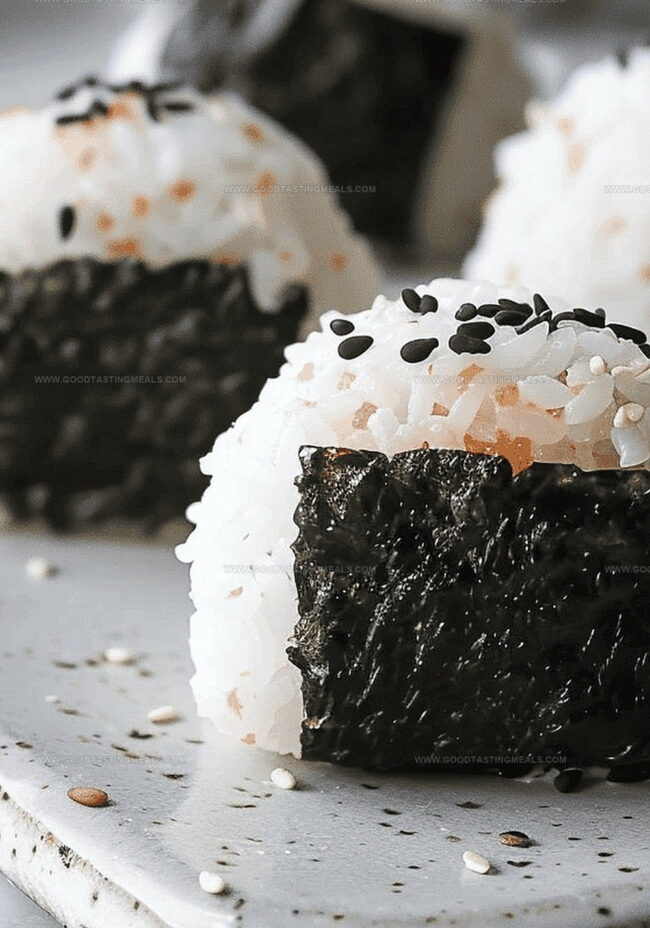
Step 8: Wrap And Garnish
Cut nori sheets into strips. Wrap a strip around the base of each rice ball. Optional: Sprinkle black sesame seeds on top for extra flavor and texture.
Tips to Get the Rice Just Right
Best Ways to Store and Reheat Onigiri
Delicious Pairings for Spicy Rice Snacks
Creative Fillings for Tuna Onigiri Fans
Print
Spicy Tuna Onigiri Recipe
- Total Time: 50 minutes
- Yield: 2 1x
Description
Japanese rice balls embrace bold flavors with this spicy tuna onigiri recipe. Crisp nori wraps around seasoned sushi rice and zesty tuna, delivering a perfect handheld snack you’ll crave at first bite.
Ingredients
Main Protein:
- 104 grams canned tuna, drained
Rice and Base Ingredients:
- 240 grams (or 1.5 rice cooker cups) sushi rice, uncooked
- ½ teaspoon salt
- Water to moisten hands and rice paddle
Flavor and Garnish Ingredients:
- ½ tablespoon Japanese mayo (or regular mayo)
- 1 teaspoon sriracha sauce
- ½ or 2 sheets nori (based on personal preference)
- ½ teaspoon black sesame seeds (optional for garnish)
Instructions
- Thoroughly cleanse sushi rice under running water until the liquid becomes transparent, then cook using a rice cooker or pot following package guidelines.
- Transfer cooked rice to a spacious mixing bowl, incorporate salt evenly, and allow to cool to ambient temperature.
- Create a spicy tuna filling by blending drained tuna with Japanese mayonnaise and sriracha sauce in a separate container.
- Position a square piece of plastic wrap on a clean work surface and lightly dampen a rice paddle with water.
- Portion the cooled rice into four uniform segments.
- Spread one rice portion onto the plastic wrap, creating a smooth, circular layer approximately half an inch thick.
- Delicately place a portion of the prepared spicy tuna mixture directly in the rice circle’s center.
- Gather the plastic wrap’s edges and gently twist, forming a compact ball that completely encases the tuna filling.
- Softly compress the rice ball, transforming it into a disc roughly two inches thick.
- Utilize your thumb and index finger to mold the disc into a triangular shape with defined edges.
- Slice nori sheets into appropriate strips and carefully wrap around the base of each rice triangle.
- Optional: Sprinkle black sesame seeds over the onigiri for added texture and visual appeal.
Notes
- Prep rice carefully by rinsing until water runs clear to remove excess starch, ensuring perfect sticky texture for shaping onigiri.
- Use wet rice paddle or hands to prevent sticky rice from clinging, making the forming process smooth and easy.
- Create tight seal when wrapping tuna filling to prevent ingredients from falling out during handling or eating.
- Select high-quality canned tuna and Japanese mayo for authentic flavor and creamy consistency in the spicy mixture.
- Nori wrapping not only adds traditional presentation but also provides convenient grip and extra umami flavor to the rice ball.
- Refrigerate onigiri immediately if not serving right away to maintain optimal texture and food safety.
- Prep Time: 20 minutes
- Cook Time: 30 minutes
- Category: Lunch, Snacks
- Method: Blending
- Cuisine: Japanese
Nutrition
- Serving Size: 2
- Calories: 360
- Sugar: 1 g
- Sodium: 450 mg
- Fat: 18 g
- Saturated Fat: 3 g
- Unsaturated Fat: 15 g
- Trans Fat: 0 g
- Carbohydrates: 36 g
- Fiber: 1 g
- Protein: 18 g
- Cholesterol: 25 mg
Liam O’Brien
Founder & Recipe Developer
Expertise
Education
Dublin Institute of Technology (now Technological University Dublin)
Ballymaloe Cookery School, County Cork, Ireland
Liam O’Brien is the co-founder and kitchen soul behind Good Tasting Meals, a chef who believes that cooking shouldn’t feel stressful or complicated.
He earned his culinary stripes at Technological University Dublin and polished his farm-to-table skills at Ballymaloe Cookery School. With over 15 years flipping pans and stirring up stories, Liam has worked in family cafés, bustling bistros, and everything in between.
At Good Tasting Meals, Liam brings you recipes that feel like home: cozy, simple, and full of flavor.