Summer Charred Corn On The Cob Recipe

Smoky Summer Charred Corn On The Cob Recipe That Sizzles

Sizzling summer charred corn on the cob brings vibrant flavors to any backyard gathering, upgradeing simple ingredients into a mouthwatering sensation.

Grilling elevates this classic side dish with smoky, caramelized notes that dance across your palate.

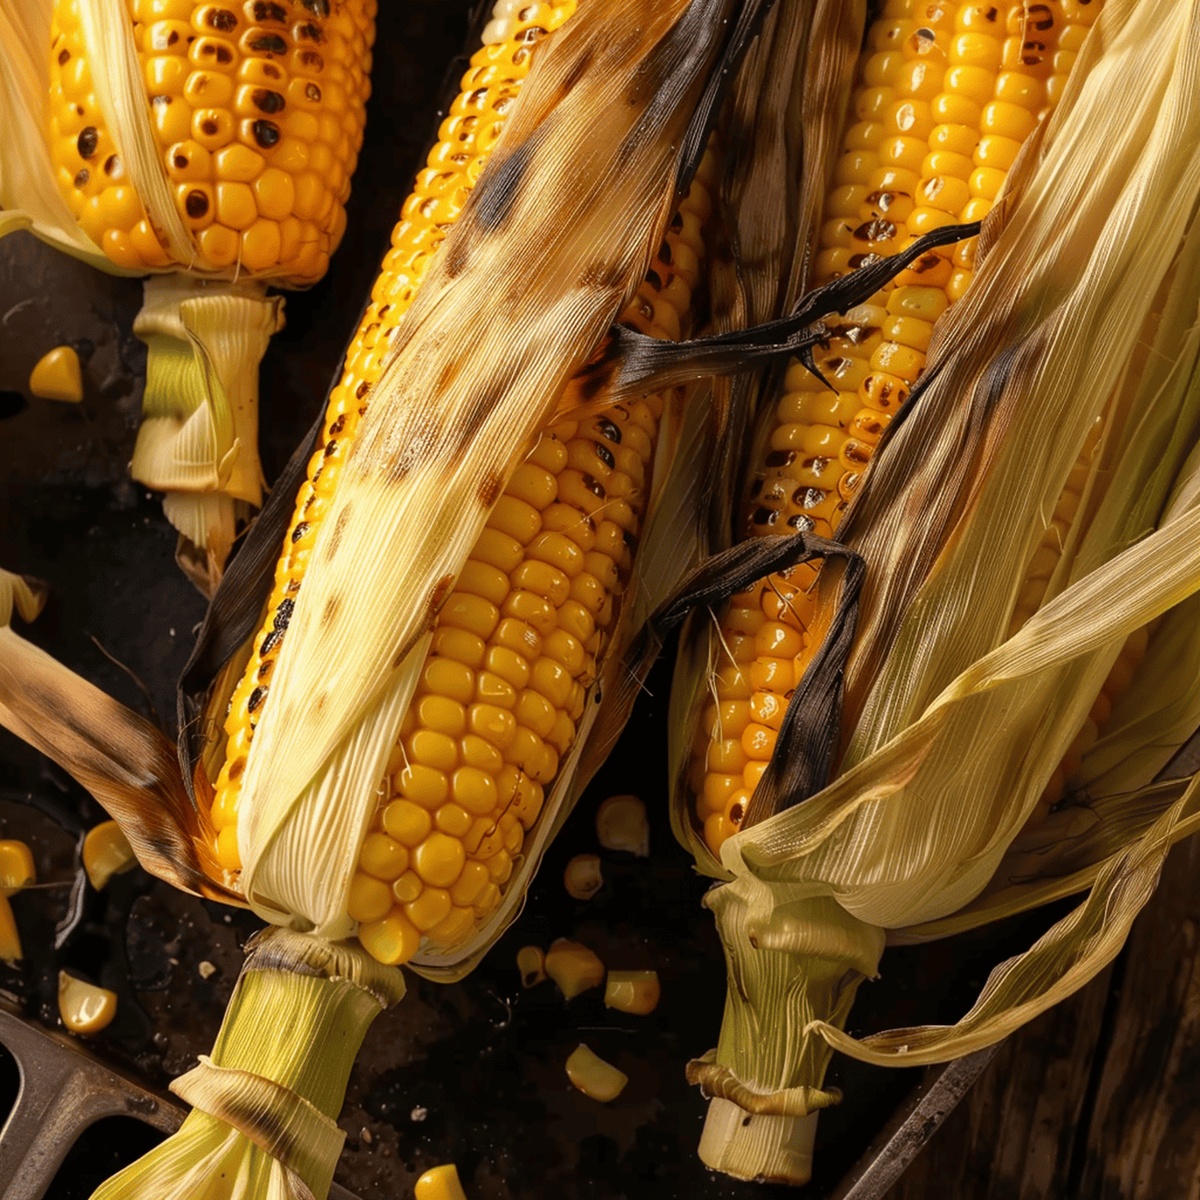
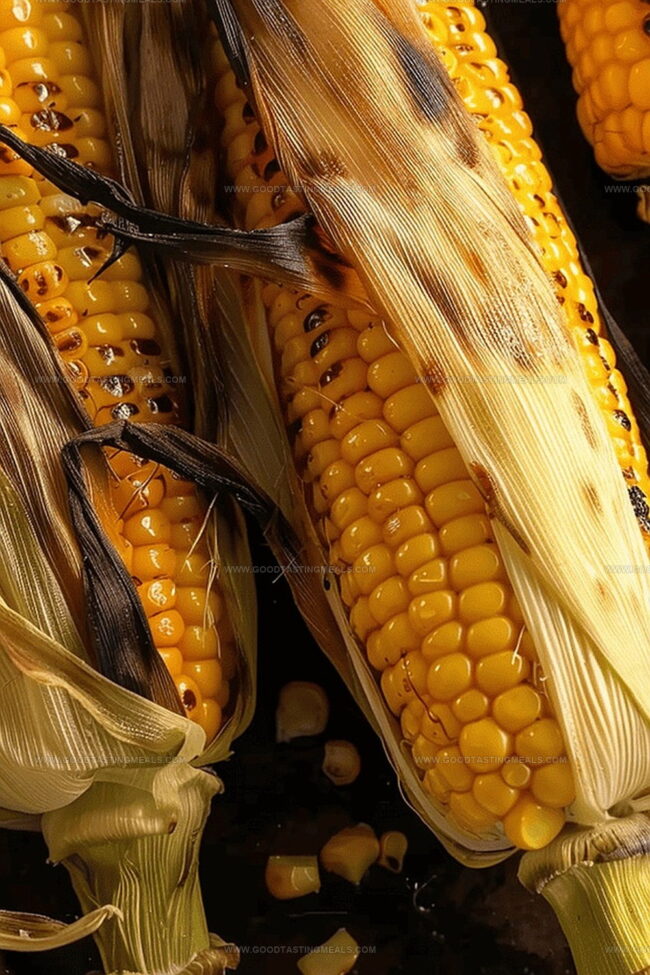
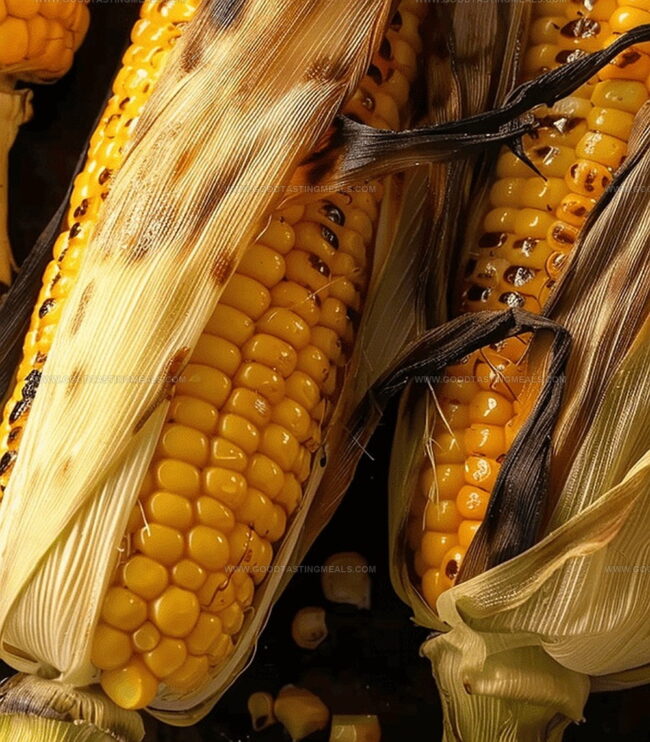
Sweet kernels develop a rich, golden exterior when kissed by intense heat, creating an irresistible texture that crackles with each bite.

Regional culinary traditions have long celebrated this technique, connecting food lovers through shared experiences of outdoor cooking.

Perfectly seasoned and expertly charred, these golden ears promise a delightful combination of rustic charm and sophisticated taste.

Fresh ingredients and a few strategic techniques will help you master this crowd-pleasing summer staple.

Pure summer magic awaits anyone ready to embrace this delectable grilling adventure.

Summer Charred Corn on the Cob That Pops with Flavor

  • Unlock Summer Flavor Explosion: This grilling method transforms simple corn into a smoky, charred delicacy that bursts with natural sweetness and intense grill-kissed flavor.
  • Foolproof Grilling Technique: The soaking method protects kernels from burning while creating a steaming effect inside the husks, ensuring perfectly cooked corn every single time.
  • Zero-Fuss Preparation: With minimal ingredients and simple steps, this recipe delivers restaurant-quality results that anyone can master, making it ideal for backyard barbecues and casual summer gatherings.
  • Versatile Seasoning Canvas: After grilling, the corn becomes a blank slate for creative toppings like herb butter, chili powder, parmesan cheese, or classic salt and pepper, allowing endless customization.

Ingredients That Bring Out the Best in Charred Corn

Fresh Corn:
  • Sweet Corn: Juicy summer vegetable that provides the main base for this charred dish. Best when picked recently with bright green husks and plump kernels.
Main Cooking Ingredients:
  • Water: Helps keep corn moist and prevents burning during grilling. Use clean, fresh water for soaking.
  • Butter: Adds rich, creamy flavor and helps seasonings stick to corn. Choose unsalted butter for better control of salt levels.
Seasoning Ingredients:
  • Salt: Enhances natural corn sweetness. Kosher or sea salt works best for even distribution.
  • Black Pepper: Provides mild heat and depth of flavor. Freshly ground pepper offers more robust taste.

How to Grill the Perfect Summer Corn

Step 1: Prepare Corn Husks

Gently peel away the top 2 layers of outer husk, keeping some protective layers intact for grilling.

Step 2: Soak Corn

Submerge corn completely in a large water container for 60 minutes, ensuring full coverage.

Step 3: Fire Up the Grill

Preheat grill to a toasty 450°F (232°C), creating the perfect charring environment.

Step 4: Place Corn on Grill

Transfer corn directly onto the hot grill grates over direct heat.

Step 5: Rotate and Char

Grill corn for 20 minutes, rotating every 5 minutes to achieve even, beautiful charred marks on the husks.

Step 6: Cool and Remove

Take corn off the grill and let cool until safe to handle.

Step 7: Unwrap and Dress

  • Carefully pull back the husks
  • Generously spread butter
  • Sprinkle with your favorite seasonings (salt, pepper, herbs)
Pro Tip: For extra flavor, try adding:
  • Chili powder
  • Lime zest
  • Grated parmesan
  • Fresh chopped cilantro

Tips to Get Even Charring and Juicy Bites

  • Hydrate Thoroughly: Soaking corn for a full hour prevents the husks from burning too quickly and helps steam the kernels to juicy perfection.
  • Check Grill Temperature: Maintain a consistent 450°F to ensure even charring and prevent scorching, which can make corn taste bitter.
  • Rotate Strategically: Turn corn every 5 minutes to create a beautiful, uniform char and develop rich, smoky flavor across all sides.
  • Test for Doneness: Kernels should look plump, bright, and slightly darkened when perfectly grilled, indicating they're tender and sweet.
  • Butter Boldly: Apply melted butter immediately after peeling back husks to help seasonings stick and enhance the corn's natural sweetness.

Storing and Reheating Charred Corn the Right Way

  • Refrigeration: Wrap leftover corn in aluminum foil or place in an airtight container. Stored properly, grilled corn stays fresh for 3-4 days in the refrigerator. Consume quickly to maintain optimal flavor and texture.
  • Reheating: Warm corn in the oven by wrapping in foil and heating at 350°F for 5-7 minutes. Alternatively, microwave for 30-45 seconds, rotating halfway through to ensure even heating. Brush with additional butter before serving to restore moisture and enhance taste.
  • Freezing: Cut kernels off the cob and store in freezer-safe bags for up to 3 months. Thaw overnight in the refrigerator before reheating. Frozen corn works perfectly in salads, soups, and side dishes.

What to Serve Alongside Charred Corn

  • Pair with Zesty Mexican Cerveza: Crack open a crisp, light Mexican beer like Corona or Modelo to complement the smoky, charred corn flavors. The refreshing beer cuts through the richness of butter and balances the grilled sweetness.
  • Create a Fresh Citrus Side Salad: Whip up a quick salad with lime, cilantro, and diced jalapeños to echo the corn's grilled notes. The bright, tangy elements will enhance the corn's natural sweetness and add a pop of freshness.
  • Match with Creamy Chilled Margarita: Blend a classic margarita with fresh lime juice and tequila for a perfect summer pairing. The cocktail's citrusy kick and cool temperature provide a delightful contrast to the warm, smoky corn.
  • Serve with Herbed Compound Butter: Mix softened butter with chopped fresh herbs like chives, parsley, and a pinch of smoked paprika. This elevated butter adds depth and complexity to the already delicious grilled corn.

Summer Corn Twists That Keep Things Fresh

  • Herb-Infused Corn: Brush corn with olive oil mixed with fresh chopped basil, thyme, and rosemary before grilling for an aromatic herb-packed flavor.
  • Spicy Mexican Street Corn: Coat grilled corn with mayonnaise, sprinkle with chili powder, crumbled cotija cheese, and fresh cilantro for a zesty street-style experience.
  • Parmesan Garlic Corn: After grilling, roll corn in a mixture of grated parmesan cheese, minced garlic, and chopped parsley for a rich, savory finish.
  • Smoky Bacon Corn: Wrap each ear of corn with thin bacon strips before grilling, creating a crispy, smoky outer layer that infuses incredible depth of flavor.
Print
clock clock iconcutlery cutlery iconflag flag iconfolder folder iconinstagram instagram iconpinterest pinterest iconfacebook facebook iconprint print iconsquares squares iconheart heart iconheart solid heart solid icon
Summer Charred Corn On The Cob Recipe

Summer Charred Corn On The Cob Recipe


5 Stars 4 Stars 3 Stars 2 Stars 1 Star

4.8 from 23 reviews

  • Total Time: 1 hour 30 minutes
  • Yield: 6 1x

Description

Mexican street corn sizzles with smoky charm, bringing zesty lime and creamy cotija together in a soulful dance of summer flavors. Backyard grills become culinary stages where sweet kernels caramelize into irresistible golden bites you’ll savor until the last delicious morsel.


Ingredients

Scale

Main Ingredients:

  • 6 ears of sweet corn

Water and Soaking Liquid:

  • 2 cups water

Seasoning and Topping:

  • 4 tablespoons (¼ cup) butter
  • 1 teaspoon salt
  • ½ teaspoon ground black pepper
  • ½ teaspoon paprika

Instructions

  1. Carefully strip away the outermost two layers of protective green husks from each ear of sweet corn, maintaining some natural covering to shield the kernels during grilling.
  2. Submerge the corn completely in a spacious water-filled container, allowing them to soak for a full hour to ensure optimal moisture retention and prevent rapid burning.
  3. Calibrate the outdoor grill to a precise temperature of 450°F (232°C), creating an ideal heat environment for charring.
  4. Extract the corn from the water bath, gently shaking off excess moisture, and position each ear directly onto the hot grill grates over direct heat.
  5. Rotate the corn every 5 minutes to achieve uniform charring and prevent uneven cooking, maintaining a total grilling time of approximately 20 minutes.
  6. After achieving a beautiful golden-brown exterior with slight blackened edges, carefully transfer the corn from the grill and allow it to cool sufficiently for safe handling.
  7. Delicately peel back the grilled husks, revealing the perfectly cooked kernels, then generously coat with softened butter and sprinkle with preferred seasonings like sea salt, black pepper, or fresh herbs.

Notes

  • Soaking corn in water creates a protective barrier, preventing the husks from burning too quickly and keeping the kernels moist during grilling.
  • Leaving some husk layers intact helps steam the corn internally while allowing beautiful charred marks on the exterior.
  • Rotating the corn every 5 minutes ensures even cooking and prevents any single side from becoming overly charred or dried out.
  • High grill temperature of 450°F creates perfect caramelization and smoky flavor while maintaining juicy corn kernels.
  • Let corn cool slightly before peeling husks to avoid burning your hands and allow the corn to finish steaming.
  • Butter and seasoning after grilling allows the corn to absorb maximum flavor and lets you customize each ear’s taste profile.
  • Prep Time: 1 hour 10 minutes
  • Cook Time: 20 minutes
  • Category: Snacks, Side Dish
  • Method: Grilling
  • Cuisine: American

Nutrition

  • Serving Size: 6
  • Calories: 94 kcal
  • Sugar: 3.2 g
  • Sodium: 135 mg
  • Fat: 4.2 g
  • Saturated Fat: 2.4 g
  • Unsaturated Fat: 1.5 g
  • Trans Fat: 0.1 g
  • Carbohydrates: 15.6 g
  • Fiber: 1.8 g
  • Protein: 3.3 g
  • Cholesterol: 10 mg
Liam O'Brien

Liam O’Brien

Founder & Recipe Developer

Expertise

  • Traditional Irish Dishes
  • Farm-to-Table Cooking
  • Recipe Creation
  • Teaching Cooking Skills
  • Sustainable Food Practices

Education

Dublin Institute of Technology (now Technological University Dublin)

  • Program: Bachelor of Arts in Culinary Arts
  • Focus: Hands-on training in cooking techniques, kitchen management, and exploring both Irish and international cuisines.

Ballymaloe Cookery School, County Cork, Ireland

  • Program: 12-Week Certificate Course
  • Focus: Farm-to-table cooking, emphasizing the use of fresh, local ingredients and traditional cooking methods.

Liam O’Brien is the co-founder and kitchen soul behind Good Tasting Meals, a chef who believes that cooking shouldn’t feel stressful or complicated.

He earned his culinary stripes at Technological University Dublin and polished his farm-to-table skills at Ballymaloe Cookery School. With over 15 years flipping pans and stirring up stories, Liam has worked in family cafés, bustling bistros, and everything in between.

At Good Tasting Meals, Liam brings you recipes that feel like home: cozy, simple, and full of flavor.

Leave a Reply

Your email address will not be published. Required fields are marked *

Recipe rating 5 Stars 4 Stars 3 Stars 2 Stars 1 Star