
Dreamy No-Bake Coconut Cream Pie Recipe for Sweet Success
Dessert lovers rejoice as this no-bake coconut cream pie recipe delivers a tropical paradise of pure deliciousness.
Creamy, dreamy, and impossibly easy to whip up, this luscious pie will transport you to sun-soaked beaches with every single bite.
The silky smooth coconut filling nestles perfectly into a crisp graham cracker crust, creating a dessert that’s both elegant and irresistible.
Cool and refreshing, this pie requires zero oven time, making it the ultimate summer treat for anyone seeking a quick and decadent dessert.
Each forkful promises a rich, velvety texture that melts on your tongue with waves of coconut goodness.
The contrast between the crunchy crust and the cloud-like filling makes this pie a true showstopper at any gathering.
Quick Recipe Overview
Everything Needed for No-Bake Coconut Cream Pie
For Filling Base:For Texture Enhancers:For Crust Foundation:Tools to Assemble No-Bake Coconut Cream Pie
How to Make No-Bake Coconut Cream Pie Fast

Grab a spacious mixing bowl and blend together silky milk, rich cream, and magical pudding powders. Whip the mixture with an electric mixer until it transforms into a dreamy, thick consistency.
Let the pudding mixture rest and thicken naturally. Sprinkle in fluffy shredded coconut, stirring gently to create a tropical texture.
Carefully fold in soft, pillowy whipped topping. The goal is maintaining the light, airy texture that makes this dessert special.
Transfer the luscious coconut mixture into a crispy graham cracker crust. Smooth the surface with a spatula for a perfect finish.
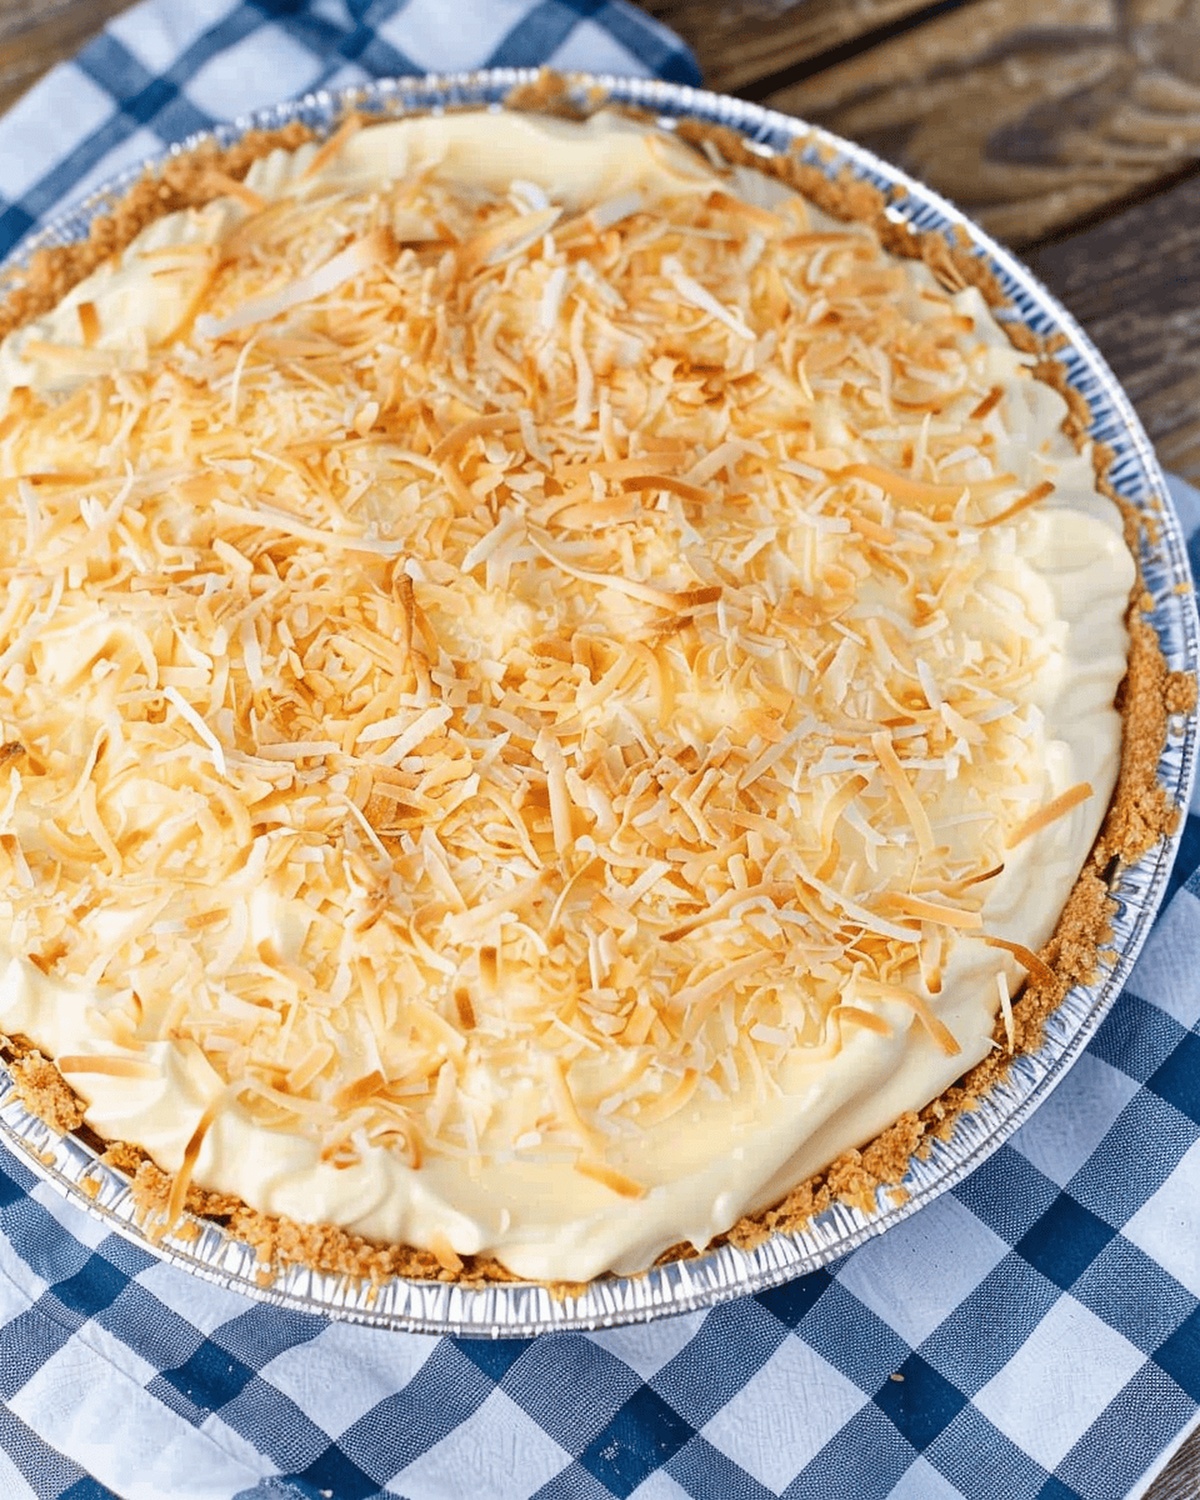
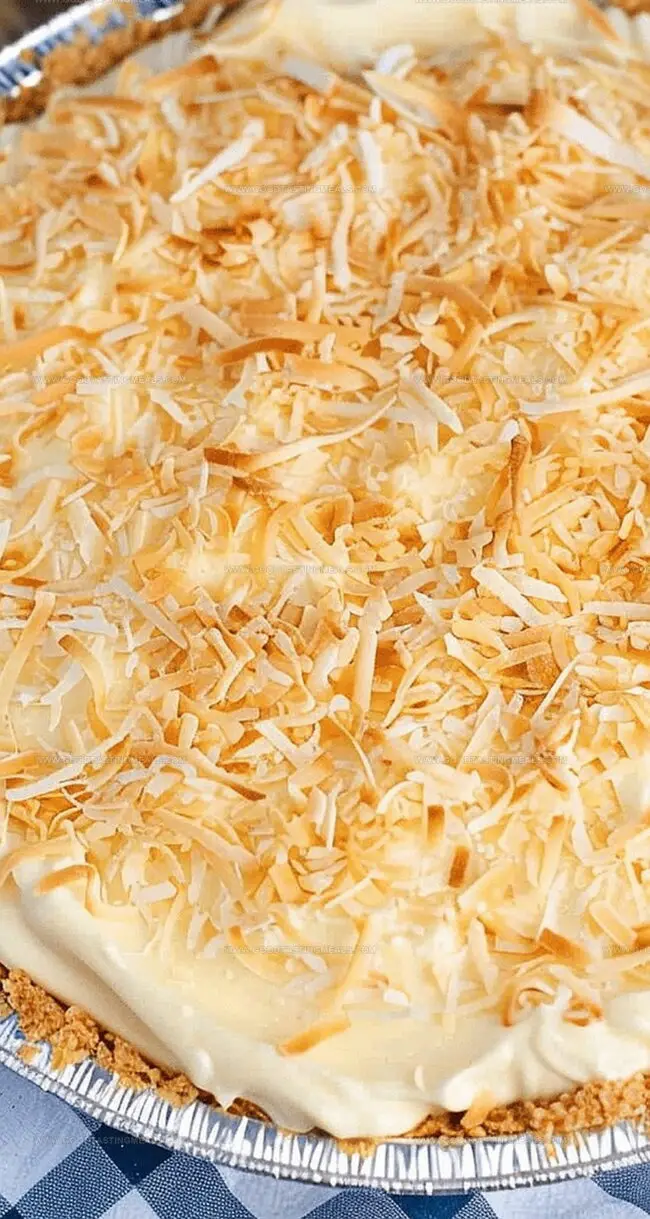
Sprinkle toasted coconut flakes on top for extra crunch. Slide the pie into the refrigerator and let it set for several hours until firm and refreshing.
When the pie is completely chilled, cut into delightful wedges and enjoy a slice of tropical paradise.
Helpful Hints for No-Bake Coconut Cream Pie
How to Present No-Bake Coconut Cream Pie
Saving Leftover No-Bake Coconut Cream Pie
Print
Dreamy Coconut Cream Pie
- Total Time: 4 hours 15 minutes (including chilling time)
- Yield: 9 1x
Description
Creamy coconut cream pie emerges as a luxurious dessert without requiring oven time. Cold tropical ingredients blend seamlessly, promising delightful sweetness for guests you’ll surely impress.
Ingredients
- 1 (9 oz / 255 g) graham cracker crust (10 in / 25 cm)
- 1 ½ cups milk
- 1 cup heavy cream
- ½ cup sweetened shredded coconut
- 1 (3.4 oz / 96 g) box coconut instant pudding
- 1 (3.4 oz / 96 g) box vanilla instant pudding
- 1 tsp coconut extract
- 1 (8 oz / 226 g) tub of cool whip, thawed
Instructions
- Pudding Preparation: Whisk milk, heavy cream, coconut instant pudding, vanilla instant pudding, and coconut extract in a large bowl using an electric mixer until achieving a smooth, velvety consistency.
- Coconut Integration: Let pudding mixture rest briefly, then fold in sweetened shredded coconut, ensuring uniform distribution throughout the creamy base.
- Filling Enhancement: Gently incorporate thawed whipped topping, maintaining the mixture’s light and airy structure while creating a luxurious texture.
- Crust Assembly: Pour the coconut cream filling into the graham cracker crust, spreading evenly with a spatula to create a perfectly smooth surface.
- Garnish and Chill: Optionally sprinkle toasted coconut on top, then refrigerate for at least four hours until the filling sets firmly and develops a rich, creamy texture.
- Serving: Slice into wedges and present this indulgent no-bake dessert, revealing its luscious coconut-infused interior.
Notes
- Chill for Perfection: Refrigerate the pie for at least 4 hours to ensure the filling sets properly and develops a firm, creamy texture that slices cleanly.
- Whip with Care: Fold in the whipped topping gently to maintain its light, airy consistency and prevent deflating the mixture.
- Toast for Texture: Sprinkle toasted coconut on top for an extra crunch and enhanced nutty flavor that elevates the pie’s overall taste and presentation.
- Mix Thoroughly: Whisk the pudding ingredients with an electric mixer until you achieve a smooth, luxurious consistency that ensures a creamy, well-blended filling.
- Prep Time: 15 minutes
- Cook Time: 0 minutes
- Category: Desserts
- Method: Blending
- Cuisine: American
Nutrition
- Serving Size: 9
- Calories: 383
- Sugar: 26 g
- Sodium: 250 mg
- Fat: 27 g
- Saturated Fat: 17 g
- Unsaturated Fat: 9 g
- Trans Fat: 0 g
- Carbohydrates: 36 g
- Fiber: 1 g
- Protein: 3 g
- Cholesterol: 73 mg
Sophie Martin
Co-Founder & Content Creator
Expertise
Education
Stellenbosch University, South Africa
South African Chefs Academy, Cape Town
Sophie Martin is the nutrition brain and feel-good foodie at Good Tasting Meals. With a degree in Human Nutrition from Stellenbosch University and chef training from the South African Chefs Academy, Sophie brings balance to the table, literally. She loves creating meals that are easy to make, great to eat, and good for your body too.
Her recipes are made for everyday living, with a little flair and a lot of heart. Sophie’s not here to count calories, she’s here to show you how fresh, simple food can fit into your life, taste amazing, and still be nourishing.